

How to Use a Pultec-Style Tube EQ




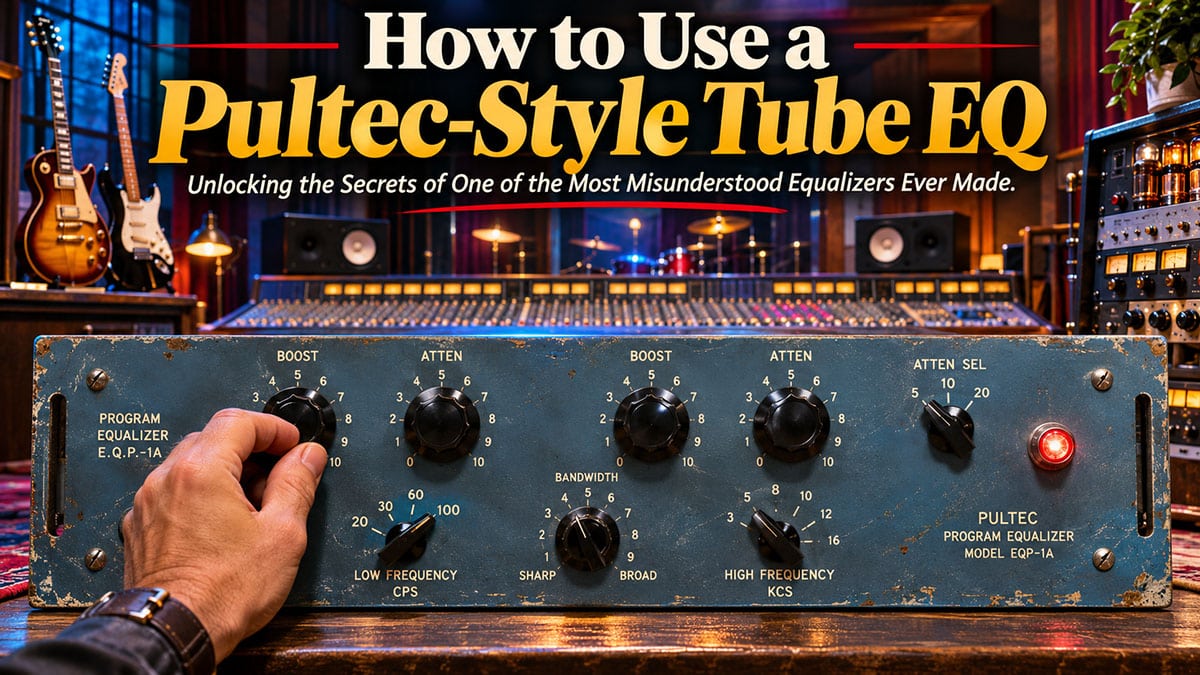
Making a Scene Presents – How to Use a Pultec-Style Tube EQ: Unlocking the Secrets of One of the Most Misunderstood Equalizers Ever Made
Listen to the Podcast Discussion
Understanding the magic behind the legendary Pultec EQ, how it works, and how to use it to create bigger, warmer, more professional recordings in your home studio.
There are certain pieces of recording equipment that have become almost mythical in the music industry. The LA-2A compressor, the 1176 limiting amplifier, the Neumann U87 microphone and, of course, the Pultec EQP-1A Program Equalizer have helped shape the sound of popular music for generations. Their influence reaches across classic blues and jazz, modern rock, hip-hop, Americana, country and electronic music. Even in an age when a laptop can contain more processing power than an entire recording studio once had, these familiar pieces of equipment remain part of the way engineers think about sound.
Yet, of all these legendary pieces of equipment, the Pultec may be one of the most misunderstood. Its controls seem to defy logic. It allows you to boost and cut the same selected low frequency at the same time, and it doesn’t offer anywhere near the number of controls found on a modern digital equalizer. Despite these apparent limitations, recording engineers continue to reach for it when they have access to some of the most sophisticated audio processing technology ever developed.
What makes the Pultec special is not simply that it contains vacuum tubes or that it looks impressive sitting in a studio rack. Its real magic comes from the way its electronic circuits interact with the audio passing through it. Understanding those interactions can change how you approach equalization, whether you’re working in a commercial recording facility or a spare bedroom with a laptop and an audio interface. Thanks to analog modeling technology, independent musicians now have access to software versions of this legendary design without having to buy vintage hardware. But having a Pultec-style EQ in your plugin folder and knowing how to use one are two entirely different things.
A Little Recording Studio History
The story of the Pultec begins in the early 1950s, when Eugene Shenk and Ollie Summerlin established Pulse Techniques in Teaneck, New Jersey. Their original EQP-1 helped establish the company’s reputation, and the EQP-1A followed in 1961. A more compact version, the EQP-1A3, followed in the 1970s. Original production eventually ended, but the designs were later brought back into production. Today, the classic design lives on in newly manufactured hardware, modern reproductions and software emulations.
At the time, recording engineers didn’t have computer screens filled with colorful frequency graphs. There were no digital audio workstations, spectrum analyzers on every channel or artificial intelligence systems suggesting how to mix a recording. Engineers relied on their ears, their experience and the equipment available to them. The Pultec was developed as a program equalizer, designed to shape the overall frequency balance of audio material rather than offer extremely narrow and precise control over individual resonances.
That approach is part of what makes it so useful today. A modern digital parametric equalizer is excellent when you need to remove a narrow ring from a snare drum or deal with a specific room resonance. The Pultec tends to encourage a different way of thinking. Rather than chasing a small problem on a screen, you are listening to the overall character of the instrument and deciding whether it needs more weight, more presence, more air or less congestion.
How a Pultec Works Under the Hood
The traditional EQP-1A uses a passive equalization network made up of electronic components such as resistors, capacitors and inductors. These components work together to shape the way different frequencies pass through the circuit. A passive circuit cannot create additional signal energy on its own. Instead, it changes the relationship between different frequencies by controlling how much signal passes through at different points in the spectrum. The network introduces a loss in overall level that must be made up before the signal continues through the recording chain.
This is where the vacuum tube amplifier comes into play. The Pultec incorporates a makeup amplifier that restores the level lost through the passive network. The input and output transformers, tube amplifier and passive filters all contribute to the behavior of the unit. A simplified signal path is: line-level input, input transformer, passive EQ network, tube makeup amplifier, output transformer and line-level output. This is not the same as a microphone preamp, even though both devices may contain vacuum tubes.
Even when the equalization controls are set to zero, audio passing through the unit can take on some characteristics of the amplifier and transformers. Depending on the design, signal level and condition of the hardware, this may introduce subtle harmonic coloration. The original design was intended to provide relatively clean amplification, however. It is not a dedicated distortion device, and simply driving it harder does not necessarily make a recording better. The same principle applies to software that models the analog circuitry.
Getting to Know the Pultec Controls
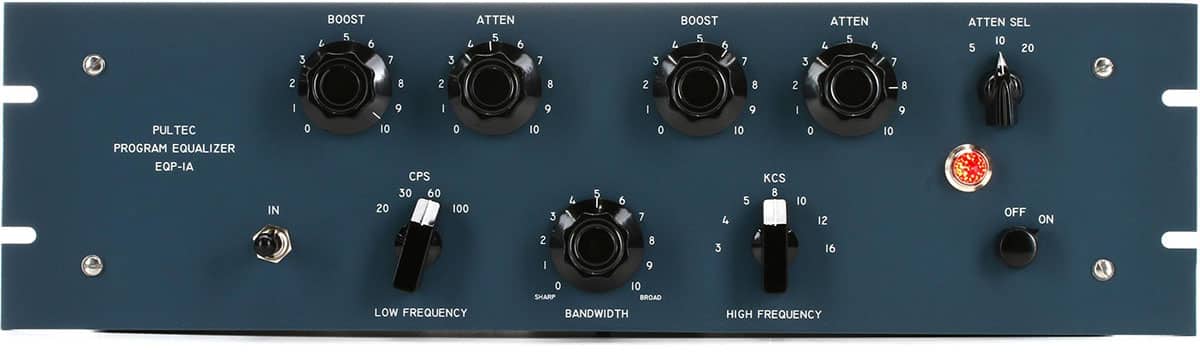
At first glance, the faceplate can look intimidating, particularly when you see terms that seem to have survived from the early days of radio broadcasting. The good news is that the original EQP-1A is actually one of the easier equalizers to operate once you understand its three main sections: low-frequency equalization, high-frequency boost and high-frequency attenuation.
The low-frequency selector offers 20, 30, 60 and 100 Hz on the classic model. The Low Boost control adds relative low-frequency energy, while the Low Attenuation control reduces it. Both controls share that same frequency selector, but the filters have different response shapes. The high-frequency boost section offers 3, 4, 5, 8, 10, 12 and 16 kHz, together with a Bandwidth control that changes the width of the boost. The separate high-frequency attenuation section offers 5, 10 and 20 kHz and its own attenuation control.
On older faceplates, CPS means cycles per second, which we now call Hertz. KCS means kilocycles per second, which we now call kilohertz. Some reproductions and plugins add extra frequency selections or other features, so don’t be surprised if your particular version looks a little different. The numbers around the original boost and attenuation knobs are relative control positions, not calibrated decibel values. A setting of 4 does not necessarily mean 4 dB.
The Famous Pultec Boost-and-Cut Trick
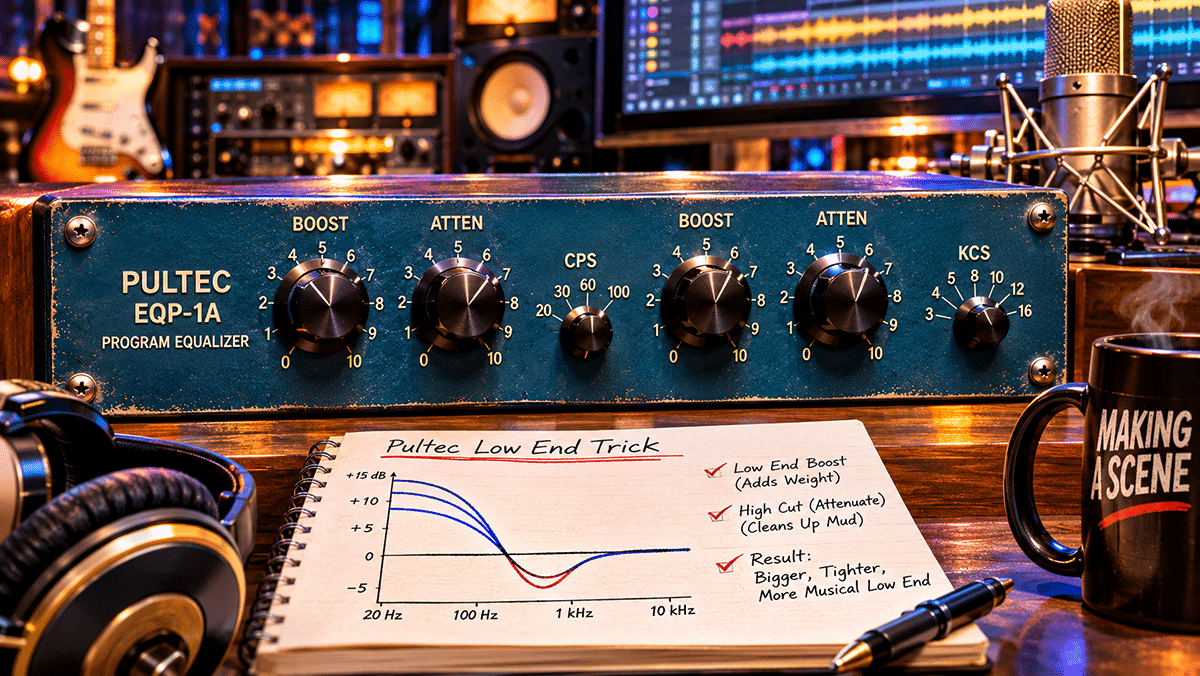
On a conventional equalizer, boosting a frequency by 6 dB and then applying an identical cut of 6 dB with matching filter shapes should effectively cancel the two adjustments. It would be a little like turning up the thermostat while opening all the windows. The Pultec doesn’t behave that way because the low-frequency boost and attenuation circuits have different response curves and interact with each other.
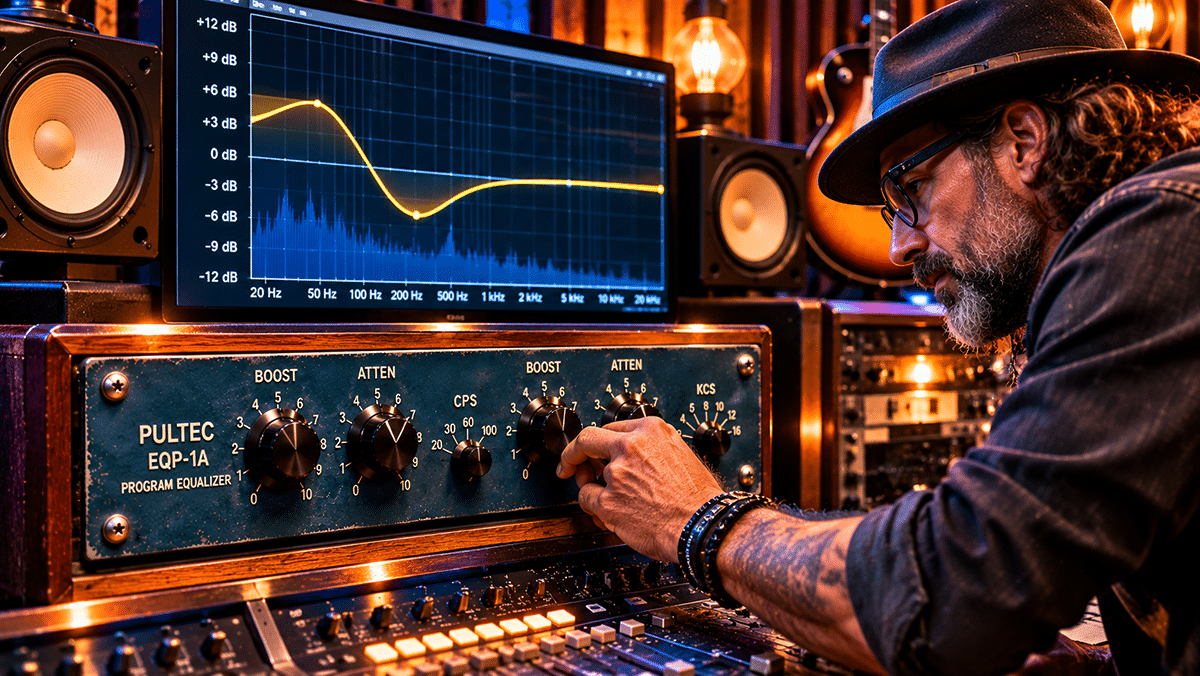
Although they share a frequency selector, the two filters do not affect the spectrum in exactly the same manner. When both are engaged, the combined response can retain a lift in the deep bass, create a dip farther up the frequency spectrum and then return toward its unaffected level. The exact shape depends on the selected frequency, the amount of boost and attenuation and the implementation of the circuit. At the 100 Hz setting, the reference response graph supplied for this feature illustrates a family of curves with a broad low-end lift and, at some settings, a dip in the several-hundred-Hertz region. That is why the result can sound bigger without necessarily becoming muddier.
The original operating instructions discouraged simultaneous low-frequency boost and attenuation. Fortunately, recording engineers have a long tradition of ignoring instructions when an experiment sounds good. Imagine a kick drum that has plenty of energy but sounds more like someone kicking a cardboard box than a proper bass drum. A conventional low shelf might make it bigger while also increasing unwanted congestion. Try selecting 60 Hz on a Pultec, increasing Low Boost to around 5 and then gradually bringing Low Attenuation up to around 3 or 4. You may end up with a more powerful drum and less energy in the region above its fundamental. This is not compression or dynamic EQ; it is the interaction of two static filters.
Understanding the Four Low-Frequency Settings
The 20 Hz setting is useful for shaping the deepest parts of the spectrum, particularly in mastering and music with significant sub-bass content. Be careful, though. Excessive energy in this area can consume headroom without producing an improvement you can hear on smaller speakers. The 30 Hz setting can help electronic kick drums, synth bass and productions that need deep weight. These are broad filters, so the frequency on the faceplate is not a boundary beyond which the effect disappears.
The 60 Hz setting is a practical starting point for conventional kick drums, bass guitar and floor toms. The 100 Hz setting can be useful for instruments that need more body, including vocals, acoustic guitar, piano and snare drum. Try changing the frequency selector while keeping the two low controls in approximately the same positions, and listen to how the area of emphasis and the dip above it shift. You will quickly discover why the same trick is useful on more than just bass instruments.
The Other Pultec Trick Nobody Talks About
While most discussions focus on the famous low-frequency technique, the high-frequency section is capable of some equally interesting results. Unlike the low section, the high boost and high attenuation circuits have independently selectable frequencies. The boost is a bell-shaped filter with adjustable bandwidth, while attenuation acts as a high-frequency shelving filter. You can therefore emphasize one region while reducing energy farther up the spectrum.
For example, try boosting around 8 kHz while applying gentle attenuation at 10 or 20 kHz. Depending on your version of the EQ and the source recording, this can emphasize detail while controlling some of the higher-frequency energy. The Bandwidth control matters because a broad setting affects a larger part of the spectrum, while a sharper setting concentrates the effect. Even a sharper Pultec boost is not necessarily a substitute for a surgical parametric EQ. On a distorted guitar or a bright set of overhead microphones, sometimes the secret to a more detailed sound is controlling the treble already in the recording rather than adding more of it.
Where Does a Hardware Pultec Fit Into the Recording Chain?
A traditional EQP-1A is a line-level processor. When recording a singer, the microphone connects to a microphone preamp, which brings its signal up to a usable line level. The output of the preamp can then feed the Pultec, followed by a compressor if desired, before the audio reaches the analog-to-digital converter in your interface. In simple terms, the chain is microphone, preamp, Pultec, optional compressor, interface line input and DAW.
If you are using a standalone microphone preamp and an audio interface with a true line-level input, this is straightforward. Use the appropriate balanced connections for your equipment and avoid unnecessarily running the outgoing signal through a second microphone preamp. Phantom power, when needed by a condenser microphone, comes from the microphone preamp, not from the equalizer. Follow the level and connection requirements in your hardware manuals.
Placing the Pultec before the compressor means the compressor reacts to the equalized signal. Boosting the low frequencies may cause it to react more strongly to loud bass notes or vocal plosives. Placing the Pultec after the compressor lets you shape the sound after its dynamics have been controlled. Neither approach is universally correct. Remember that hardware EQ applied before the converter while tracking becomes part of the recorded audio. Conservative adjustments are often a good idea, particularly when you are both the performer and the engineer.
Using Hardware Pultec EQs While Mixing in a DAW
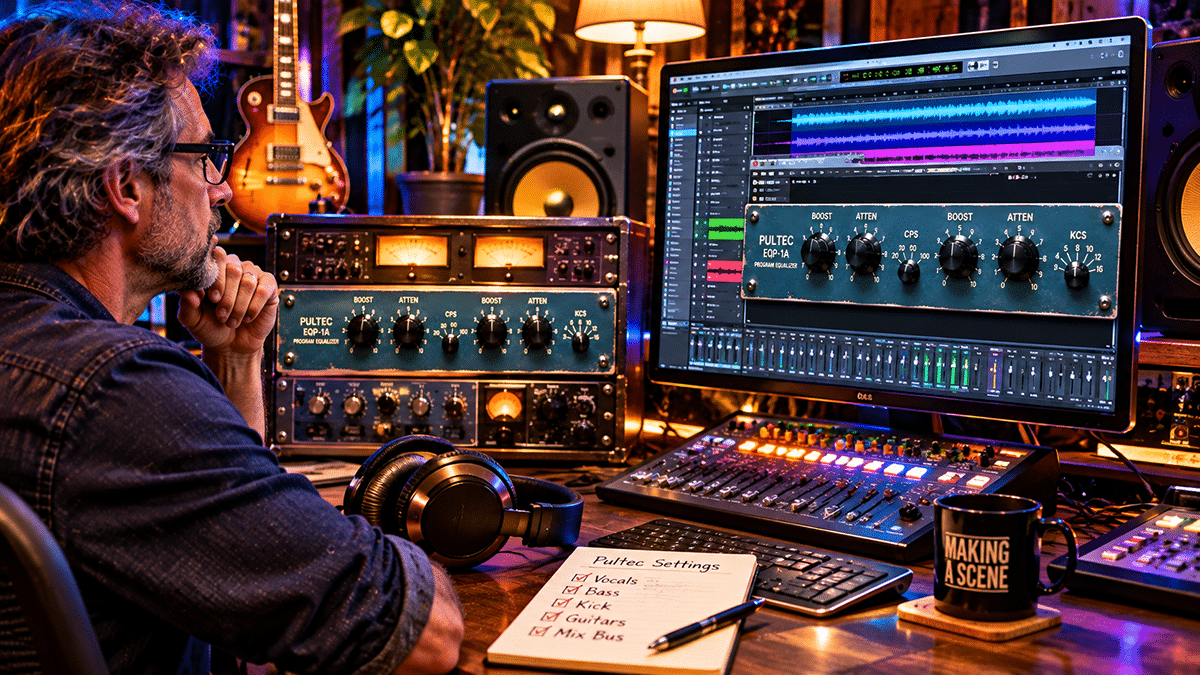
You can use a hardware Pultec after the recording is completed by routing audio out of your DAW through an interface line output, into the equalizer and back through an interface line input. The signal goes through digital-to-analog conversion on the way out and analog-to-digital conversion on the way back. Many DAWs offer a dedicated external hardware insert feature that makes routing and latency compensation easier. Make sure the routing does not create a feedback loop, and verify the timing if you plan to blend the processed signal with the original.
A traditional EQP-1A is mono, so processing a stereo mix typically requires two suitably matched units or a stereo Pultec-style equalizer. Hardware also requires available interface connections, cables, rack space and a means of documenting your settings. Taking a photograph of the faceplate can save a great deal of frustration when a client calls three weeks later asking for a slightly louder tambourine. Unlike a plugin, the hardware will not automatically remember where you left all the knobs.
Using a Pultec-Style Plugin
Software emulations can recreate the characteristic filter curves through digital signal processing. Some also simulate nonlinear behavior associated with tubes, transformers and amplifier circuits, making the result dependent in part on input level. Not all developers model the same elements, so two plugins may sound different with identical-looking control positions. You can use an emulation on individual tracks, vocal groups, drum buses or a stereo mix bus, with as many instances as your computer and software license allow.
A particularly effective approach is to pair a modern parametric equalizer with a Pultec-style EQ. The parametric EQ takes care of very specific problems, such as rumble or narrow resonances, while the Pultec shapes the broader musical character. A useful vocal chain might begin with corrective EQ, followed by compression, Pultec-style tonal EQ and a de-esser if necessary. Change the order when the music calls for it. You wouldn’t use a sledgehammer to tighten a screw, and you probably shouldn’t use a Pultec to remove an extremely narrow resonance at 437 Hz.
Making A Scene’s Free Interactive Pultec Studio Settings Finder
Before we get into individual instruments, try our free interactive Pultec Studio Settings Finder below. Choose an instrument or mix source and the tool displays suggested starting positions on a Pultec-style faceplate. You can copy the settings and try them on your own hardware or plugin. It is an educational guide, not an audio processor, so it doesn’t listen to your recording or actually apply equalization. The numbers are relative knob positions rather than exact dB values, and you should always adjust the settings by ear.
Loading studio tool…
Using a Pultec on Lead Vocals
One of the beautiful applications of a Pultec-style EQ is the human voice. Imagine an Americana singer-songwriter whose performance is excellent but whose recorded vocal lacks some of the warmth and intimacy you heard in the studio. Set the low-frequency selector to 100 Hz and try Low Boost around 2, with Low Attenuation around 1 if the voice starts to become congested. You are looking for body, not the sound of a late-night radio announcer speaking from inside a refrigerator.
Next, select 12 kHz in the high boost section, set the bandwidth toward Broad and gradually increase High Boost toward 2 to 4. Listen for breath, texture and the little details of the performance. For an aggressive rock or blues vocal that needs to compete with electric guitars, you could experiment with 3 or 5 kHz instead. If the voice is already bright or sibilant, use less boost or place a de-esser after the Pultec as needed. If you find yourself applying massive amounts of de-essing, the high-frequency boost may be the problem you need to fix.
Using a Pultec on Acoustic Guitar
An acoustic guitar produces the resonance of its wooden body, the attack of the pick, the vibration of the strings and the sound of the room. A large-bodied acoustic guitar may sound beautiful by itself but fight with bass, drums and vocals once the rest of the arrangement arrives. Try selecting 100 Hz, using little or no Low Boost and bringing Low Attenuation to around 2 to 4. This can help reduce some of the boomy quality often caused by recording too close to the sound hole.
A gentle broad boost at 8 or 10 kHz, perhaps around 2 to 4 on the control, can bring out string texture and finger articulation. For fingerstyle guitar, try 12 kHz if the recording needs a little air. For a solo acoustic performance, keep more of the natural body. For a full-band production, the guitar may need less low-frequency energy. Its job in the song matters more than whether it sounds enormous by itself.
Using a Pultec on Electric Guitar
Electric guitars live largely in the midrange, but low and high frequencies influence whether they sound thin, powerful, smooth or harsh. A blues guitar recorded through a small tube amplifier might benefit from a modest boost at 100 Hz, perhaps 2 to 3 on the Low Boost control with 1 to 3 on Low Attenuation if needed. A little boost at 3 or 5 kHz, with a medium or broad bandwidth, can help it speak in a mix.
For heavily distorted guitars, the high-frequency attenuation section can become a valuable tool. Select 5 or 10 kHz and gradually increase attenuation to smooth excessive fizz. You could pair a small 3 kHz boost with 5 kHz attenuation when you want presence without so much edge. Before reaching for EQ, remember that moving the microphone an inch or two away from the center of the speaker can sometimes accomplish more than an entire rack of expensive equipment.
Using a Pultec on Bass Guitar
A bass guitar needs both physical weight and audible note definition. A sound that is impressive on large studio monitors may disappear through a smartphone speaker, while a bass with too much midrange may be audible everywhere but lack weight. Start with the low-frequency selector at 60 Hz, Low Boost around 5 and Low Attenuation around 4, backing off if the result is excessive. Listen for a deep foundation and a reduction in congestion farther up the spectrum.
If the instrument needs more string definition or finger articulation, try a broad boost near 3 kHz around 1 or 2. A separate midrange equalizer or gentle saturation may be more effective if the bass still does not translate to small speakers. For a five-string bass or synth bass, the 30 Hz setting may be worth exploring. Small rooms and limited monitor response make judging this range particularly difficult, so check your results on more than one playback system.
Using a Pultec on Kick Drum
The kick drum is probably the most famous application of the Pultec boost-and-attenuation technique. An acoustic kick contains low-frequency energy, shell resonance and the attack of the beater hitting the head. Try 60 Hz with Low Boost around 5 or 6, then introduce Low Attenuation around 3 or 4 until the drum sounds more focused. If you need beater definition, try 4 or 5 kHz with a medium bandwidth and a modest High Boost setting around 2 or 3.
For jazz, these settings may be too pronounced, while rock or contemporary blues might benefit from a stronger curve. The Pultec does not change drum tuning or shorten the decay of an overly resonant drum. If the kick rings excessively, change its tuning, damping or microphone position before assuming an EQ can solve everything. Listen to the kick alongside the bass guitar, not just in solo.
Creating Space Between the Kick Drum and Bass Guitar
One useful technique involves choosing different areas of emphasis for the kick and bass. Imagine the kick has a strong fundamental around 60 Hz while the bass sounds particularly full somewhat higher. Applying identical boosts to both tracks may create a buildup of energy. Experiment with the 60 Hz boost-and-attenuation combination on the kick and a more conservative 100 Hz setting on the bass, or reverse that strategy if the music calls for the bass to occupy the deepest part of the spectrum.
Because the Pultec uses broad overlapping curves, these are not isolated frequency slots. The two instruments will still share plenty of sonic territory. What matters is their combined balance, and you may need additional EQ, level adjustments or changes in the arrangement. A great rhythm section is often the result of two instruments working together rather than two instruments fighting for control of the studio subwoofer.
Using a Pultec on Snare Drum and Toms
A snare needs a combination of body, crack and texture. If it sounds thin, start with a small 100 Hz boost, around 2 to 3, with little or no attenuation. A high boost at 3 or 5 kHz can emphasize stick attack, while 8 or 10 kHz may reveal more of the snare wires. For rack toms, try 100 Hz with Low Boost around 3 to 4 and attenuation around 2 to 3. A floor tom may benefit from a 60 Hz setting with boost around 4 to 5 and attenuation around 2 to 4. A modest 4 kHz boost can add definition if needed.
Always check how the processing affects the entire drum kit. A snare mic often contains hi-hat bleed, and high-frequency boosts might make the hi-hat more aggressive. Changes in the phase response of filters on one microphone can also affect how that microphone combines with others. Make final decisions with the whole kit playing and check mono compatibility rather than trying to make every close microphone sound like a finished drum record by itself.
Using a Pultec on Overheads and Room Microphones
Overheads capture more than cymbals. In many jazz, blues and roots recordings, they form the foundation of the drum sound. A broad high-frequency boost around 12 or 16 kHz can introduce detail and a sense of space, but excessive boost can make already bright cymbals brittle. A little high attenuation at 10 or 20 kHz may be more useful in that situation. If the overheads are too thick, try a little low attenuation at 100 Hz.
Room microphones offer an opportunity for more dramatic experimentation. Low boost around 60 or 100 Hz paired with some attenuation can make the room feel more powerful. Compression can then add excitement, and the room tracks can be blended underneath the close microphones. For stereo overheads or room pairs, begin with matching settings on both sides to avoid accidentally pulling the stereo image in one direction.
Using a Pultec on Piano, Keyboards and Synthesizers
A piano occupies a large part of the audible spectrum. A small 100 Hz boost can add warmth, while a broad 8 or 10 kHz lift can bring out the sound of the hammers and strings. If the piano needs to sit behind a lead vocal, low attenuation and conservative high-frequency settings may help it occupy less space. Electric pianos can benefit from similar treatment, with high attenuation available to soften an overly bright instrument or amplifier.
Synth bass can contain substantial energy below the lowest fundamental of a standard four-string bass guitar. Try the 20 or 30 Hz setting when this area needs shaping, but keep an eye on headroom and check playback on other systems. For synth pads, a broad 10 or 12 kHz boost can reveal texture. High-frequency attenuation may instead help push the pad back in the arrangement, leaving room for the singer and other lead instruments.
Using a Pultec on Horns and Strings
Brass instruments produce significant energy in the upper midrange, which is part of what makes them exciting. If a trumpet or trombone is already too aggressive, try a little high attenuation at 5 or 10 kHz before automatically reaching for another boost. For tenor or baritone saxophone, a small boost around 100 Hz can add richness, and a broad lift around 8 or 10 kHz may bring out breath and texture where appropriate.
String instruments can also benefit from subtle shaping. A violin that feels harsh may improve with gentle attenuation in the high section, while a thin cello recording may benefit from more low-frequency body. With acoustic instruments, the Pultec is often at its best when the adjustments preserve the character of the performance instead of attempting to turn one instrument into another.
Meet the Pultec MEQ-5: The Missing Midrange
The EQP-1A has no dedicated continuously variable low-mid or midrange control. Pulse Techniques developed the MEQ-5 Midrange Equalizer to address much of this territory. Its low-mid boost offers 200, 300, 500 and 700 Hz and 1 kHz. Its upper-mid boost offers 1.5, 2, 3, 4 and 5 kHz. The midrange attenuation section offers selections from 200 Hz to 7 kHz, including the boost frequencies.
A boxy vocal might benefit from a cut at 300 or 500 Hz, followed by a modest boost at 2 or 3 kHz for presence. A bass guitar might be easier to hear on small speakers with some emphasis at 700 Hz or 1 kHz. On a snare, 200 Hz can add body and attenuation at 500 or 700 Hz may reduce a boxy quality. The MEQ-5 and EQP-1A complement each other because they address different parts of the spectrum, and some plugin collections provide models of both.
Using a Pultec on the Stereo Mix Bus
Applying a Pultec across a stereo mix can introduce final tonal shaping, but this is where restraint pays off. You are changing every instrument, vocal and reverb in the production. Start with the low selector at 30 or 60 Hz, a boost around 0.5 to 1.5 and attenuation around 0.5 to 1. For the high section, try 12 or 16 kHz, broad bandwidth and a very small boost. These are experiments, not a prescription. For mastering, an actual change of half a decibel or one decibel may be enough.
If the recording will go to a mastering engineer, there is nothing wrong with using a Pultec on the mix bus when it is part of your artistic sound. Avoid using it to compensate for problems that should have been addressed in the individual tracks or pushing the level to the point where the mix clips. Preserve a clean export and document important processing decisions so the mastering engineer can work with the sound you’ve created.
Putting the Pultec Before or After a Compressor
When you place EQ before a compressor, any boosted frequencies can influence how the compressor reacts, depending on its detector and sidechain settings. Increasing the low end of a bass guitar may cause certain notes to trigger more gain reduction. Put the Pultec after the compressor and you can add energy back without causing that particular compressor to react more strongly. On a vocal, post-compression EQ may restore a sense of air. On drums, pre-compression tonal shaping may help create a more aggressive sound.
One of the most valuable experiments you can make in a home studio is changing the order of two processors you already own. Many musicians spend money buying more plugins without discovering what the ones they have can do in different combinations. Try both signal chains at approximately the same output loudness and listen in the context of the whole song. You may find that changing the order gives you exactly what you were about to purchase another plugin to achieve.
Gain Staging and Tube Color
Gain staging means managing levels as audio travels through a chain. Some analog-modeling plugins have a nominal calibration such as -18 dBFS for 0 VU, but others use different references or allow you to adjust them. Check the documentation rather than treating this number as universal or confusing it with a peak ceiling. Too much input may produce unwanted modeled distortion, and EQ boosts can raise the level enough to overload a subsequent processor or output.
Universal Audio documents roughly 1.13 dB of insertion gain in its EQP-1A models, which illustrates why even a flat setting may change the level. Some hardware and software versions also allow the passive EQ to be switched out while the amplifier remains in the signal path. This is different from bypassing an entire plugin. Compare a fully bypassed signal, a flat active unit and a gently equalized signal, matching their perceived loudness as closely as possible. Our ears tend to prefer louder sounds, and you want to judge the change in tone rather than the change in volume.
Hardware and Software Pultec-Style EQ Options
The original design remains available from Pulse Techniques, and Warm Audio’s EQP-WA offers another hardware interpretation with real tubes and transformers. Both of these are mono designs. If you want stereo hardware processing, remember to budget for a second unit or consider a dedicated stereo design. Also consider maintenance, converter connections and the practical cost of recalling settings for clients.
Software options include the Universal Audio Pultec Passive EQ Collection, which includes models of the EQP-1A, MEQ-5 and HLF-3C; IK Multimedia’s T-RackS Vintage Tube Program EQ; and Black Rooster Audio’s VEQ-1P. These represent different approaches to analog modeling. Before purchasing another processor, check whether your DAW already includes a Pultec-inspired EQ. Compare compatibility, licensing and trial options before committing your money.
For most independent musicians, software is a practical way to access the technique on many tracks, automate adjustments and recall a session instantly. Hardware offers a hands-on experience and can be used before conversion during tracking, but requires physical space, connections and maintenance. A commercial studio may find that quality analog equipment differentiates its service. A musician building a home studio may be better off spending the difference on acoustic treatment, microphones, monitors or the next recording project.
Training Your Ears Instead of Depending on Presets
Open a familiar session and choose one instrument. Insert a Pultec-style EQ with all boost and attenuation controls at zero. Select 60 Hz and gradually increase Low Boost. Next, add attenuation without changing the boost and listen to what happens. Repeat the experiment at 30 and 100 Hz. Try the same exercise on the high-frequency section, moving the Bandwidth control from Sharp to Broad and experimenting with high attenuation. Use the free interactive settings finder above when you need a starting point, but don’t let the suggested numbers make the decisions for you.
Modern spectrum analyzers and AI-assisted mixing tools can help you identify unwanted energy, reveal resonances and compare the impact of different approaches. They can be valuable educational tools, but they cannot decide whether a darker guitar or warmer vocal better communicates the emotional intent of the song. Use technology to educate your ears instead of replacing them. The more you understand why an adjustment works, the less likely you are to depend on someone else’s preset.
How Better Recording Skills Translate Into Real Income
At Making A Scene, we talk about building a music industry middle class by giving independent artists more control over their careers, music and income. Every recording skill you develop gives you more control over the creation of your music assets. Learning to capture and mix quality recordings can reduce expenses, help you release music more consistently and let you retain control of your master recordings. Keep accurate records of who owns the recordings and compositions, especially when you work with collaborators.
An independent musician with a capable home studio can also offer recording, mixing, remote session work, stem preparation and production services to other artists. Professional instrumental versions, alternate mixes and organized stems can expand the ways a recording may be licensed or sold. Direct music sales, physical merchandise, sync licensing and fan memberships can all benefit from a catalog of well-produced recordings that you control. AI-assisted production may make some processes faster, but understanding equalization and gain staging allows you to maintain creative and technical quality control over the finished work.
The Real Magic of the Pultec
After decades of technological innovation, we have equalizers that automatically identify resonances, react dynamically to frequencies, display detailed graphs and make recommendations with AI. Yet engineers still reach for an equalizer based on a design developed when music was being recorded onto magnetic tape. Its appeal is not that it offers more control than a modern equalizer. In many ways it offers considerably less, and those limited controls encourage us to listen to the musical character of a recording instead of becoming distracted by technical details.
Whether you use an original tube-powered unit, a modern analog reproduction or a software emulation on your laptop, the principles remain the same. Start with a good recording, understand what your controls do, listen to the instrument in the context of the song and make adjustments that serve the performance. The best recording engineers are not necessarily those who own the most expensive equipment. They are the people who understand how to get the most out of what they already own. That knowledge is something no record label, streaming platform or industry gatekeeper can take away from you.
Technical note: The suggested settings are educational starting points, not results of controlled listening tests. Filter response varies with the hardware or software model. The interactive settings finder does not process audio.
 |  Spotify |  Deezer |  Breaker |
 Pocket Cast |  Radio Public |  Stitcher |  TuneIn |
 IHeart Radio |  Mixcloud |  PlayerFM |  Amazon |
 Jiosaavn |  Gaana |  Vurbl |  Audius |
 Reason.Fm | |||
Find our Podcasts on these outlets