

Proximity Effect and Vocal Tone




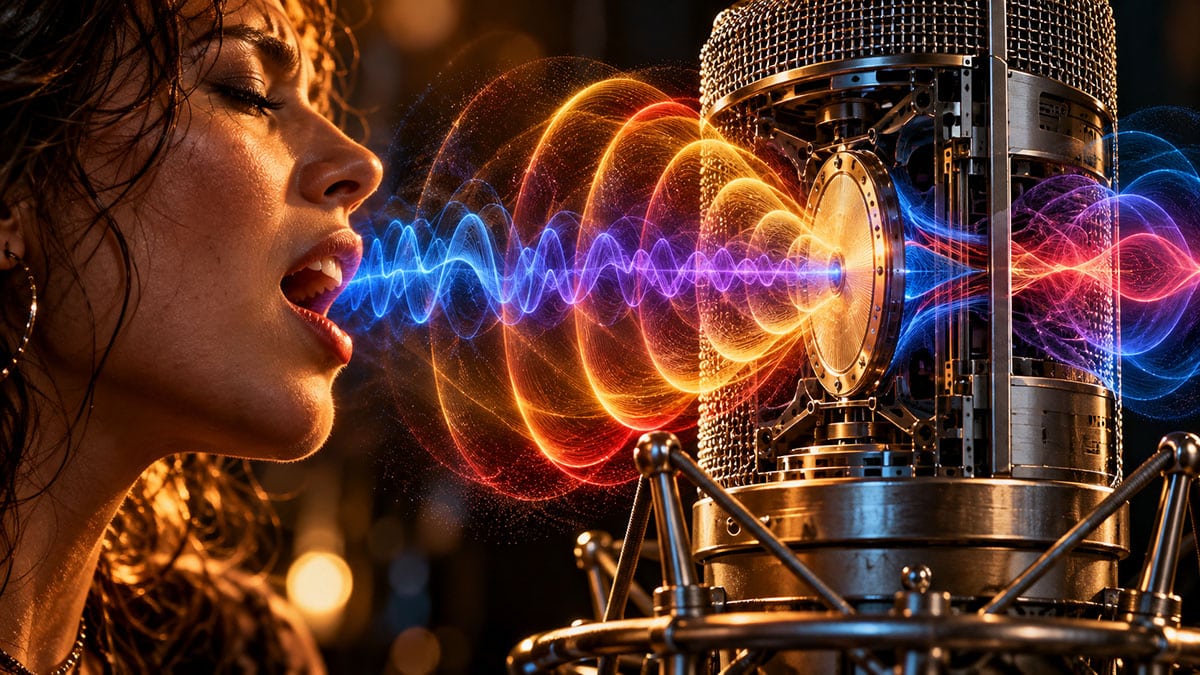
Making a Scene Presents – Proximity Effect and Vocal Tone: How a Few Inches Can Change Everything About Your Voice
Listen to the Podcase Discussion
Understanding the relationship between microphone distance, bass response, vocal intimacy, and recording quality can help independent musicians make better recordings without spending another dime on equipment.
The Most Overlooked Tone Control in Your Home Studio
There is a particular kind of frustration that nearly every independent musician experiences sooner or later. You spend weeks choosing the right microphone, watching reviews, comparing specifications, and convincing yourself that one particular piece of equipment will finally deliver the professional vocal sound you have been chasing. You connect your new microphone, put on your headphones, sing a few lines, and discover that your voice sounds remarkably similar to the way it sounded through your old microphone. Naturally, you begin investigating expensive preamps, vintage compressors, and mysterious plugins that promise to add warmth, depth, and something called analog magic. Meanwhile, one of the most powerful tone controls in your entire recording studio is sitting right in front of your face, and it doesn’t even have a knob.
That control is the distance between your mouth and your microphone.
Moving just a few inches closer to or farther away from a microphone can dramatically change the sound of a recorded voice. Depending on the microphone, moving closer can increase the bass response, make a vocal feel more intimate, reduce the amount of room sound in the recording, and bring the listener emotionally closer to the singer. Moving farther away can create a more balanced tone, reduce unwanted mouth noises, and allow the voice to develop naturally in the room. Neither approach is automatically better, because the correct microphone position depends on the singer, the microphone, the recording environment, and the emotional purpose of the song.
The interesting part is that these changes occur before the sound ever reaches your recording software. They happen in the physical relationship between the performer, the air, and the microphone itself. That means you can solve certain recording problems without equalizers, compressors, artificial intelligence, or another monthly subscription quietly eating away at your music budget. In a world where equipment manufacturers would love to sell you a new solution every six months, understanding how your existing microphone works is a surprisingly rebellious act.
One of the most important concepts behind these changes is something called the proximity effect, and learning to control it can completely change the way you approach vocal recording.
What Is the Proximity Effect, and Why Does It Happen?
The proximity effect is a change in the low-frequency response of certain microphones as a sound source moves closer to them. In simple terms, when a singer moves closer to a directional microphone, the microphone often produces more bass relative to the rest of the voice. The closer the singer gets, the more noticeable this increase can become. The exact amount depends on the microphone’s design, pickup pattern, frequency response, and the distance involved.
Imagine listening to someone speaking across a room. Their voice sounds fairly natural because you hear a combination of direct sound and reflections from the surrounding space. Now imagine that person leaning close to your ear and speaking quietly. Suddenly the experience becomes much more personal, and the voice seems fuller and more immediate. A close microphone can produce a similar emotional impression, although the technical reasons are different from what happens when someone whispers into your ear.
To understand why microphones behave this way, we need to look briefly at how they respond to sound. A microphone contains a component called a diaphragm, which is a very thin surface that moves in response to changing air pressure. Those movements eventually become the electrical signal that your recording interface converts into digital audio. Different microphone designs measure those changes in different ways, and this is where the proximity effect begins.
Many directional microphones work partly by responding to differences in sound pressure between the front and rear of the diaphragm. This is called the pressure-gradient principle. When a sound source is very close, the relationship between the sound arriving at the two sides changes in a way that produces an increased response at lower frequencies. The microphone is not creating new bass frequencies that were missing from the singer’s voice. Instead, it is changing the balance of the frequencies it captures.
That distinction is important because the proximity effect is not the same thing as simply turning up the bass control on an equalizer. It is a physical characteristic of how certain microphones respond to nearby sound sources. The resulting tonal balance can be influenced later with EQ, but the original interaction has already occurred by the time your recording software receives the signal.
There is another important distinction that gets lost in many discussions about proximity effect. Moving closer to any microphone usually makes the direct voice louder relative to the room, assuming the recording level remains unchanged. That happens because the direct sound becomes stronger as the distance decreases. But the extra bass response we call proximity effect is specifically associated with microphones that use pressure-gradient operation. These are two related but different things, and understanding the difference will keep you from confusing louder, closer sound with an actual change in low-frequency response.

Not Every Microphone Responds the Same Way
If you have ever looked at the specifications for a microphone, you have probably encountered a term called the polar pattern. This describes how the microphone responds to sounds arriving from different directions. Although polar-pattern diagrams can resemble mysterious symbols left behind by an ancient civilization of recording engineers, the basic idea is quite simple. Some microphones concentrate their sensitivity toward one direction, while others respond more evenly to sound arriving from around them.
The most common vocal recording pattern is cardioid, which gets its name from the roughly heart-shaped diagram used to represent its directionality. A cardioid microphone is most sensitive to sounds coming from the front, responds less strongly to sounds arriving from the sides, and substantially reduces sounds coming from directly behind it. That makes it particularly useful in home studios where the singer wants to capture a clear voice without recording every reflection, computer fan, and questionable acoustic decision in the room.
Cardioid microphones also commonly exhibit proximity effect. As you move closer, the bass response increases, sometimes enough to make a fairly light voice sound noticeably fuller. This can be an advantage when recording quiet vocals, spoken passages, or singers whose voices need additional body. However, the same characteristic can make naturally bass-heavy voices sound overly thick or muddy, particularly when the recording already contains guitars, bass, keyboards, and other instruments competing for space in the lower frequencies.
A figure-eight microphone has a different pickup pattern. It is sensitive to sound coming from both the front and back while rejecting sound arriving from the sides. Because figure-eight operation relies on the pressure-gradient principle, these microphones typically exhibit a particularly strong proximity effect. That can produce an impressive sense of warmth and weight when the microphone is positioned close to a vocalist, although it also makes distance control especially important.
Omnidirectional microphones behave differently. A true pressure-operated omnidirectional microphone does not exhibit the normal proximity effect associated with directional microphones. Moving closer still increases the level of the direct voice compared with the room, and it can still make the recording feel more immediate, but it does not produce the same distance-related bass boost. This makes omnidirectional microphones useful when a singer moves around during a performance or when maintaining a more consistent tonal balance is important.
Some studio microphones allow the recording engineer to switch between cardioid, omnidirectional, and figure-eight patterns. This gives the home recordist another useful creative option because changing the pickup pattern can also change the relationship between microphone distance and bass response. There is no reason to assume that one pattern is always superior. What matters is choosing the combination that supports the performance while controlling the acoustics of the room.
There are exceptions and variations in real microphone designs, so the manufacturer’s specifications and actual listening tests still matter. Some directional microphones are engineered to reduce or control proximity effect, and different models can behave quite differently at the same distance. The important lesson is that you should never assume two microphones will produce the same amount of bass simply because they share the same basic polar pattern.
Why Moving Closer Can Make Your Voice Sound Bigger
Think about the way a singer delivers a quiet, emotional verse. The performance may contain subtle movements of the lips, gentle changes in breathing, and little variations in tone that help communicate the meaning of the lyrics. If the microphone is too far away, some of those details may become less prominent compared with the sound of the room. The recording might be perfectly clear, but it can feel emotionally distant, as though the listener is watching the performance instead of participating in it.
Bringing the singer closer to the microphone changes that relationship. The direct sound becomes much stronger compared with the room reflections, allowing small details to stand out. When the microphone is directional, the proximity effect may also increase the lower frequencies, adding weight to the performance. Together, these changes can create the impression that the singer is right in front of the listener.
This is particularly useful for intimate acoustic songs, soulful ballads, spoken introductions, and other performances where subtle expression matters. A singer working close to a cardioid microphone can sometimes deliver a remarkably full sound without having to sing loudly. Rather than pushing the voice to create power, the microphone provides some of the perceived body through its natural response.
However, it is important to separate bass response from emotional intimacy. A voice can be intimate without having exaggerated bass, and a bass-heavy recording can feel strangely disconnected if the performance itself lacks expression. Intimacy comes from the relationship between the singer’s delivery, microphone placement, room sound, arrangement, and production choices. The proximity effect can support that emotional connection, but it cannot manufacture sincerity out of a performance that doesn’t communicate anything.
For independent musicians, this creates an interesting creative opportunity. Instead of trying to make every vocal track sound equally large, you can use microphone distance to support the story being told. A vulnerable verse might benefit from a close, detailed performance, while a powerful chorus might sound better if the singer moves back and allows the voice to open up. The microphone becomes part of the instrument, responding to the way the singer performs.
When Warmth Turns Into Mud
There is a point where additional bass stops making a vocal sound impressive and starts making it difficult to understand. This usually becomes noticeable when lower frequencies begin masking the clarity of the words or competing with other instruments in the recording. A singer may sound rich and powerful when listening to the vocal alone, yet become almost impossible to place properly once the rest of the band enters the mix.
This happens because recordings are built from overlapping frequency ranges. A bass guitar occupies a significant part of the low-frequency spectrum, but so do the lower notes of electric guitars, acoustic guitars, keyboards, drums, and many human voices. When too many instruments demand attention in the same area, the mix can begin to sound crowded. Engineers often describe this condition as muddy, although there is no single frequency that magically defines the problem.
Proximity effect can contribute to that congestion by adding unnecessary low-frequency weight to the vocal recording. The result may seem impressive through headphones, especially when the singer is performing alone, but become difficult to manage when the track is combined with the rest of the arrangement. An engineer may respond by applying aggressive equalization, only to discover that removing enough bass to clean up the mix also changes the attractive character that made the recording appealing in the first place.
A better approach is often to solve the balance before recording. Moving the singer a few inches farther away may reduce the proximity effect enough to produce a vocal that naturally fits the arrangement. This may also reduce the need for corrective equalization later. Instead of spending twenty minutes repairing a problem with plugins, you can often improve the source sound by changing the distance between the singer and microphone.
It is also worth remembering that low-frequency buildup is not always caused by proximity effect. Room resonances, microphone frequency response, poor monitoring, and the singer’s natural vocal characteristics can produce similar problems. If the sound remains boomy after increasing the microphone distance, you may need to investigate the recording environment rather than continuing to blame the microphone.
This is why experienced recording engineers listen before they start adjusting controls. A frequency analyzer can show where energy exists, but it cannot tell you whether the emotional quality of a performance benefits from that energy. The goal is not to remove every trace of warmth. It is to capture enough warmth to support the music without allowing it to dominate everything around it.

The Hidden Price of Getting Too Close
Although proximity effect is often discussed as a bass-response issue, moving extremely close to a microphone introduces several additional problems. Some are acoustic, some are mechanical, and others come from the simple fact that the human mouth is not a particularly quiet place when examined in microscopic detail. Under ordinary circumstances, nobody notices the tiny sounds created by saliva, lips, tongue movements, or subtle changes in breathing. Put a sensitive microphone a couple of inches away, however, and those little sounds suddenly become important participants in the recording session.
Breath noise is one of the first things you may notice. A close microphone can capture the physical movement of air from the singer’s mouth along with the actual vocal sound. Depending on the style of music, this may add a sense of closeness and vulnerability, or it may become an irritating distraction. A breath that sounds natural between phrases can suddenly seem enormous when it is recorded at nearly the same apparent level as the words around it.
Mouth clicks can become equally noticeable. These are small sounds produced by the lips, tongue, and saliva during speech or singing. Some singers produce more of them than others, and their prominence can change with hydration, delivery, and microphone position. Recording very close to a microphone may make these sounds stand out because the microphone is capturing such a detailed picture of everything happening around the mouth.
Then there are plosives, which are among the most frustrating problems in close vocal recording. A plosive occurs when a consonant releases a burst of air, as with many pronunciations of the letters P and B. That burst can strike the microphone diaphragm or create turbulence around the capsule, producing a deep thump or pop. This is not simply an ordinary bass note that can always be removed cleanly with equalization. A strong plosive can create such a large disturbance that it overwhelms the recording momentarily.
Extreme closeness can also make changes in microphone position more obvious. When the singer is very close, a movement of only an inch can represent a substantial change in distance. This may produce an audible change in volume, tonal balance, or both. A singer who gently rocks forward during an emotional phrase may create a sudden increase in low-frequency energy, while leaning backward can make the next phrase sound noticeably thinner.
None of these problems means that close recording is automatically a bad technique. Some of the most engaging vocal recordings deliberately include breath sounds and other human details. The important difference is whether those sounds contribute to the performance or distract from it. A little breathing can make a vocal feel alive, while excessive popping and clicking can make listeners wonder whether someone has placed a microphone inside the singer’s mouth.
Why a Pop Filter Matters More Than You Think
A pop filter is one of the least glamorous pieces of equipment in a recording studio, which probably explains why it receives so little attention compared with microphones and preamps. It usually consists of a thin mesh or perforated screen positioned between the singer and microphone. Its main purpose is to reduce the force of sudden air bursts before they reach the microphone capsule.
When a singer produces a strong plosive, the pop filter helps disrupt and disperse the airflow. The goal is to prevent the moving air from directly striking the microphone while allowing the sound of the voice to pass through with relatively little change. A properly positioned pop filter can make close vocal recording considerably more reliable, particularly for singers who deliver consonants with a great deal of energy.
The filter also performs another useful function that is often overlooked. It can establish a physical reference point for the singer, helping maintain a consistent microphone distance throughout the performance. Instead of asking the singer to remain exactly eight inches from an invisible point in space, you can position the filter where it creates a comfortable boundary and explain how far behind it the microphone is located.
For example, you might place the microphone several inches behind the pop filter and ask the singer to remain a few inches in front of it. This creates a repeatable working distance without forcing the singer to think constantly about measurement. The exact spacing should be adjusted through listening, because different filters, microphones, and singers respond differently. A screen positioned directly against the microphone may offer less effective protection than one that provides room for the airflow to dissipate.
A pop filter should not be confused with an acoustic treatment device. It will not remove excessive room reverberation, fix a poor recording position, or correct the tonal problems caused by excessive proximity effect. It also cannot eliminate every breath sound or mouth click. What it can do is reduce one major source of recording trouble while making it easier to control the distance that influences all the other factors.
For a home recordist working on a limited budget, that combination makes a basic pop filter one of the more useful studio accessories you can buy. You may not be able to impress your friends with stories about its exotic circuitry, mostly because it doesn’t have any, but a clean vocal recording is considerably more valuable than a complicated explanation of why the microphone keeps popping.

Finding the Right Distance for Your Voice
One of the most common questions beginning recording engineers ask is how far a singer should stand from the microphone. Unfortunately, there is no universal distance that works for every vocalist, microphone, room, and style of music. A singer with a naturally deep voice may need more distance to avoid excessive bass buildup, while a lighter voice might benefit from working somewhat closer. A powerful rock singer who projects loudly may require a different position from someone delivering a soft acoustic ballad.
Still, having a reasonable starting point is useful, especially when you are recording yourself and cannot easily experiment while listening from another room. For many vocal recording situations, a distance of approximately six to twelve inches from the microphone capsule provides a practical place to begin. This is neither a rule nor a guarantee of good sound. It is simply a useful range where many singers can achieve a balance between vocal detail, tonal consistency, and manageable room sound.
For an intimate vocal, you might begin around three to six inches from a directional microphone, using a pop filter and adjusting the angle to reduce direct airflow. This range can emphasize closeness and potentially increase bass response, but it also demands greater attention to performance technique. A singer working at this distance should listen carefully for excessive low-frequency buildup, mouth noise, and sudden changes in tone.
For a conventional pop, country, blues, or singer-songwriter vocal, beginning around six to ten inches can provide a more forgiving balance. At this distance, the performer still benefits from a strong direct signal, but small movements are less likely to cause dramatic changes than they would at extremely close range. It is often an effective starting position for singers who are learning how to work with a studio microphone.
For louder vocal performances, moving to approximately ten to eighteen inches may help the singer project more naturally while reducing the exaggerated bass that can develop at close distances. However, moving farther away also increases the relative contribution of room reflections. This means the technique may work beautifully in a well-controlled recording space and considerably less well in a small untreated bedroom.
For classical, theatrical, ensemble, or more open acoustic performances, even greater distances may be appropriate when the room supports that approach. The microphone can capture more of the complete acoustic experience rather than concentrating on the sound coming directly from the mouth. The tradeoff is that the room becomes a more important part of the recording, and that room needs to contribute something worth hearing.
These distances should be measured approximately from the mouth to the active microphone capsule, not necessarily to the front of the microphone’s outer grille. The capsule may be recessed inside the housing, and different microphone designs have different physical arrangements. In practical sessions, a consistent approximate position matters more than measuring every fraction of an inch.
It is also essential to understand how the microphone is supposed to be addressed. Many large-diaphragm studio microphones are side-address designs, meaning the singer performs toward the side of the microphone marked as the front. Most handheld vocal microphones are end-address designs, meaning the singer performs toward the grille at the top. Singing into the wrong side of a microphone can create tonal and level problems that no amount of careful distance measurement will fix.
Why the Six-Inch Starting Point Is So Useful
There is a reason that many recording engineers begin with the singer roughly six inches away from a directional microphone. It provides a reasonably close position without demanding the extreme precision associated with placing the mouth almost against the grille. The microphone can capture plenty of direct vocal sound while maintaining a little breathing room for natural performance movement.
At this distance, many cardioid microphones will still exhibit some proximity effect, but the amount may be easier to manage than it would be at two inches. The singer also has enough space to deliver consonants without directing every burst of air into the capsule. With a pop filter in place, this can create a useful compromise between warmth and clarity.
Another advantage is consistency. When the singer stands six inches away, moving forward or backward by an inch changes the relationship less dramatically than the same movement would at an extremely close distance. That does not eliminate differences in level or tone, but it makes the performance somewhat easier to control.
The six-inch position can also help singers concentrate on their delivery rather than the equipment. This matters because a technically perfect microphone placement is not particularly useful if the performer feels uncomfortable, restricted, or overly aware of the recording process. The microphone should support the singer, not become an intimidating piece of machinery that demands all their attention.
Of course, the sound still has to be judged in context. Some microphones produce their most attractive tonal balance much closer, while others may sound better with the singer farther away. The purpose of starting at six inches is to establish a reference that can be changed deliberately. Once you know what the microphone sounds like at that position, moving closer or farther away becomes a meaningful creative choice rather than an experiment conducted without any point of comparison.
The Difference Between Volume and Tone
One of the easiest mistakes to make when testing microphone distance is confusing increased volume with improved tone. Human hearing does not judge loudness and frequency balance independently. A louder recording can seem more impressive even when the underlying tonal quality has not improved. This makes it surprisingly easy to decide that a close microphone position sounds better simply because the singer is producing a stronger recorded signal.
To make a fair comparison, you need to listen at approximately the same playback level. Record the same short vocal passage at several distances, then adjust the playback gain of the individual recordings so that they sound similarly loud. Do not use equalization or compression during the initial comparison, because those processes can conceal the very differences you are trying to identify.
Once the recordings are level-matched, listen for the balance between low frequencies, clarity, and room sound. Does the closer recording genuinely sound warmer in a useful way, or does it simply contain too much bass? Does the farther recording sound more open because the voice is naturally balanced, or is the room making it seem distant? Are consonants easier to understand at one position than another?
This simple test can reveal differences that might otherwise go unnoticed. It can also help you distinguish actual proximity effect from the normal increase in direct sound level that occurs when a microphone is moved closer to a source.
A particularly useful variation is to record the same passage while using an omnidirectional microphone or an omnidirectional setting on a multipattern microphone, if one is available. Because a true omni pattern does not exhibit the usual proximity effect, comparing it with a cardioid setting can demonstrate how much of the tonal change comes from the directional microphone’s bass response.
The more important lesson is that your ears need a fair comparison before they can make a useful judgment. Recording engineers who learn to compare sounds at similar levels become much better at evaluating microphones, preamps, equalizers, compressors, and almost every other part of the recording process. That skill saves money because it makes it harder for louder demonstrations and impressive marketing claims to substitute for actual improvements.

Using Distance as Part of the Vocal Performance
There is a difference between positioning a microphone before a performance and learning to work with it during the performance. Experienced singers often understand microphone technique as part of their instrument. They move closer during quiet passages, create space during powerful notes, and adjust their angle to control breath and consonants. These movements are not random gestures. They are choices that influence the sound being captured.
A quiet verse, for example, may benefit from the singer moving a little closer to the microphone. The stronger direct sound and possible increase in low-frequency response can create an intimate feeling that matches the emotional content of the lyrics. The singer may not need to increase their vocal effort because the microphone position helps preserve the small details of the performance.
When the chorus arrives, the same singer might step back several inches. This can reduce excessive proximity effect, create more room for the louder voice, and prevent the recording level from increasing as dramatically as it otherwise would. The resulting vocal may feel more open and powerful without becoming overly heavy in the lower frequencies.
This technique requires practice because microphone distance changes both level and tonal balance. Moving away reduces the amount of direct sound reaching the microphone and usually changes the direct-to-room ratio. The singer must learn to anticipate these changes rather than reacting after the problem occurs. A controlled movement can make a recording feel expressive, while an unpredictable movement can make consecutive phrases sound like they were recorded with different microphones.
In the studio, there is no requirement that every section of a song use exactly the same microphone position. You can record verses and choruses separately if the song benefits from different tonal characteristics. This may be easier than asking a singer to make dramatic movements during one uninterrupted performance, especially when recording alone.
The goal is to use distance as a creative tool rather than treating it as something that must remain absolutely fixed under all circumstances. Consistency matters when you want repeated phrases to sound alike, but variation can be equally valuable when it serves the emotional development of the song.
Intimate Ballads, Blues, Rock, and Other Vocal Styles
Different styles of music create different expectations about how the human voice should sound. A softly delivered acoustic ballad often benefits from a sense of closeness, while a powerful rock vocal may need space for the singer to project naturally. A blues performance might depend on the warmth and texture of the voice, while a polished pop production may demand carefully controlled clarity and consistency.
For a quiet folk or singer-songwriter performance, recording relatively close to a cardioid microphone can help preserve the fragile details that make the song feel personal. A distance of around four to eight inches may be a useful starting point, depending on the singer’s natural tone. The trick is to capture the subtle character of the performance without allowing the breath and mouth sounds to become more noticeable than the lyrics.
A blues vocalist may benefit from experimenting with stronger proximity effect, particularly when delivering a low, conversational phrase. A close microphone position can add weight to a naturally expressive voice, creating the impression of a singer performing directly for the listener. However, a performer who already has a powerful low register may need to back away to prevent the recording from becoming too thick. A great blues vocal depends on phrasing, emotion, and storytelling, and excessive bass can obscure the very words that carry that story.
For rock vocals, the correct approach often changes between sections of the song. A restrained verse may sound effective at six inches, while a heavily projected chorus may work better at twelve inches or more if the room is suitable. The farther position can allow the singer to open the mouth, project naturally, and avoid exaggerating the low-frequency buildup that might occur when singing forcefully into a very close microphone.
Country vocals create their own interesting challenges because the lyrical storytelling often demands a clear understanding of every word. Warmth can be useful, especially for lower voices, but excessive proximity effect can blur consonants and make the performance less intelligible. A slightly greater microphone distance may preserve the natural character of the voice while allowing its emotional qualities to remain apparent.
For highly produced contemporary pop vocals, consistency can become especially important because multiple takes, doubles, harmonies, and edited phrases often need to fit together seamlessly. If one vocal phrase is recorded two inches from the microphone and the next is recorded ten inches away, the difference in tonal balance may become obvious during editing. Establishing a repeatable distance can simplify the entire production process, particularly when recording vocal doubles or additional takes days apart.
There is no musical genre that demands one specific microphone position. These examples are starting points for experimentation, not rules that should override the sound of an individual singer. The greatest advantage comes from understanding why one position works and how changing it might improve the emotional impact of the recording.
The Room Is Always Part of the Equation
Every recording space has its own acoustic personality, whether the owner realizes it or not. Some rooms produce pleasing reflections that add depth and natural resonance to a performance. Others create short, harsh echoes, exaggerated bass frequencies, or unusual resonances that make even an excellent singer sound difficult to record. The farther the microphone moves from the singer, the more important the room generally becomes in the captured sound.
This is because moving the microphone away reduces the level of the direct voice relative to reflections arriving from the walls, floor, ceiling, and surrounding objects. The microphone does not suddenly become more sensitive to the room, but the balance between the singer and room sound changes. When the direct voice becomes quieter, reflected sound makes up a larger portion of what the microphone captures.
In a well-treated recording room, that extra ambience can be beautiful. A singer may sound more natural when the microphone is positioned farther away, and the recording can develop a sense of space that would be difficult to reproduce artificially. In a small bedroom with bare walls and a low ceiling, however, the same approach may reveal boxy resonances and distracting reflections.
This is one reason close microphone placement is common in home recording. By positioning a directional microphone near the singer, you can improve the balance between the desired voice and unwanted room sound. The result may be cleaner and easier to process, even though the microphone itself has not changed.
However, getting close to escape a bad room can introduce the excessive proximity effect and plosive problems we have already discussed. The solution is to find the best compromise rather than moving as close as physically possible. Sometimes modest acoustic treatment, a better recording position, or moving away from reflective surfaces will improve the sound enough to allow a more natural microphone distance.
Heavy curtains, suitable absorption panels, and thoughtfully arranged acoustic materials can reduce some unwanted reflections, although not every soft furnishing provides meaningful low-frequency control. A mattress placed behind a singer may help absorb certain reflections, but it will not magically transform a bedroom into a professional recording studio. Room treatment works best when the problem has been identified rather than when random objects are placed around the microphone in the hope that something improves.
For an independent artist, this matters because the recording environment is usually a fixed resource. You may not have access to a beautifully designed commercial vocal booth, but you can learn where your room sounds best, how microphone direction affects unwanted reflections, and what distance produces the strongest balance between vocal quality and room sound. That knowledge can be more valuable than replacing an otherwise capable microphone.
Microphone Angle Can Change the Results
Distance is not the only part of microphone placement that matters. The angle between the singer and microphone can also influence the balance of frequencies and the amount of direct airflow reaching the capsule. This becomes especially important when working close, where small changes in position can produce noticeable differences in the recorded sound.
A common approach is to place the microphone slightly above mouth level and angle it downward toward the singer. This can help keep the strongest bursts of air from traveling directly into the capsule while still capturing the vocal performance. Another option is to position the microphone slightly to one side of the mouth, allowing the singer to perform across the pickup area rather than directing every consonant straight toward the diaphragm.
These approaches can reduce certain plosive problems, but they also introduce a possible tradeoff. Directional microphones do not always reproduce sound arriving from different angles with exactly the same frequency response. Moving too far off-axis can change the high-frequency detail and overall tonal character of the voice. Some microphones handle off-axis sound very smoothly, while others produce more obvious coloration.
The best position therefore depends on the microphone. A small angle may reduce plosives while preserving the desired clarity, but an extreme position may cause the vocal to lose presence or articulation. Experimentation is necessary, and the singer should listen for changes in the overall sound rather than assuming that an unusual angle is automatically an improvement.
Head movement introduces another consideration. When singers turn away from the microphone, the sound reaching the capsule can change considerably, particularly in the upper frequencies. This is one reason experienced vocalists often learn to maintain a reasonably consistent relationship with the microphone while still allowing natural expression.
There is no need to turn a recording session into a geometry examination. The practical objective is to find a comfortable position where the microphone hears the voice clearly while avoiding unnecessary airflow and exaggerated tonal changes. Once that position is found, a few minutes of rehearsal can help the performer become comfortable working within it.
What About Dynamic, Condenser, and Ribbon Microphones?
Recording discussions frequently describe dynamic microphones as warm, condenser microphones as detailed, and ribbon microphones as smooth. Although these descriptions may provide a rough starting point for understanding certain models, they can also encourage misunderstandings. The proximity effect is not determined simply by whether a microphone is dynamic, condenser, or ribbon. It depends primarily on the acoustic operating principle and directional behavior of the microphone, along with its particular design.
A cardioid dynamic microphone can exhibit significant proximity effect when used close to a singer. This is part of the reason many broadcast and vocal microphones can produce such a full sound when positioned near the mouth. However, the amount of bass boost varies, and some microphones are designed specifically to control it.
A cardioid condenser microphone can exhibit the same general phenomenon. In fact, many large-diaphragm condensers used for studio vocals have a noticeable proximity effect that becomes important when singers work close to the capsule. Their ability to capture fine details can also make breath sounds, mouth clicks, and subtle changes in performance particularly apparent, although the actual results depend on the individual microphone.
Ribbon microphones are often associated with figure-eight pickup patterns, which can produce a pronounced proximity effect. This creates opportunities for rich vocal tones, but it also means that microphone distance may strongly influence the low-frequency balance. Some ribbon microphones use different directional designs, so it is important not to assume that every ribbon microphone behaves identically.
The useful lesson is that microphone categories do not replace actual listening. A less expensive dynamic microphone positioned correctly may deliver a better vocal sound for a particular singer than an expensive condenser placed poorly. Similarly, a beautifully detailed microphone may be completely inappropriate for a recording situation if it exaggerates unwanted room sound or requires a tonal balance that does not suit the performance.
For independent musicians, understanding this can prevent an expensive cycle of unnecessary equipment upgrades. Before purchasing another microphone because your current recordings sound muddy, thin, harsh, or distant, investigate whether microphone placement is contributing to the problem. You might discover that the sound you were trying to buy was available from your existing equipment all along.
The Simple Recording Experiment Every Home Studio Should Try
The best way to understand proximity effect is to hear it using your own voice and microphone. You do not need specialized testing equipment or expensive measurement software. A basic audio interface, a directional microphone, headphones, and your preferred recording program are enough to demonstrate the difference.
Begin by placing the microphone on a stable stand with a pop filter installed. Choose a short vocal passage containing both low notes and clearly articulated consonants. A section that includes quiet phrases and louder words can be particularly useful because it reveals how the microphone responds to different types of vocal energy. Try to perform the passage at approximately the same vocal intensity each time.
Start by recording from about twelve inches away. Listen to the result and pay attention to the balance of the voice, the amount of room sound, and the clarity of the words. Do not apply equalization or compression. You want to hear the relationship between the microphone and performance without processing that might disguise the differences.
Next, move to approximately six inches and record the same passage. Keep the microphone position and angle consistent, adjusting only the distance. Depending on the microphone, you may hear more low-frequency weight and a stronger sense of closeness. You may also notice that the room seems less obvious compared with the singer.
Now move to approximately three inches and record again. At this distance, many directional microphones will produce a more pronounced proximity effect. Listen carefully to the bass response, plosives, breath sounds, and changes in vocal level. The result may be wonderfully intimate, excessively boomy, or somewhere between the two.
For a final comparison, move back to approximately eighteen inches and record the passage again. You may hear a more open tonal balance, less proximity-related bass emphasis, and a greater contribution from the recording room. Depending on the acoustics, this may sound natural and attractive or reveal problems that were much less noticeable at closer distances.
After recording all four positions, match their playback levels as closely as possible. This is essential because the closer recordings will usually be louder if the microphone gain remains unchanged. Once the levels are matched, compare the recordings without looking at which one is playing. You may be surprised by which distance actually produces the best result.
The most important part of this experiment is to repeat it with the instrumental arrangement playing at a comfortable monitoring level. A vocal that sounds magnificent on its own may be too heavy when combined with a bass guitar and drums. Another recording that seems slightly thinner by itself may sit perfectly in the mix without requiring much equalization. The correct recording choice is the one that supports the finished song, not necessarily the one that sounds most impressive in isolation.
Teaching Yourself Consistent Microphone Technique
Once you discover a useful microphone position, the next challenge is learning how to repeat it. This is especially important for independent musicians who record their own vocals because they often have to move between performing, operating the recording software, and evaluating the results. It is easy to become so focused on the emotional delivery that microphone position changes from one take to the next.
A pop filter provides a convenient visual reference, but it is also helpful to pay attention to posture and body movement. If you begin each take in a different position, the microphone may respond differently even though the recording settings remain unchanged. Establishing a comfortable stance and a consistent starting distance makes it easier to compare takes and combine phrases during editing.
The most useful technique is not to become completely motionless. Singers need physical freedom to breathe, communicate emotion, and deliver a convincing performance. Instead, learn how different movements affect the sound, then develop enough awareness to use them deliberately. A slight lean toward the microphone during an intimate phrase may be beneficial, while an accidental movement during a sustained note may create an undesirable tonal change.
You should also rehearse the loudest sections of the song before recording the final take. A microphone position that works beautifully during a quiet verse may become uncomfortable or overly aggressive when the singer reaches the chorus. Testing the strongest vocal passages early can prevent the discovery of major recording problems after several otherwise excellent takes have already been completed.
If you record yourself regularly, consider making a simple note of the microphone model, pickup pattern, approximate distance, angle, pop filter position, and any other details that contributed to a successful recording. This information can be stored in the notes section of your recording project. When you return to record harmonies, replacement lines, or additional vocal sections, those notes can help restore the original sound much more quickly.
This is particularly valuable when working on an album over several weeks or months. Vocal recordings may be made on different days under different conditions, and maintaining a consistent microphone setup can reduce the amount of corrective processing required to make those performances sound like they belong together.
Can Equalization Fix a Poor Microphone Distance?
Modern recording software provides remarkable control over vocal recordings. Equalizers can adjust the balance of low and high frequencies, compressors can reduce dynamic differences, and editing tools can remove many unwanted noises. Some AI-assisted audio processors can even identify and reduce certain recording problems automatically. These capabilities are useful, but they should not encourage engineers to ignore the quality of the original recording.
If proximity effect adds too much low-frequency energy, a high-pass filter or carefully chosen low-frequency EQ adjustment may help. A high-pass filter gradually reduces frequencies below a selected point, while a shelving equalizer can reduce a broader bass range. These tools can be effective when used carefully, particularly if the recording is otherwise clear and consistent.
However, equalization cannot completely recreate the sound of a different microphone distance. When a singer moves farther away, the relationship between direct sound and room reflections changes. Moving also affects the capture of breath, mouth noise, and the relative strength of certain vocal details. An equalizer can change the frequency balance, but it cannot independently reverse all of those acoustic differences.
Compression introduces another complication. When the singer moves unpredictably close to and far from the microphone, a compressor can help control changes in level, but it will not necessarily correct accompanying changes in tone. A heavily compressed vocal may still become boomy when the singer moves close, even if the overall volume remains relatively consistent.
Strong plosives can be even more difficult. Although high-pass filtering and specialized repair tools may reduce the audible thump, a severe burst of air can cause distortion or overwhelm the microphone signal. Once a recording has been damaged in that way, restoring it perfectly may not be possible. Preventing the problem through proper microphone placement and pop-filter use is generally much easier.
AI-based repair tools are becoming increasingly useful, especially for independent artists who do not have the budget to hire an experienced editor for every recording. They can help clean up certain unwanted details and save time during production. But there is an important difference between using technology to improve a strong performance and depending on technology to rescue an avoidable technical mistake.
The best recording workflow combines good acoustic decisions with appropriate processing. Capture a vocal that already sounds close to the way you want it, then use equalization, compression, and other tools to refine the result. This approach usually produces a more natural recording and leaves the artist with greater creative freedom during mixing.
Why Better Microphone Technique Can Save Independent Artists Money
For an independent musician, recording quality is not simply an artistic concern. It also affects the cost of producing music and the number of useful assets that can be created from each recording session. A clean vocal track may become part of the original release, an acoustic version, a live-style arrangement, a remix, or a licensing presentation. The better the recording is at the source, the easier it becomes to use that performance in different contexts.
Poor microphone placement can create additional work at nearly every stage of production. Excessive proximity effect may require more equalization. Uncontrolled plosives may demand hours of editing. Inconsistent microphone distance can complicate vocal comping, where the best sections from several performances are combined into one final track. If the problems cannot be repaired successfully, the artist may have to schedule another recording session.
These costs are not always obvious because home recordists often perform the extra work themselves. It may feel as though no money has been spent when an artist spends an entire evening repairing a poorly recorded vocal, but that time still has value. It could have been used to finish another song, prepare a release campaign, contact venues, update a merchandise store, or connect with fans who already support the music.
Professional recording studios understand that the performance captured at the microphone determines much of what is possible later. Expensive equipment may provide additional options, but it cannot replace thoughtful engineering decisions. An independent artist who learns to capture consistent, usable performances is developing a skill that can reduce production costs for years.
The relationship between recording quality and revenue becomes especially important when music is prepared for licensing opportunities. Film, television, advertising, and other media projects may require clean vocal tracks, instrumental versions, alternate edits, and properly organized production assets. A recording filled with technical problems can create difficulties when those versions are prepared. Solving avoidable issues during the original session helps protect the usefulness of the music as a long-term asset.
That does not mean every successful recording must be clinically perfect. Breath, texture, natural performance movement, and even certain imperfections can contribute to emotional authenticity. The objective is to distinguish artistic character from unwanted technical problems. A gritty blues vocal may be exactly what the song needs, but a massive plosive that overloads the microphone is unlikely to improve its chances of being licensed.
In the Making a Scene philosophy, the independent musician is not simply someone who makes recordings and hopes a company eventually notices them. The artist is building a business around music they own and control. Improving recording technique contributes to that business because it helps create better assets with fewer avoidable expenses.
How AI Can Help You Learn Microphone Technique
Artificial intelligence is becoming an increasingly familiar part of the home recording environment, but its most useful role may not be generating sound or making creative decisions for the artist. AI can also function as an educational assistant, helping beginning musicians understand recording problems and develop better troubleshooting habits.
Imagine recording several versions of a vocal performance at different distances. Rather than immediately asking an automated processor to make everything sound professional, you could use an AI assistant to develop a listening exercise. The assistant could explain what characteristics to compare, why the low-frequency response may differ, and how microphone pattern and room acoustics influence the results.
Some modern audio-analysis tools can help visualize frequency balance, identify excessive low-frequency energy, and point out level differences. These tools do not replace critical listening, and their results must be interpreted carefully. A graph showing more energy below 200 Hz does not automatically mean the recording is wrong. It simply provides information that may help explain what you are hearing.
AI can also help organize recording knowledge. A home recordist might maintain notes describing which microphone distances work well for specific singers, rooms, and musical styles. Those observations can become part of a searchable recording reference that helps the artist prepare future sessions. Rather than starting every recording from scratch, the musician gradually develops a practical understanding of their own equipment and recording environment.
This is where technology becomes genuinely empowering. An artist who understands why a recording sounds good can reproduce that result without depending on a particular plugin company, subscription service, or outside engineer. AI becomes a learning tool that supports the artist’s judgment rather than replacing it.
For the independent musician, this is a much more sustainable relationship with technology. The goal is not to remove human creativity from the process. It is to give the artist better information, faster troubleshooting, and more confidence when making recording decisions.
The Microphone Is Part of the Performance, Not Just the Equipment
There is a tendency in modern recording discussions to treat microphones as static pieces of equipment that either sound good or sound bad. We compare frequency-response charts, noise specifications, sensitivity ratings, and price tags as though selecting the correct product automatically guarantees the correct recording. These details matter, but they only describe part of the relationship between a singer and a microphone.
A microphone does not hear a voice in isolation from the physical circumstances of the performance. It responds to the distance, angle, intensity, acoustics, and movement of the person singing. Two vocalists can use the same microphone and produce dramatically different results because their voices, delivery styles, and physical relationships to the capsule are different.
This is why microphone technique should be considered part of a singer’s musical education. Just as a guitarist learns how picking position changes tone, a vocalist can learn how microphone distance influences the recorded sound. The knowledge becomes instinctive through experimentation and practice, allowing the performer to concentrate on emotional expression while still making intelligent technical decisions.
For a home recordist, the same principle changes the way recording problems are approached. Instead of assuming that an unpleasant vocal tone requires a new microphone or processor, the first question becomes whether the existing microphone is positioned correctly. If the recording sounds muddy, moving back may help. If the performance sounds too distant, moving closer may improve the direct sound. If plosives are becoming a problem, changing the microphone angle or pop-filter placement may provide a solution.
These are simple adjustments, but their cumulative effect can be substantial. They make recording sessions more efficient, reduce unnecessary editing, and help artists develop a recognizable sound based on their own performances rather than a collection of presets.
Building a Vocal Sound That Belongs to You
Every singer has a different voice, and the microphone should be positioned to capture the qualities that make that voice recognizable. A rich baritone may need less proximity effect than a lighter tenor. A singer with a naturally bright tone may benefit from additional warmth, while someone with a strong low-midrange presence may sound clearer when recorded farther away. These differences are not defects that must be corrected. They are part of the individuality that makes music interesting.
This is also why copying another artist’s microphone distance rarely guarantees the same result. You can purchase the same microphone used on a famous album, stand at the same distance, and follow the same recording chain, yet still produce a different sound. The original singer’s voice, delivery, room, and production decisions all contributed to the final recording. Without those conditions, the equipment alone cannot reproduce the result.
The better approach is to treat recording as a process of discovery. Experiment with close and distant positions, compare the results at equal listening levels, and pay attention to how the voice fits the arrangement. Gradually, you will identify positions that work for different types of songs and performances.
You may discover that the most intimate recordings happen when you stand four inches from the microphone, while powerful choruses sound better at ten inches. You may find that one microphone works beautifully at close range but becomes less interesting when placed farther away. Another microphone might reveal its best qualities when it has enough space to capture the singer without exaggerated low-frequency buildup.
These discoveries create a personal recording method that can be repeated, adapted, and improved over time. That method becomes part of your artistic identity, just as surely as your choice of instruments, songwriting style, and approach to arranging music.
The important thing is to avoid confusing consistency with rigidity. A reliable recording method gives you a starting point, not a permanent rule. Songs change, voices develop, and creative ideas sometimes demand a sound that breaks every conventional guideline. Understanding proximity effect allows you to make those decisions knowingly rather than stumbling into them by accident.
Great Vocal Tone Begins Before You Press Record
The next time you prepare to record a vocal, resist the temptation to begin by loading your favorite equalizer, compressor, and collection of vocal enhancement plugins. Instead, spend a few minutes listening to the singer through the microphone while experimenting with distance. Move the singer slightly closer and listen to how the low frequencies respond. Move farther away and notice how the tonal balance and room sound change. Try a different microphone angle, adjust the pop filter, and compare the results without assuming that louder automatically means better.
These experiments require very little equipment, but they develop something far more valuable than another collection of presets. They teach you to recognize the relationship between acoustic conditions and recorded sound, which is one of the foundations of good recording engineering. Once you understand that relationship, microphones become easier to use because their behavior is no longer mysterious.
For independent artists, the larger lesson is about learning to control the tools already available to them. Better recordings do not always require better equipment, and professional results do not always begin with professional budgets. A home studio becomes more capable when the person operating it understands how to use the room, microphone, and performance together.
Proximity effect is a perfect example because it can be both a creative advantage and a technical problem. A few inches of movement may add warmth and emotional closeness, or it may introduce excessive bass, unwanted noise, and inconsistent vocal tone. The difference is not determined by the price of the microphone. It comes from understanding what the microphone is doing and choosing the position that serves the music.
When you learn to make that choice deliberately, you gain more than a better vocal sound. You gain a repeatable recording skill that improves the quality of the music you own, reduces the need for expensive corrections, and helps you spend more of your resources making music rather than repairing it. That is an advantage independent musicians can carry into every future recording session, regardless of the equipment they can afford.
The microphone may be the tool that captures the voice, but the artist and engineer decide how that voice should reach the listener. Learning what happens in those few inches between the singer and microphone gives you another way to make that decision for yourself.
 |  Spotify |  Deezer |  Breaker |
 Pocket Cast |  Radio Public |  Stitcher |  TuneIn |
 IHeart Radio |  Mixcloud |  PlayerFM |  Amazon |
 Jiosaavn |  Gaana |  Vurbl |  Audius |
 Reason.Fm | |||
Find our Podcasts on these outlets

Subscribe to Our Newsletter
Discover more from Making A Scene!
Subscribe to get the latest posts sent to your email.


