

How Microphones Hear





Making a Scene Presents – How Microphones Hear
Listen to the Podcast Discussion
Why the Voice in the Room Is Not Always the Voice in the Recording
One of the strangest experiences in a home studio happens before anybody has touched an EQ, compressor, reverb, or one of those plugins that promises to make your vocal sound like it was recorded in a million-dollar studio somewhere in the Hollywood Hills. A singer stands a few feet in front of you and sounds wonderful. The voice feels warm and natural, the low notes have body without getting muddy, the high notes have excitement without becoming painful, and everything seems balanced enough that you start congratulating yourself on how easy this session is going to be. Then you put up a microphone, record thirty seconds, listen through the monitors, and discover that the same singer has somehow become thin, nasal, boomy, brittle, overly intimate, or so painfully sibilant that every “S” sounds like somebody opening a shaken can of soda directly beside your ear.
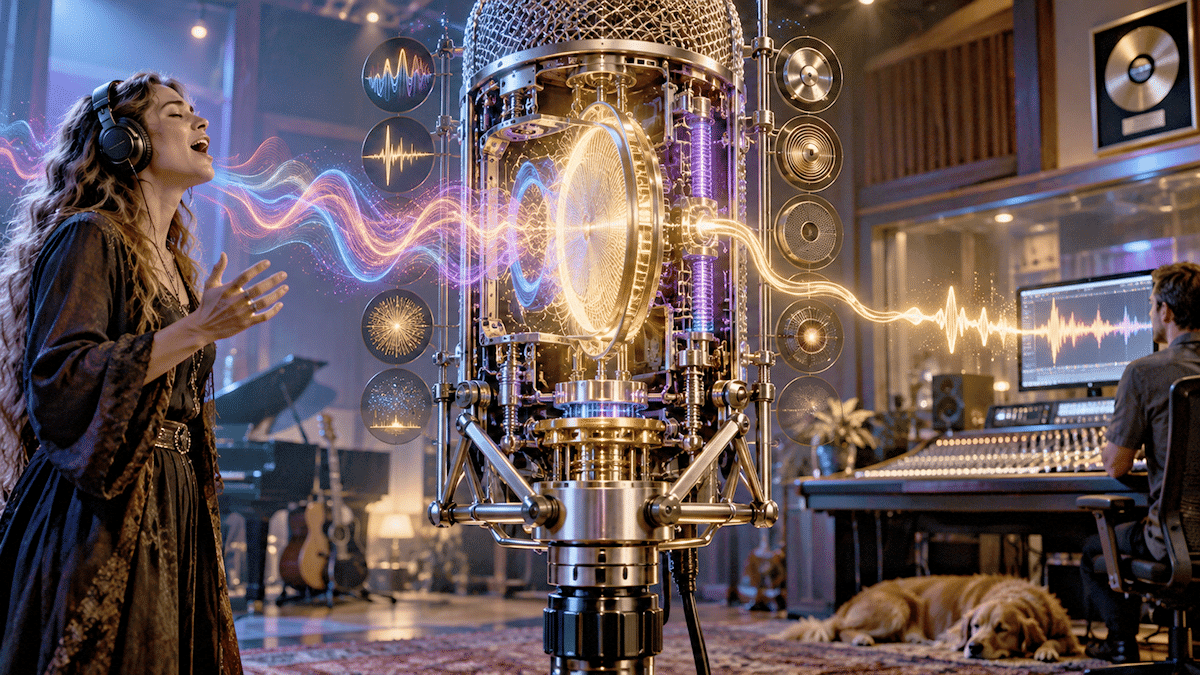
The obvious reaction is to blame the microphone, because microphones are conveniently shaped like suspects and generally refuse to defend themselves. The singer may wonder whether that awful playback is what everybody else has secretly been hearing all along, while the engineer begins scrolling through plugins in search of something called “Vintage Vocal Magic.” Before anybody starts buying new equipment or questioning the singer’s career choices, however, it helps to understand the real problem. A microphone does not hear sound the way a human being hears it, because a microphone does not actually hear anything at all. It is an acoustic transducer that reacts to changes in air pressure at a particular physical location and converts those changes into an electrical signal.
That difference seems simple, but it explains an enormous amount about recording. Human hearing involves two ears, the shapes of our heads and outer ears, our bodies, our position in the room, and an astonishing amount of processing inside the brain. We are constantly interpreting the sounds around us, comparing what reaches one ear with what reaches the other, identifying familiar voices, deciding where sounds are coming from, and mentally separating the things we want to hear from the things we would rather ignore. A microphone receives none of that help. It responds to whatever acoustic energy reaches its diaphragm according to its design, frequency response, directional pattern, distance from the source, angle to the source, and relationship with the room.
Learning how microphones “hear” therefore has less to do with memorizing microphone models and more to do with understanding what happens between the sound source and the diaphragm. Once you understand that relationship, microphone placement stops feeling like some mystical art passed down through secret recording-engineer societies. You begin to recognize why moving a microphone two inches can accomplish more than fifteen minutes of EQ, why a singer who sounds magnificent from across the room can sound terrible at six inches, and why the most expensive microphone in the building can produce a worse recording than a much cheaper one when it is placed badly.
Your Brain Is Doing Far More Work Than You Think
When you listen to someone singing in a room, you are hearing much more than a stream of sound pressure arriving at one point. Sound reaches your two ears at slightly different times and levels depending on the location of the singer. The shape of your outer ears, your head, and even your torso changes the sound depending on where it comes from, giving the auditory system additional clues about direction and distance. Researchers describe these direction-dependent changes through head-related transfer functions, or HRTFs, which help explain how people can locate sounds in three-dimensional space even though we only have two ears.
Your brain then adds an extraordinary amount of interpretation. Imagine sitting in a crowded club talking with a musician across a table while the bartender is loading glasses into a rack, another conversation is happening behind you, a PA system is playing music somewhere overhead, and somebody near the door has decided that this is an excellent time to laugh at the approximate level of an aircraft engine. You are still often able to concentrate on the person speaking to you because your auditory system is actively sorting location, timing, tone, familiarity, and attention into something meaningful. You do not experience the room as one giant undifferentiated waveform even though, from the standpoint of air pressure, all of those sounds are arriving at your ears at the same time.
A traditional studio microphone has no equivalent mental filtering system. It does not know that the singer is important while the ceiling reflection is not, and it has no idea that the air conditioner should be ignored because nobody plans to put it on the album. If a reflection from the wall reaches the diaphragm, the microphone records that reflection according to its directional and frequency response. If the computer fan reaches the microphone, the microphone does not recognize that the computer fan is an embarrassing side effect of your home studio rather than the newest member of the band.
This is one reason the voice you hear while standing in the room can be very different from the voice heard through the microphone. You are listening through an incredibly adaptive binaural system that has spent your entire life learning how to interpret acoustic spaces. The microphone is sitting in one place waiting for air pressure to move a diaphragm. Expecting those two systems to produce identical results is where much of the confusion begins.
It All Starts With a Diaphragm Moving in Air
At the center of a microphone is a diaphragm, which is a lightweight surface designed to move when sound creates changes in air pressure. That movement is then converted into an electrical signal, although the method used to accomplish this depends on the microphone design. In a moving-coil dynamic microphone, the diaphragm is connected to a coil of wire positioned within a magnetic field, so movement of the diaphragm and coil generates an electrical signal. A condenser microphone uses a very thin conductive diaphragm positioned near a backplate, forming a capacitor whose electrical behavior changes as sound moves the diaphragm.
The important part for the musician is that the diaphragm is a physical object. It has mass, tension, dimensions, resonances, mechanical limits, and an acoustic structure surrounding it. The designers of a microphone make choices about all of those things because there is no single diaphragm design that behaves perfectly for every source, every frequency, every volume level, and every recording situation. Even microphones based on the same general operating principle can therefore behave very differently when presented with the same voice.
The physical behavior of the diaphragm also helps explain why microphone type influences transient response. A very light diaphragm can react quickly to sudden changes in sound pressure, which can reveal fine details in the attack of a guitar pick, percussion instrument, consonant, or drum hit. Neumann notes that low diaphragm mass is one of the reasons condenser microphones can provide very strong transient performance, while its discussion of small-diaphragm condensers points out that smaller diaphragms can follow rapid sound-wave movement with particularly high accuracy.
This greater ability to capture rapid detail can be wonderful when you want clarity and definition, but recording engineers eventually discover that “more detail” and “better recording” are not synonyms. A microphone that captures every tiny pick attack on an acoustic guitar may also capture fret noise, fingernails, breathing, clothing movement, and the small mechanical noises musicians never noticed while they were simply enjoying the instrument in the room. High resolution is useful when the information being revealed helps the music, but there is no award for successfully recording every unpleasant sound that happened during the performance.
The Microphone Is Not Capturing “The Voice”
One of the most useful mental changes a young engineer can make is to stop thinking of a microphone as a device that simply captures “the singer’s voice.” There is no single version of that voice floating in the air waiting to be collected. The sound changes with distance and direction, while reflections from the room continually mix with the direct sound. What the microphone captures is the particular acoustic event occurring at its diaphragm at the moment of recording.
This is why moving a microphone can alter a vocal so dramatically even when nothing about the singer has changed. A microphone placed directly in front of the mouth receives a different balance of frequencies than one located above the mouth and angled downward. A microphone positioned four inches away experiences a very different ratio of direct sound to room sound than one positioned three feet away. A directional microphone moved very close to the singer may produce considerably more bass because of proximity effect, while the same microphone farther away may sound leaner and capture more of the room.
The recording engineer is therefore selecting a listening perspective rather than merely selecting a microphone. Photographers understand this intuitively because nobody expects a portrait made from three feet away with one lens to look identical to a portrait made from twenty feet away with another. Both pictures may accurately depict the same person, but perspective changes the appearance. Microphones do much the same thing with sound, except our culture has somehow convinced musicians that if a vocal changes when the microphone moves, something must be wrong with the microphone.
Once you understand this, microphone placement becomes one of the most powerful tone controls in the studio. Before reaching for an equalizer, you can move the microphone closer, farther away, higher, lower, or slightly to one side. Instead of buying another plugin because the vocal is too bright, you can change the acoustic relationship before the sound ever reaches the cable. It is one of the few studio upgrades that costs nothing, never needs authorization software, and has yet to announce a monthly subscription plan.
Frequency Response Is the Microphone’s Version of the Story
Every microphone responds differently across the frequency spectrum, and the graph showing those differences is called its frequency response. A microphone described as relatively flat produces approximately similar output across much of its intended frequency range when presented with equal sound pressure, while a microphone with a shaped response deliberately emphasizes or reduces certain regions. Manufacturers often design microphones with these characteristics because an absolutely neutral response is not always the most useful response for making music.
A vocal microphone, for example, may have additional energy in the upper midrange or high frequencies because those frequencies can improve clarity, articulation, and the sense that the vocal is sitting forward in a mix. That same emphasis can be flattering on a dark or soft voice and absolutely brutal on a singer whose natural tone already contains strong upper-midrange energy. The microphone is not necessarily defective in the second situation; it is simply emphasizing something that did not need additional help.
This is why a singer can sound rich and smooth while standing a few feet away from you and suddenly sound harsh once recorded. Your auditory system experienced the singer at a particular distance and within the broader acoustic context of the room, while the microphone may be positioned close enough to receive a much stronger direct signal and may also contain a presence boost that emphasizes consonants and vocal edge. When you play that recording through studio monitors at close range, the result can seem far more aggressive than the voice you remember hearing naturally.
The same principle works in reverse. A microphone with a softer high-frequency response can make an aggressive singer feel more controlled, but it can also make a naturally dark voice disappear inside a dense arrangement. There is no universal microphone frequency response that is best for vocals because singers are not standardized test signals. The useful microphone is the one whose behavior complements the source, the distance, the arrangement, and the emotional perspective you are trying to create.
Why the Frequency Range Printed on the Box Can Mislead You
Microphone specifications often advertise a frequency range such as 20 Hz to 20 kHz, which looks wonderfully scientific and gives everyone something reassuring to compare while shopping. Unfortunately, that range tells you very little about how the microphone behaves between those two numbers. Two microphones can both claim similar frequency ranges while one has a substantial rise in the presence region, another has a smoother top end, and another begins reducing low-frequency response earlier than you might expect.
The actual frequency-response graph is much more informative because it shows where the microphone’s output rises and falls across the spectrum. Even that graph needs context, however, because directional microphones can change their low-frequency behavior with distance as a result of proximity effect. DPA specifically notes that measurement distance matters when evaluating the frequency response of directional microphones for exactly this reason.
This is another reason microphone comparisons made on the internet can create more confusion than enlightenment. If one microphone is tested at a slightly different distance, the tonal difference may come partly from placement rather than the microphone itself. If playback levels are not accurately matched, the louder microphone often seems more impressive simply because human listeners tend to perceive louder signals as fuller or more exciting. A useful comparison requires far more discipline than putting two microphones on stands and announcing that one sounds “expensive.”
For the working indie artist, the lesson is not that specifications are useless. They can tell you quite a lot when you know what they mean, but they should help explain what you hear rather than replace listening. A frequency-response graph is a map of behavior under defined conditions, not a guarantee of how your singer will sound in your bedroom at eleven o’clock on a Tuesday night.
Transient Response Changes the Feeling of Detail
Music is full of sounds that begin very quickly. A drumstick hits a snare head, a guitarist strikes a string, a piano hammer hits a string, a singer produces a hard consonant, or a percussionist attacks a tambourine, and each event creates a rapid change in acoustic energy. The ability of a microphone system to follow those rapid changes contributes to what engineers call transient response.
A microphone with fast transient response can make a performance feel immediate and highly defined because the leading edges of sounds are reproduced clearly. On an acoustic guitar, this might make the pick attack seem vivid and realistic. On percussion, it can provide a sharp sense of impact. On vocals, it can reveal the small changes produced by consonants, breath, mouth movement, and articulation that give a performance intimacy and personality.
The danger is assuming that maximum transient detail is always musically desirable. A very revealing microphone in front of a singer with aggressive consonants may make every “T,” “K,” and “S” feel larger than it did in the room. A detailed condenser pointed at a bright acoustic guitar may emphasize pick attack so strongly that the body of the instrument seems less important, even though standing several feet from the guitar produced a beautifully balanced sound.
This is where engineering becomes more interesting than shopping. Instead of asking whether one microphone has “better” transient response than another, ask what kind of detail the recording actually needs. A dense rock track may benefit from a vocal microphone that helps the singer remain solid and smooth inside the arrangement, while a sparse acoustic recording may benefit from every tiny change in articulation. Technical accuracy is useful, but music ultimately gets to decide which version of accuracy matters.
Sensitivity Does Not Mean the Microphone Can Hear Through Walls
Microphone sensitivity is one of the most frequently misunderstood specifications because the everyday meaning of the word suggests that a more sensitive microphone must be capable of hearing quieter things from greater distances. In microphone specifications, sensitivity refers primarily to the electrical output a microphone produces for a defined acoustic input. A microphone with higher sensitivity produces more output voltage from the same sound pressure than a microphone with lower sensitivity. DPA describes microphone sensitivity as the relationship between acoustic pressure and electrical output, while microphone specifications commonly reference a test level of 1 Pascal, equal to 94 dB SPL.
That does not mean a high-sensitivity microphone somehow extends invisible arms into the room and pulls distant sounds toward itself. Sound must physically reach the microphone diaphragm before anything can be converted into electricity. A low-output dynamic microphone and a higher-output condenser placed at the same position both experience the acoustic field that exists at that location, although they may require very different amounts of preamp gain to reach the same recorded level.
The confusion arises because a high-sensitivity condenser often appears to “pick up everything,” particularly when somebody replaces a dynamic vocal microphone with a condenser in an untreated home studio. Part of what is happening is that the condenser may provide greater output, broader high-frequency response, faster transient reproduction, and a different directional response, all of which can make environmental details more obvious. Meanwhile, the dynamic microphone may have been used much closer to the singer, giving the direct voice a much greater advantage over the room.
This distinction is important because it prevents people from trying to solve acoustic problems by shopping for a microphone that supposedly cannot hear the room. If your singer is six feet away in a reflective bedroom, the microphone is going to receive a substantial amount of reflected sound regardless of the fantasy language used in an advertisement. Moving the microphone closer to the source, changing its orientation, selecting an appropriate polar pattern, and treating troublesome reflections are real acoustic solutions because they change what physically reaches the diaphragm.
Self-Noise Matters Most When the Music Gets Quiet
Microphones and their associated electronics can also produce noise of their own, and condenser microphones commonly specify this as equivalent noise level or self-noise. DPA explains that equivalent noise represents the sound-pressure level that would produce an output equal to the microphone’s internal electrical noise, while Neumann describes self-noise as the signal a microphone produces even when no intentional acoustic source is present.
Whether that specification matters depends heavily on what you are recording. A microphone’s self-noise is unlikely to ruin your day when the capsule is sitting in front of a loud guitar amplifier, snare drum, or screaming vocalist because the desired source is overwhelmingly louder. Move the same microphone into a very quiet recording of fingerpicked guitar, delicate strings, whispered vocals, distant room ambience, or Foley effects, and the microphone’s noise floor becomes much more important because there is less source level available to mask it.
Home studios introduce another complication because the microphone is often blamed for noise that is not coming from the microphone at all. Computer fans, HVAC systems, refrigerators in nearby rooms, traffic, electrical dimmers, laptop power supplies, outside lawn equipment, and the mysterious low-frequency rumble that appears only after you press Record can all become part of the signal. A microphone with extremely low self-noise cannot make a physically noisy room quiet because, once again, the microphone is responding to the air around it rather than deciding what you intended to record.
This is a good place to remember that specifications should always be interpreted within the complete recording system. An extremely quiet microphone connected to a noisy preamp can still produce an undesirable recording, just as a low-output dynamic microphone may require enough gain that preamp noise becomes more important. The goal is not to collect impressive numbers but to maintain a useful signal-to-noise ratio from the source through the entire recording chain.
Maximum SPL Tells You When Loud Becomes Too Loud
At the opposite end of the dynamic range is maximum sound pressure level, usually shortened to maximum SPL. This specification describes how much acoustic level a microphone can accept before its distortion reaches a defined limit. Condenser microphones can encounter overload in the capsule or internal electronics, while dynamic microphones generally tolerate extremely high levels but can eventually reach mechanical limits when diaphragm movement becomes excessive. Shure notes that maximum SPL in a moving-coil dynamic design can also vary with frequency because diaphragm excursion is frequency dependent.
This matters because musicians often judge loudness from where they are standing rather than from where the microphone is sitting. A snare drum, brass instrument, or guitar cabinet may create extremely high sound pressure when the microphone is positioned only a few inches away. The microphone may therefore be receiving a much more intense acoustic event than the engineer standing several feet back in the room realizes.
If a recorded signal sounds strangely flattened, crunchy, or distorted even though the digital meter on the interface never reaches clipping, distortion may already have occurred earlier in the chain. The microphone itself may be overloaded, its internal electronics may be reaching a limit, or the analog input stage of the preamp or interface may be clipping before the digital meter tells the complete story. Lowering the track after recording cannot undo distortion that was created before the signal became digital.
Many condenser microphones include a pad that reduces level inside the signal path and allows higher-SPL sources to be handled more comfortably. That switch is not there because microphone designers enjoy adding tiny controls that disappear the moment the room gets dark. It exists because source level is part of microphone technique, and understanding where overload can occur helps you diagnose distortion before replacing cables, interfaces, preamps, microphones, and eventually your entire studio out of frustration.
Proximity Effect Is Why Distance Becomes a Tone Control
Proximity effect is one of the most useful and most abused characteristics of directional microphones. In pressure-gradient designs such as cardioid microphones, low-frequency response increases as the sound source moves very close to the microphone. Omnidirectional pressure microphones do not exhibit the same proximity effect, which is one reason working distance can create dramatically different tonal behavior between microphone patterns.
For a singer with a naturally light voice, proximity effect can be incredibly useful. Moving closer to the microphone may create additional low-frequency warmth and make the vocal feel larger and more intimate without applying any EQ. Broadcasters have exploited this behavior for generations because a voice placed close to a directional microphone can gain that familiar deep, authoritative quality associated with radio.
The same effect can become a problem when a naturally full singer works extremely close to the microphone. Suddenly the vocal carries far more low and low-mid energy than you heard while standing several feet away, and that energy begins fighting with the bass, kick drum, guitars, keyboards, and anything else living in the lower half of the mix. The engineer responds by cutting large amounts of low frequency with EQ, even though moving the singer or microphone a few inches farther apart might have produced a much better tonal balance before recording.
Proximity effect also explains why microphone technique should be treated as part of the performance. A singer who moves dramatically closer and farther from a cardioid microphone is changing more than level. The tonal balance may also be changing because the amount of proximity effect changes with distance. Experienced singers learn to use this creatively, moving closer during intimate passages and backing away during powerful sections while maintaining a consistent musical relationship with the microphone.
Distance Changes the Room Along With the Voice
Working distance has another enormous effect that has nothing to do with proximity effect. As the microphone moves farther from the source, the level of direct sound reaching it decreases while reflected sound from the room becomes a larger part of the total recording. Every enclosed room has some relationship between direct energy and reverberant energy, and acousticians use the idea of critical distance to describe the region where direct and reverberant sound become equal in level. Shure emphasizes that microphones cannot separate wanted direct sound from unwanted reverberation once both arrive at the capsule.
This is why moving a vocal microphone from eight inches away to four feet away does far more than simply reduce volume. At the closer distance, the singer dominates the microphone’s world and the room occupies a smaller percentage of what reaches the diaphragm. At the greater distance, the singer has lost direct level while reflections bouncing from the walls, ceiling, floor, desk, windows, and other surfaces remain part of the acoustic environment.
If the room sounds beautiful, that increased contribution can make a recording feel open and natural. Great recording rooms are valuable partly because engineers can deliberately allow the room to become part of the sound without regretting the decision later. In a typical untreated bedroom with parallel drywall, a low ceiling, a desk against one wall, and a large window somewhere you wish it were not, pulling the microphone farther away may reveal flutter echoes, low-frequency resonances, comb filtering, and enough room character to make you wonder whether you accidentally recorded the vocal inside a storage container.
This is also why the voice can sound perfectly pleasant when you are simply standing in that bedroom. Your brain has adapted to the room and is interpreting the singer within that familiar acoustic environment. The microphone does not perform the same perceptual cleanup. It records the direct voice and the reflections according to what physically reaches its diaphragm, leaving you to discover the consequences during playback.
The Very Close Vocal Is a Perspective Humans Rarely Experience
Modern recording often puts singers extremely close to microphones, particularly in home studios where close placement helps increase direct sound relative to the room. That can be a sensible technique, but it creates a listening perspective that almost nobody experiences in ordinary life. Human beings generally do not conduct conversations with one ear located three inches from another person’s lips, and doing so would probably shorten your list of friends considerably.
At that distance, a microphone can capture tiny details that disappear naturally when you listen from farther away. Breath movement becomes larger, lip noises and tongue sounds become more obvious, plosive bursts strike the diaphragm with greater force, and subtle mouth clicks that nobody noticed in the room suddenly become important events in the recording. If the microphone also has strong high-frequency detail and fast transient response, the result can sound extremely intimate.
That intimacy can be artistically beautiful. Modern pop, indie, acoustic, and singer-songwriter productions often use close vocal perspectives because they make the listener feel as though the singer is speaking directly into their private space. The mistake is assuming that this perspective represents some absolute version of the singer’s natural voice rather than one carefully chosen microphone perspective among many.
When a vocal sounds too intimate, too breathy, or almost uncomfortable in its physical closeness, the solution may not require complicated processing. Increasing the distance moderately while controlling the room can allow the voice to develop before reaching the microphone and can reduce the dominance of tiny mouth sounds. What changes is not the quality of the singer but the place from which you have chosen to listen.

Off-Axis Response Is Where Many Microphones Reveal Their Personality
Microphone buyers spend a great deal of time staring at the on-axis frequency-response graph because that is the graph manufacturers most prominently display. Real rooms, unfortunately, have not agreed to send all sound directly into the front of the microphone. Reflections, other instruments, background noise, and even portions of the intended source arrive from many different angles, which makes off-axis response just as important as the beautifully controlled line printed in the brochure.
A directional microphone reduces sensitivity to sounds arriving from certain angles, but that reduction is not necessarily identical at every frequency. DPA explains that a well-behaved directional microphone should maintain a smooth frequency response even as off-axis sounds are reduced; otherwise those off-axis sounds can become tonally colored. Shure similarly notes that off-axis coloration often affects higher frequencies particularly strongly.
Imagine a singer facing a cardioid microphone in a small room. The direct voice reaches the front of the microphone, but part of that voice also travels toward the sidewall, reflects, and reaches the microphone from another angle a few milliseconds later. The reflection has already been changed by the wall and the path it traveled, and the microphone’s off-axis response may change it again. When that delayed, altered reflection combines electrically with the direct sound, the result may have a tonal character that never seemed obvious while you were simply standing in the room.
This is one reason two cardioid microphones with reasonably similar on-axis frequency responses can behave very differently in the same room. Their polar patterns and off-axis frequency behavior may not be identical, particularly at high frequencies. A microphone that maintains smooth response away from the front can make reflected sound feel more natural, while another may turn those same reflections into a colored wash around an otherwise good vocal.
Microphone Angle Is an Acoustic Equalizer
Once you understand off-axis response, microphone angle becomes another practical tone control. Suppose a singer has strong sibilance and a microphone pointed directly at the mouth emphasizes it. Moving the microphone slightly above the singer, shifting it a little to the side, or angling it so the capsule is not receiving the strongest high-frequency energy directly can change the vocal before a de-esser ever gets involved.
This works because high-frequency energy is often more directional than lower-frequency energy, while many microphones also exhibit changing high-frequency response off-axis. A small adjustment can therefore reduce aggressive consonants or excessive brightness while preserving much of the body of the voice. The exact result depends on the microphone and the singer, so there is no magic angle that works for everyone, which is inconvenient for anyone hoping to turn microphone technique into a six-second social-media tip.
The same principle is famous in guitar-cabinet recording. A microphone aimed near the center of a guitar loudspeaker often produces more upper-frequency attack than one moved toward the outer portion of the cone, while changing microphone angle can further alter the balance. Engineers have shaped electric-guitar tones this way for decades because the position of the microphone changes the actual sound being captured rather than trying to rebuild that sound afterward.
None of this makes EQ obsolete. Equalizers are extraordinary tools, and modern recording would be miserable without them. The point is that EQ becomes far more effective when it is shaping a fundamentally good capture rather than attempting major surgery on a perspective that was wrong from the beginning.
Polar Patterns Decide Which Parts of the Room Get a Vote
The polar pattern of a microphone describes how its sensitivity changes depending on the direction from which sound arrives. An omnidirectional microphone responds broadly around itself, while a cardioid microphone emphasizes sound from the front and reduces sound arriving from the rear. Supercardioid and hypercardioid microphones create narrower front pickup with different rear-lobe behavior, while a figure-eight pattern responds strongly to the front and back and rejects sound from the sides.
These patterns matter in recording because they allow the engineer to make decisions about the room as well as the source. A cardioid microphone can be positioned so that an undesirable noise source or reflection falls closer to its least-sensitive region. A figure-eight microphone can use its strong side rejection creatively when unwanted sound is arriving from the side. An omnidirectional microphone can provide wonderfully natural room pickup when the room itself deserves to be part of the recording.
The key is to stop thinking of polar patterns as shields that block unwanted sound. They are frequency-dependent sensitivity patterns, and they work by reducing sounds arriving from some directions relative to others. Reflections that arrive from the front of a cardioid microphone are still front-arriving sounds, regardless of whether the engineer wishes they had stayed on the wall.
This is especially important in small studios because room treatment and microphone direction work together. If the wall directly behind the singer reflects sound toward the sensitive front of the microphone, the microphone cannot know that the returning sound is unwanted. Placing absorption behind the singer can often be more useful than placing it behind the microphone because you are stopping a reflection that would otherwise travel directly toward the capsule’s most sensitive side.
Why a Great Microphone Can Make a Bad Room Seem Worse
There is a particularly cruel moment in the development of many home studios when the owner finally purchases a high-quality condenser microphone and discovers that the new microphone appears to have made everything worse. The old recording sounded acceptable, while the expensive new microphone suddenly reveals room reflections, computer fans, mouth noises, street traffic, and a mysterious ringing sound apparently generated by one specific corner of the bedroom.
The problem is not that good condenser microphones inherently “hear farther” in some supernatural sense. A high-quality condenser may have greater sensitivity, extended high-frequency response, low self-noise, strong transient detail, and highly revealing reproduction, which can make elements of the acoustic environment easier to notice. More importantly, people often use condensers at greater working distances than handheld dynamics, changing the ratio of direct sound to reflected sound.
A dynamic microphone used very close to the singer can therefore appear to reject the room beautifully, but much of that advantage may come from geometry. The singer’s direct sound is extremely strong at the close microphone position, so the room becomes relatively less important. Move the dynamic microphone several feet away, add enough clean gain to restore playback level, and the room has not somehow disappeared simply because the microphone contains a moving coil.
For the independent artist working in a spare bedroom, basement, rehearsal room, or converted office, this is actually encouraging. You do not necessarily need to replace every microphone because the room sounds bad. Improving placement, reducing reflective surfaces around the recording area, controlling noise, and working at sensible distances can transform recordings without turning the Sweetwater shopping cart into a long-term financial relationship.
Why Vocals Become Muddy
A muddy vocal usually contains too much energy in a region where warmth has stopped being useful and started obscuring clarity. Several parts of microphone technique can contribute to this, particularly when a singer works very close to a directional microphone. Proximity effect may increase low-frequency response, while room modes and nearby boundaries can reinforce other low and low-mid frequencies until the vocal seems to occupy far more space than it should.
Room placement can also make the problem worse. Positioning a singer or microphone near a wall can change low-frequency behavior because reflected energy interacts with the direct sound. In a small room, the combination of proximity effect, boundary interaction, and uneven room response can produce enough low-mid buildup that the engineer starts cutting huge sections of the vocal with EQ.
Sometimes that EQ is necessary, but it is worth conducting a much cheaper experiment first. Move the singer or microphone farther apart, change the singer’s position in the room, and listen again. If the mud decreases before the signal reaches the preamp, you have solved part of the problem without creating another processing stage.
This habit becomes increasingly valuable as your ears develop. Experienced engineers often move microphones because they are listening for the cause of a tonal problem rather than immediately treating the symptom. The goal is not to avoid processing but to make processing a creative decision instead of emergency repair.
Why Vocals Become Thin
A voice that sounds full in the room can also become surprisingly thin through a microphone. This may happen when a directional microphone is being used farther from the singer than the distance at which its tonal balance is most flattering, reducing the bass contribution associated with close placement. It can also happen because the microphone’s frequency response does not complement that particular voice or because its position emphasizes frequencies that make the vocal seem smaller.
Reflections can create another problem through phase interaction. When a direct sound reaches the microphone and a reflected version of that sound arrives slightly later, the two signals combine. At some frequencies they reinforce one another, while at others they partially cancel, creating a pattern of peaks and dips known as comb filtering.
Comb filtering can make a recording sound hollow, phasey, thin, nasal, or simply wrong in a way that is difficult to correct with ordinary EQ. The frustrating part is that the exact cancellation depends on path length, which means moving the singer or microphone can change the problem dramatically. A recording that seems to require complicated processing may sometimes improve when the microphone moves by a surprisingly small distance.
This is another example of why microphones do not simply document the voice that existed in the room. The recording captures a particular combination of direct and reflected sound at one location. Change that location and you change the acoustic equation before the computer ever becomes involved.
Why Vocals Become Harsh
Harshness often appears when several factors that are harmless on their own begin working together. A singer may naturally have strong upper-midrange energy, the microphone may contain a presence boost in roughly the same region, and the microphone may be placed close enough that consonants and direct high-frequency information become especially prominent. Add a reflective room that returns bright early reflections and you may end up with a vocal that sounds far more aggressive through the microphone than it ever did while standing beside the singer.
A different microphone can certainly help, but microphone choice should not be treated as the only solution. Increasing distance slightly, changing vertical position, angling the microphone away from the most direct mouth radiation, or altering the room around the singer can reduce harshness acoustically. A smoother microphone may then require much less corrective processing because the entire recording setup is working with the voice instead of against it.
This matters especially for indie artists building studios gradually because it is very easy to believe every difficult vocal requires another microphone purchase. Sometimes it does; having several microphones with different characteristics is enormously useful. Just as often, the existing microphone is capable of producing a much better sound when the physical setup changes.
A good engineer learns the microphone before deciding the microphone is wrong. That means discovering where it becomes bright, how quickly proximity effect develops, how its off-axis response behaves, and what distance produces the most useful balance for different singers. Those lessons remain valuable long after whatever plugin currently dominates social media has been replaced by the next miracle.
Why the Room Always Ends Up on the Record
Every microphone exists inside an acoustic environment, which means room pickup is not an optional feature that can simply be switched off. Sound leaves the singer, travels directly toward the microphone, and simultaneously travels outward toward every nearby surface. Some of that energy is absorbed, some passes through boundaries, and some reflects back into the room before eventually reaching the microphone from other directions.
Shure’s discussion of critical distance makes the central limitation very clear: a conventional microphone cannot separate direct speech from reverberant speech once both arrive at the microphone. The solution has to involve the acoustic relationship itself, such as changing distance, improving the room, reducing noise, or using directionality intelligently.
This is why room treatment is not simply something wealthy studios install because bare walls look insufficiently expensive. Absorption and diffusion change the actual sound field in which the microphone operates. When troublesome early reflections are reduced, the microphone receives a cleaner version of the direct source, and everything later in the signal chain has an easier job.
For a home-recording artist, treatment does not necessarily mean covering every surface in foam until the room resembles the inside of a shipping crate. The goal is to identify the reflections that are damaging the recording and reduce them intelligently while maintaining a useful acoustic environment. A few properly placed broadband absorbers can often accomplish far more than randomly attaching thin foam squares to every visible wall and hoping physics respects enthusiasm.
The Five-Minute Test That Teaches More Than an Hour of Shopping
One of the best ways to understand how your microphone hears is to perform short comparison recordings using the same source and microphone while changing only one physical variable at a time. Record the singer at a close working distance, then move the microphone somewhat farther away without changing anything else. Listen to how the low end, room contribution, mouth detail, and emotional intimacy change, and then repeat the experiment with a small change in angle or height.
The important part is resisting the temptation to change everything simultaneously. If you swap microphones, move the singer, change preamp gain, switch polar patterns, and add a compressor between takes, you may produce two different sounds but learn almost nothing about why they differ. Controlled experimentation turns recording sessions into useful education because your ears begin connecting audible changes with physical causes.
Over time, this becomes far more valuable than memorizing online descriptions of microphones as “warm,” “open,” “silky,” “vintage,” or whatever other adjective somebody used while attempting to justify buying their seventh large-diaphragm condenser. You begin knowing what happens when your own microphone moves closer to a singer, what its top end does off-axis, how much room enters the recording at different distances, and whether its presence response helps or hurts particular voices.
That knowledge effectively gives you more microphones without buying more microphones because you learn to use each one across a wider range of perspectives. The same microphone can sound intimate or open, bright or smoother, fuller or leaner, depending on how you position it relative to the source and the room. Gear matters enormously, but technique determines how much value you actually receive from the gear you already own.
Hearing the Microphone Before Reaching for the Plugin
Modern recording software gives independent artists processing power that major studios could only dream about a few decades ago. We can perform surgical EQ, dynamic equalization, multiband compression, spectral repair, intelligent noise reduction, resonance suppression, pitch correction, and AI-assisted cleanup from a computer sitting on a desk. Those tools are remarkable, and there is no good reason to pretend that real engineers should avoid them in favor of some romantic fantasy about recording everything perfectly on the first take.
The danger comes when processing becomes a substitute for understanding the capture. If a vocal is muddy because the singer is buried in proximity effect, aggressive EQ may reduce the mud but also change the character of the voice. If sibilance is being exaggerated by microphone angle and frequency response, a de-esser can control it, but repositioning the microphone may produce a more natural result before the de-esser does anything at all.
AI tools make this distinction even more important because they are becoming increasingly capable of correcting problems after recording. Noise reduction, source separation, dereverberation, and spectral repair can rescue performances that might once have been unusable. That is valuable technology for independent artists because it saves time and protects performances, but the best economic use of AI is often preventing expensive rework rather than relying on software to repair every avoidable recording mistake.
When the original capture is strong, those tools can be used creatively instead of defensively. The vocal requires less repair, mixes move faster, revisions become easier, and the artist can spend more time finishing music rather than trying to make a bad microphone position sound like a good one. Better engineering knowledge does not compete with modern technology; it gives the technology better material to work with.
A Better Recording Becomes a More Valuable Artist Asset
For the independent artist, all of this eventually leaves the recording room and enters the business. A finished master is not merely something uploaded to a streaming service. It can become the foundation for direct music sales, sync licensing, physical products, fan memberships, Smart Media releases, promotional videos, alternate mixes, stems, instrumentals, remixes, archival editions, and future licensing opportunities.
A poorly captured vocal creates costs throughout that chain. More time has to be spent editing, repairing, remixing, or replacing it. If the recording later becomes part of a sync package, an immersive mix, a stripped-down version, or some future format we have not invented yet, problems buried inside the original source material can return because the processing that concealed them in the stereo master may no longer apply.
That is why microphone technique belongs in the larger conversation about artist ownership. Owning your masters is tremendously important, but the quality and flexibility of those masters determine how useful the assets become over time. An independent artist who understands recording technology is not merely learning how to make nicer demos; that artist is learning how to manufacture higher-quality intellectual property.
Artificial intelligence will continue giving musicians new ways to analyze, repair, organize, version, search, and monetize recorded material, while emerging direct-to-fan and Web3 technologies may create additional ways to authenticate ownership, manage permissions, and connect recordings to fans and licensees. None of those technologies change the first step. Before the master becomes data, commerce, licensing inventory, or a fan experience, somebody has to put a microphone in front of something worth hearing.
Learning to Hear What the Microphone Hears
The most useful change you can make as a developing recording engineer is to stop asking whether a microphone is simply good or bad and begin asking why it sounds the way it does in a particular situation. Listen to what happens when distance changes the direct-to-room balance. Listen for the increase in low end when a directional microphone moves close to a source. Notice how microphone angle affects consonants and brightness, how room reflections appear when you back away, and how a fast transient response can make small performance details suddenly become enormous.
With enough practice, you begin hearing those relationships before you even press Record. A singer walks into the room and you start thinking about how much upper-midrange energy the voice contains, whether a bright microphone will help or hurt it, whether close proximity will create too much low end, and where the singer can stand without exciting the worst parts of the room. The microphone stops being a mysterious device that either likes the singer or does not like the singer and becomes a predictable part of an acoustic system.
That is when home recording becomes considerably less frustrating. You stop trying to force every source through the same microphone at the same six-inch distance because somebody on the internet called that setup “professional.” You begin using your own ears, your understanding of physics, and the equipment you actually have to create the perspective the song needs.
The singer in front of you can still sound wonderful in the room and completely different through the microphone, but now that difference is no longer a mystery. Your ears and brain were hearing the entire performance through a sophisticated human perception system, while the microphone was responding to the sound field at one specific location according to the mechanical and electrical choices built into its design. Frequency response shaped the tone, transient response shaped the detail, sensitivity determined electrical output, maximum SPL established how much level the microphone could tolerate, self-noise helped determine the lower usable limit, proximity effect changed the bass as distance changed, off-axis response shaped the sound arriving from other directions, and the room contributed reflections whether anyone invited them or not.
Understanding those relationships gives independent artists something far more valuable than another preset: control. Instead of treating the microphone as a magic tube that either blesses or destroys a performance, you can deliberately decide what perspective enters the recording and make corrections while the sound still exists in the air. That means cleaner tracks, faster mixes, fewer expensive fixes, stronger masters, and recordings that remain useful as the artist turns those masters into products, licenses, experiences, and income.
That is really what learning how microphones hear is about. The microphone will never hear a singer the way you do because it was never designed to imitate the complete human hearing system. Your job as the engineer is to understand that difference well enough to make the microphone capture the version of the performance you want the listener to experience, and once you can do that consistently, you have moved beyond simply owning recording equipment and started learning how to make records.
 |  Spotify |  Deezer |  Breaker |
 Pocket Cast |  Radio Public |  Stitcher |  TuneIn |
 IHeart Radio |  Mixcloud |  PlayerFM |  Amazon |
 Jiosaavn |  Gaana |  Vurbl |  Audius |
 Reason.Fm | |||
Find our Podcasts on these outlets

Subscribe to Our Newsletter
Discover more from Making A Scene!
Subscribe to get the latest posts sent to your email.


