


Mid/Side Processing in Mixing: The Secret to Width, Clarity, and Control


Making a Scene Presents – Mid/Side Processing in Mixing: The Secret to Width, Clarity, and Control
Listen to the Podcast Discussion for more insight into Mid Side Processing
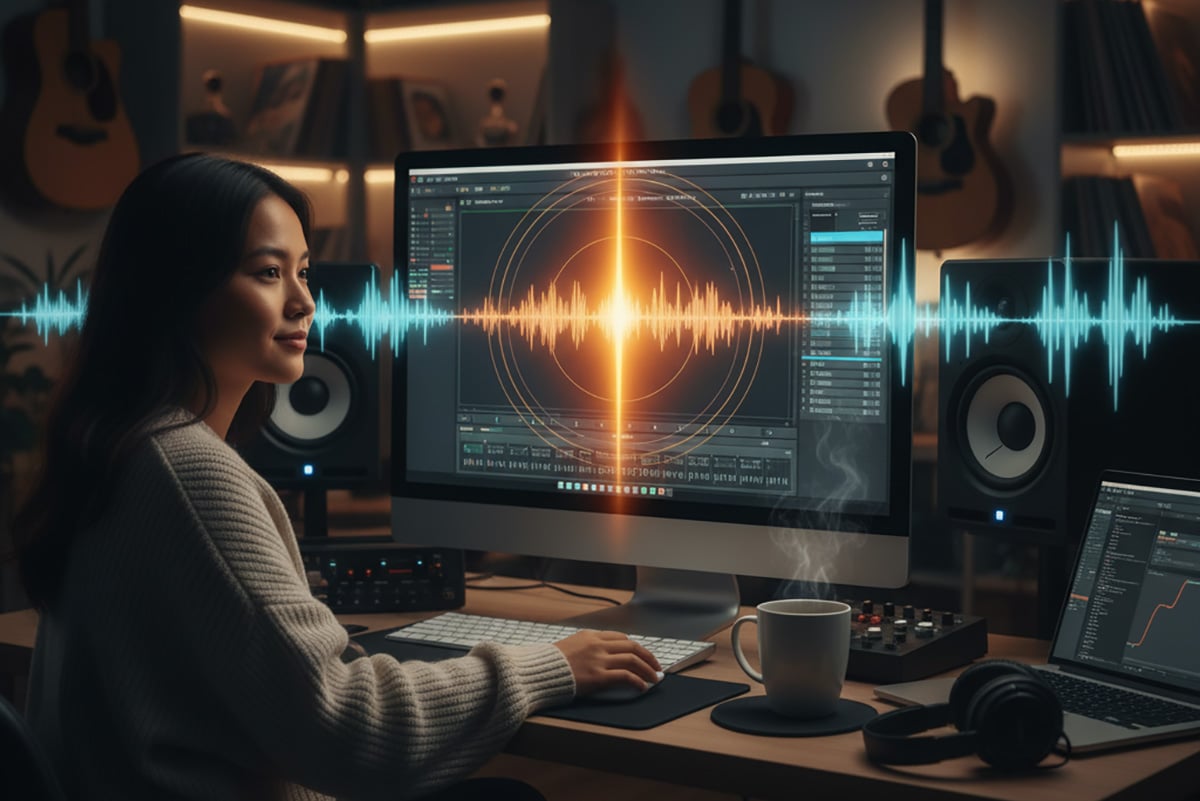
Have you ever listened to a pro mix and thought, “Why does this sound so wide and full, but everything still feels perfectly in place?” That’s not just good EQ or compression — chances are, the engineer used a little Mid/Side processing to get that balance between focus and space.
Mid/Side, or M/S, is one of those behind-the-scenes techniques that can take your mixes from sounding flat and two-dimensional to open, clear, and three-dimensional. Once you understand what it does and how to use it properly, it becomes one of the most powerful tools in your mixing toolbox.
Let’s take a deep dive into what Mid/Side processing actually is, how it works, and how you can use it to solve common mix problems. We’ll also talk about some of the best modern plugins that make it super easy to use, when it shines, and when you’re better off leaving it alone.
What Mid/Side Processing Actually Means
Let’s start with the basics. In a normal stereo recording, you’ve got two channels — the left and the right. Every sound you hear is panned somewhere between those two speakers. That’s how stereo creates the sense of width and direction.
Mid/Side processing flips that idea around. Instead of working with the left and right channels, it separates your stereo mix into two new components: the Mid, which is everything in the center, and the Side, which is everything out on the edges.
Think of it like a photograph. The Mid is the subject in focus — your vocals, your kick, your snare, your bass — the elements that live right in the middle. The Sides are the background and lighting — the guitars, synths, reverbs, and other spatial elements that give your mix a sense of width and atmosphere.
Mid/Side processing lets you adjust those two elements independently. You can make the center tighter, clearer, or more powerful, while making the sides wider, brighter, or softer — all without affecting each other.
Behind the scenes, it’s just clever math. The Mid signal is created by adding the left and right channels together, while the Side is made by subtracting one from the other. When it’s time to play the mix back, your DAW or plugin decodes it all back into stereo automatically. You don’t have to think about the math; you just choose which “part” of the mix you want to tweak — the center or the edges.
Why Mid/Side Exists — and Why It’s So Useful
You might wonder why you’d even want to do this. Isn’t regular stereo mixing enough? The answer is that Mid/Side gives you a level of control over the stereo image that normal EQ and compression can’t.
Let’s say your mix feels too crowded, but you don’t want to cut frequencies across the entire track. Or maybe the edges sound too bright, but dulling them also affects your lead vocal. Mid/Side lets you solve problems like that surgically.
You can make your bass and vocals stay rock-solid in the middle while keeping your guitars and reverbs beautifully wide. You can tighten up the center without making your mix sound narrow. You can even fix harsh cymbals on the edges without touching your snare or vocal brightness.
It’s like having a stereo microscope for your mix.
Getting Started: Using Mid/Side EQ
The most common place to start with Mid/Side processing is EQ. Plugins like FabFilter Pro-Q 3, iZotope Ozone 12 EQ, and Waves F6 Dynamic EQ make it easy to switch any EQ band into Mid or Side mode.
Imagine your mix is feeling muddy — everything sounds like it’s fighting for space around 300 Hz. If you try to EQ that frequency normally, you might take away warmth from your vocal or bass. But if you cut just that frequency in the Mid channel, you clean up the center without touching the wide guitars or reverb that live on the sides. The result is a clearer, more balanced mix without losing fullness.
On the flip side, if your mix feels too narrow or stuck in the middle, you can boost a little high-end on the Sides around 8 to 12 kHz. Suddenly the cymbals, guitars, and reverbs open up and breathe. It’s like someone widened the walls of your mix.
One of the most important uses of Mid/Side EQ is keeping the low end mono. Low frequencies spread too wide can cause phase issues and make your bass feel sloppy. Rolling off everything below 100 Hz on the Sides keeps your low end tight and centered, which helps your kick and bass hit with focus and power.
These moves are usually subtle — a dB or two here and there. But that’s all it takes to reshape your mix in ways traditional EQ can’t.
Adding Mid/Side Compression
EQ is only the beginning. Mid/Side compression takes it a step further by letting you control dynamics differently in the center and edges.
Say your vocals, kick, and snare are in the Mid channel. If they’re jumping out too much, you can compress the Mid slightly harder to keep them controlled while leaving the Sides more open and dynamic. Or, if your mix feels too “stuck” in the center, you can compress the Sides less so the ambient parts breathe a little more.
A plugin like FabFilter Pro-C 2 or the Ozone Dynamics module can handle this easily. You can even do it with Brainworx bx_digital V3 which was built around M/S processing from day one.
If you compress the Mid more aggressively and leave the Sides relatively untouched, your center will feel more focused and solid. That contrast actually creates the illusion of width, because your brain perceives the compressed center as denser and the edges as lighter and more open.
You can also use Mid/Side compression creatively — for instance, you might use a slower attack and faster release on the Sides so the stereo ambience swells naturally with the groove. It’s a subtle trick that gives a track more movement without any obvious effect.
Using Mid/Side Saturation and Exciters
Now, let’s talk about color. EQ and compression shape your dynamics and tone, but saturation and harmonic excitement add personality. You can use Mid/Side mode in plugins like Ozone Exciter, Softube Tape , or FabFilter Saturn 2 to add warmth and brightness exactly where you need it.
Imagine your mix feels too clinical. You could add a bit of tape saturation to the Mid to warm up the vocal and bass, giving them more analog depth. Or maybe your mix sounds dull on the edges. You could add a touch of harmonic excitement to the Sides above 8 kHz, which brings life back into your cymbals and guitars without messing with the clarity of the center.
It’s like putting different lighting on your subject and your background — one warm and intimate, the other bright and atmospheric. Together, it creates a dynamic and natural stereo field.
Mid/Side in Reverbs and Effects
Reverb is one of those places where M/S processing can save a mix. Wide reverbs sound beautiful, but they can also make the mix sound washy or muddy if the low end spreads too far.
Plugins like Valhalla VintageVerb or iZotope Neoverb sound great out of the box, but if you place an EQ or stereo tool after them and roll off the lows on the Sides, you’ll instantly clean up your mix. The reverb stays wide and lush, but it won’t eat up the middle frequencies.
You can even take it further with dynamic control. Use a compressor or dynamic EQ that ducks the Sides of the reverb when the vocal comes in. That way, your reverb stays wide and present when there’s space in the mix, but it pulls back automatically when the vocal takes over. It’s an advanced trick that gives your mix clarity without losing vibe.
Mid/Side in Mastering
If there’s one place where M/S processing really shines, it’s mastering. Here, it’s used like a precision scalpel — small moves that make big differences.
Maybe the mix feels a bit too harsh on the edges. You can gently tame the highs on the Sides to smooth things out. Maybe the whole song feels too centered. You can boost a touch of air in the Sides around 10 kHz to bring back sparkle and space. Or, if the low end feels a little bloated, you can roll off a bit of Side energy below 100 Hz to keep the bass solid.
Tools like Ozone 12 or Brainworx bx_masterdesk make this incredibly intuitive, with simple M/S sliders that let you adjust width, tone, and dynamics with precision.
At the mastering stage, you’re not trying to change the mix — you’re just refining how it feels in space. A single dB of change can make the difference between a mix that sounds okay and one that sounds like a record.
Solving Common Mixing Problems with Mid/Side
Let’s get practical. Imagine your vocal sounds buried no matter how much you turn it up. The issue might not be volume — it could be that the guitars or reverbs are masking the same frequencies out on the sides. If you cut a few dB around 3 kHz on the Sides, suddenly your vocal pops right through without you having to touch the fader.
Or maybe your low end sounds messy. That’s usually because your bass or kick frequencies are bleeding into the stereo field. Rolling off the Sides below 100 Hz instantly tightens the mix and gives the bottom end a solid, focused feel.
Sometimes your mix just feels “stuck in the middle.” You can add a touch of high-end boost to the Sides or use a stereo imager like Ozone Imager or Waves S1 Stereo Imager to subtly widen the top end. The key word here is subtle. You want it to sound open, not phasey.
If your cymbals are biting too hard on the edges, you can use a dynamic EQ on the Sides around 8 to 10 kHz. That’ll smooth out harshness without dulling the whole mix.
And if you ever notice that your mix sounds amazing in stereo but collapses in mono, that’s a sign you’ve pushed the Sides too far. Always check your mix in mono — if things disappear, back off the width a bit or rebalance the M/S EQ.
Creative Uses That Go Beyond Fixing
Mid/Side processing isn’t just about fixing problems — it can also be a creative tool. You can automate stereo width so the chorus feels bigger than the verse. You can add a bit of reverb or harmonic excitement only to the Sides of your background vocals, making them wrap around the lead like a halo. You can even carve out a small EQ pocket in the Mid during a solo so the guitar or vocal has its own spotlight.
Once you start thinking in Mid and Side, it changes the way you hear music. You’ll start noticing how the pros control width and space not by volume, but by frequency and depth.
Knowing When Not to Use It
As powerful as Mid/Side is, it’s not always the right choice. You don’t need it on every track or even every mix. If your mix already feels balanced and open, adding M/S tweaks can sometimes do more harm than good. It’s also pointless on mono sources — there’s no Side information to process.
The best time to use it is after you’ve already got your levels, panning, and basic EQ in a good place. Think of it as a finishing tool, not a quick fix. And always remember that too much Mid/Side processing can cause phase problems or make your mix sound hollow.
If you’re boosting or cutting more than a few dB at a time, you might be chasing the wrong issue. Get the fundamentals right first — M/S should enhance, not rescue, your mix.
Putting It All Together
So, how do you actually approach Mid/Side processing in your own workflow? Start simple. Pull up a plugin like FabFilter Pro-Q 3 or Ozone 12 and listen to your mix in Mid mode. What feels off in the center? Maybe there’s some muddiness around 300 Hz — try cutting a bit there. Then switch to Side mode. Is there too much brightness? Maybe add a gentle shelf to smooth it out.
From there, you can experiment with compression or saturation. Add a little more weight to the center with compression on the Mid channel, or bring life to the Sides with subtle saturation. Keep checking your mix in mono to make sure nothing disappears.
If you can, toggle between bypass and active often. A good M/S adjustment should make your mix feel clearer and more three-dimensional without sounding drastically different. If you instantly hear a huge change, you’ve probably gone too far.
The Real Secret
The real magic of Mid/Side processing isn’t in the plugins or the tricks — it’s in the subtlety. A one-decibel move here, a half-decibel there. Those small decisions add up to mixes that feel deep, balanced, and alive.
It’s not about showing off your width — it’s about creating space for every element to exist naturally. Once you start using M/S thoughtfully, you’ll find your mixes start breathing in a way they never did before.
And the best part? It doesn’t matter if you’re working in a bedroom studio or a high-end room. Tools like Ozone 12, FabFilter Pro-Q 3, Waves S1, and Brainworx bx_digital V3 make Mid/Side mixing accessible to everyone.
So next time your mix feels a little flat, try looking at it from a different angle. Instead of turning up the volume or adding another plugin, ask yourself: “Is this a Mid problem or a Side problem?” The answer just might be the key to unlocking the mix you’ve been chasing.
 |  Spotify |  Deezer | Breaker |
 Pocket Cast |  Radio Public |  Stitcher |  TuneIn |
 IHeart Radio |  Mixcloud |  PlayerFM |  Amazon |
 Jiosaavn |  Gaana |  Vurbl | Audius |
Reason.Fm | |||
Find our Podcasts on these outlets
Buy Us a Cup of Coffee!
Join the movement in supporting Making a Scene, the premier independent resource for both emerging musicians and the dedicated fans who champion them.
We showcase this vibrant community that celebrates the raw talent and creative spirit driving the music industry forward. From insightful articles and in-depth interviews to exclusive content and insider tips, Making a Scene empowers artists to thrive and fans to discover their next favorite sound.
Together, let’s amplify the voices of independent musicians and forge unforgettable connections through the power of music
Make a one-time donation
Make a monthly donation
Make a yearly donation
Buy us a cup of Coffee!
Or enter a custom amount
Your contribution is appreciated.
Your contribution is appreciated.
Your contribution is appreciated.
DonateDonate monthlyDonate yearlyYou can donate directly through Paypal!
Subscribe to Our Newsletter
Order the New Book From Making a Scene
Breaking Chains – Navigating the Decentralized Music Industry

Breaking Chains is a groundbreaking guide for independent musicians ready to take control of their careers in the rapidly evolving world of decentralized music. From blockchain-powered royalties to NFTs, DAOs, and smart contracts, this book breaks down complex Web3 concepts into practical strategies that help artists earn more, connect directly with fans, and retain creative freedom. With real-world examples, platform recommendations, and step-by-step guidance, it empowers musicians to bypass traditional gatekeepers and build sustainable careers on their own terms.
More than just a tech manual, Breaking Chains explores the bigger picture—how decentralization can rebuild the music industry’s middle class, strengthen local economies, and transform fans into stakeholders in an artist’s journey. Whether you’re an emerging musician, a veteran indie artist, or a curious fan of the next music revolution, this book is your roadmap to the future of fair, transparent, and community-driven music.
Get your Limited Edition Signed and Numbered (Only 50 copies Available) Free Shipping Included
Discover more from Making A Scene!
Subscribe to get the latest posts sent to your email.


