

Move the Microphone Before You Buy Another Plugin




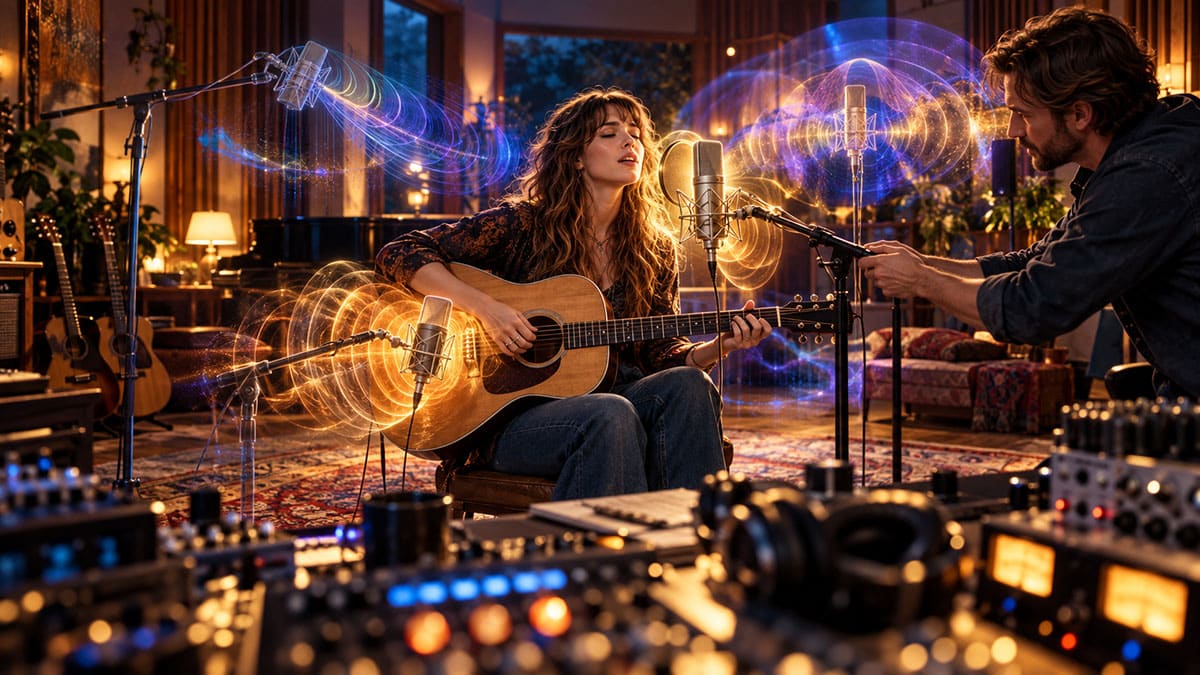
Making a Scene Presents – Move the Microphone Before You Buy Another Plugin
Listen to the Podcast Discussion
The Science of Microphone Placement and Better Guitar and Vocal Recordings
How distance, angle, reflections, and a little understanding of acoustics can transform your recordings without transforming your home studio into another expensive equipment collection.
There is a peculiar ritual that takes place in home recording studios all over the world. A musician records an acoustic guitar, listens to the playback, and decides the instrument sounds too muddy. The next hour is spent searching through equalizers, downloading compressor presets, watching videos about expensive microphones, and wondering whether the audio interface needs to be upgraded. Eventually, the musician considers buying another microphone because the internet has suggested that the current one might not be professional enough. Meanwhile, the microphone is sitting six inches from the soundhole, patiently recording exactly the muddy sound it was asked to capture.
Professional recording engineers have known for decades that a microphone does not simply record an instrument. It records the sound arriving at one particular location, from one particular direction, at one particular distance, inside one particular acoustic environment. Change any of those conditions, and the recording changes along with them. Sometimes the difference is subtle, but sometimes moving a microphone just a few inches accomplishes what an impressive collection of expensive plugins could not. The challenge is learning why those changes happen so that microphone placement becomes a deliberate recording decision rather than a desperate search for something that sounds halfway decent.
This is particularly important for independent artists building their own recording studios. Most working musicians do not have unlimited budgets, professionally designed recording rooms, or a warehouse full of microphones waiting to be auditioned. They have a few pieces of equipment, a room that probably serves several other purposes, and a collection of songs they want to record well enough to release into the world. Understanding the science of microphone placement allows those artists to get more from the equipment they already own, which leaves more money available for the parts of their music business that actually generate income. It also makes recording sessions faster because fewer problems need to be repaired after the performance has already been captured.
The most useful thing about this knowledge is that it applies to nearly everything you record. The relationship between microphone distance and sound affects acoustic guitars, electric guitar amplifiers, vocals, drums, percussion, and almost any other instrument that makes noise in a room. Once you understand those relationships, you begin hearing your recording space differently and recognizing that some of the problems you previously blamed on equipment were created by placement. Before we start chasing the perfect acoustic guitar sound or trying to understand why one vocal microphone makes a singer sound wonderful while another makes them sound like an angry refrigerator, we need to understand what the microphone is actually hearing.
The Science of Microphone Placement: Why a Few Inches Can Change Everything
Understanding Distance and the Relationship Between Direct Sound and the Room
Imagine standing directly in front of someone playing an acoustic guitar. You hear the individual strings, the movement of the player’s fingers, the sound of the pick striking the strings, and the resonance coming from the wooden body. Now imagine walking backward across the room while that person continues playing. The guitar becomes quieter, but the character of what you hear also begins to change because you are hearing less of the instrument’s immediate detail and more of the sound that has traveled around the room before reaching your ears. Your microphone experiences the same change when you move it farther from the instrument.
Sound travels outward from an instrument and reflects from the surfaces around it. Some of that sound reaches the microphone directly, while other parts strike the floor, ceiling, walls, furniture, and equipment before arriving at the microphone a little later. When the microphone is close to the source, the direct sound is usually much stronger relative to the reflected sound. As the microphone moves farther away, the direct sound becomes weaker, and the reflected sound makes up a greater proportion of the recording. This relationship determines how intimate, detailed, spacious, or distant an instrument appears to the listener.
In a free sound field, where reflections do not significantly influence the result, doubling the distance from a sound source reduces the direct sound pressure level by approximately six decibels. Real recording rooms complicate that relationship because sound reflects from boundaries and interacts with the room’s resonances, but the underlying principle remains useful. A microphone positioned six inches from a guitar is not simply producing a louder version of what another microphone hears from three feet away. Each position captures a different relationship between the instrument and its environment, and that relationship becomes part of the recorded performance.
Close microphone placement is especially useful when an instrument needs definition or separation from other sounds. A rhythm guitar recorded for a dense rock arrangement may benefit from the focused attack captured near the instrument, while a delicate fingerstyle performance might sound more natural when the microphone is moved back far enough to hear the complete guitar. Neither position is automatically more professional, and neither should be treated as a universal solution. The engineer’s job is to determine which perspective supports the music rather than force every instrument into the same recording technique.
Angle, Direction, and the Frequencies Your Microphone Chooses to Hear
Distance is only part of the equation because microphones also respond differently to sounds arriving from different directions. Most musicians are familiar with the basic distinction between cardioid microphones, which primarily capture sound arriving from the front, and omnidirectional microphones, which capture sound arriving from all directions. What receives less attention is that a microphone’s tonal balance can also change when sound approaches its diaphragm from an angle. This behavior, known as off-axis coloration, is one reason rotating a microphone can alter the recording even when the microphone remains the same distance from the instrument.
Directional microphones are designed to emphasize sounds arriving from particular directions while reducing sounds arriving from others. However, that rejection is not always uniform across the frequency spectrum, and high frequencies often behave differently from low frequencies when arriving off-axis. As a result, a microphone pointed directly at the bright center of an electric guitar speaker may capture a sharper sound than the same microphone rotated slightly away from that point. A similar adjustment can change the amount of string attack captured from an acoustic guitar or reduce the intensity of certain high-frequency sounds coming from a vocalist.
There is an important distinction between moving a microphone sideways and changing its angle. If you move a microphone across the front of a guitar amplifier while keeping it pointed straight at the speaker, you are changing the part of the speaker being recorded. If you leave the microphone in the same position and rotate it, you are changing the direction from which the sound enters the microphone. Both adjustments can influence the tone, but they do so for different reasons, and understanding that distinction gives you much greater control over the result.
Once you begin thinking about microphone placement in this way, the microphone stand becomes something more than a device that keeps expensive equipment from falling onto the floor. It becomes a physical tone control that allows you to change the recording before the sound reaches the preamp, audio interface, or recording software. Unlike an equalizer, which changes the frequency balance of a signal that has already been captured, microphone placement can alter the relationship between the instrument, the room, and the microphone’s directional response. That gives you opportunities to solve several recording problems at their source instead of attempting to repair them after they have become part of the recording.
Your Room Is Playing Along, Whether You Invited It or Not
Most independent musicians record in bedrooms, basements, garages, spare offices, and other spaces that were not originally designed for recording music. These rooms can produce excellent recordings, but they also have acoustic characteristics that need to be understood. Hard surfaces reflect sound, room dimensions influence low-frequency resonances, and nearby objects can change the way sound travels toward the microphone. A room that sounds perfectly acceptable while you are playing an instrument can produce surprisingly unpleasant results when a microphone captures those interactions in detail.
One of the most common problems occurs when reflected sound arrives at the microphone shortly after the direct sound. Because the two signals have traveled different distances, they arrive at slightly different times and interact with one another. At some frequencies, the signals reinforce each other, while at other frequencies, they partially cancel. This produces a pattern of peaks and dips known as comb filtering, which can make an otherwise good recording sound hollow, nasal, thin, or strangely artificial.
Sound travels through ordinary room-temperature air at approximately 343 meters per second, which works out to roughly one foot per millisecond. That may seem incredibly fast, but microphones are sensitive to timing differences far smaller than a millisecond. A reflection from the floor can therefore interfere with the direct sound even when a microphone appears to be positioned very close to a guitar amplifier. Sound On Sound’s explanation of phase relationships demonstrates how floor reflections can change the frequency response of a close-miked guitar cabinet, providing a useful reminder that a short microphone distance does not make the room disappear.
This is why recording location matters as much as microphone position. A vocalist standing directly in front of a bare wall may produce a recording filled with reflections that return toward the microphone, while moving the singer farther from that wall can change the relationship between those reflections and the direct vocal. An acoustic guitar placed in a corner may produce excessive low-frequency energy because of the interaction between the instrument and nearby boundaries. Moving the instrument to another part of the room can sometimes produce a more balanced recording before the microphone itself is adjusted.
Acoustic treatment can help control these problems, but it is important to understand what different materials actually accomplish. Thin blankets, inexpensive foam, and other lightweight materials can reduce some higher-frequency reflections without doing nearly as much to control low-frequency resonances. Thicker broadband absorbers and carefully considered placement can address a wider frequency range, although the results still depend on the room and the construction of the treatment. Covering every wall with thin foam may leave you with a room that sounds unpleasantly dull in the upper frequencies while the bass continues doing whatever it wants.
For many home studios, a useful starting point is to experiment with the position of the performer and microphone before purchasing additional treatment. Move the instrument away from corners and nearby reflective surfaces, record short passages in several locations, and listen for changes in resonance and clarity. If you have suitable broadband absorbers, experiment with placing them where strong early reflections are likely to interfere with the recording. The goal is not necessarily to eliminate every reflection because a pleasant acoustic environment can contribute something wonderful to music. The goal is to understand which reflections help the recording and which ones make your room sound like an unusually musical storage closet.
Proximity Effect and the Bass Boost You Didn’t Know You Were Creating
There is another important reason distance changes the sound, and it has nothing to do with room reflections. Directional microphones generally exhibit a phenomenon called proximity effect, which increases their low-frequency response as the sound source moves closer to the microphone. This happens because pressure-gradient microphone designs respond to differences in sound pressure between different parts of their acoustic system. When a sound source is very close, those pressure relationships change in a way that emphasizes lower frequencies.
Anyone who has listened to a radio announcer speaking directly into a microphone has probably heard proximity effect at work. The voice becomes deeper and fuller as the speaker moves closer, creating the familiar intimate sound associated with certain broadcast performances. Used deliberately, this can be a wonderful recording technique, especially when a voice needs additional weight. Used carelessly, it can make a vocalist sound unnaturally heavy or turn an acoustic guitar into a collection of low-frequency resonances with a few strings attached.
The strength of proximity effect depends on the microphone’s polar pattern and design. Figure-eight microphones generally exhibit stronger proximity effect than cardioid microphones, while true pressure-operated omnidirectional microphones do not exhibit the same bass boost. This is one reason an omnidirectional microphone can be useful when recording an acoustic instrument at close range in a suitable room. Neumann’s technical explanation of proximity effect describes the relationship between polar pattern, distance, and low-frequency response in greater detail. (Neumann)
The practical lesson is that moving a microphone closer does not simply make the instrument louder or more detailed. It can also change the frequency balance, especially when a directional microphone is involved. If your acoustic guitar sounds unnaturally boomy or your vocalist seems to have developed a second chest cavity during the recording session, moving the microphone back a few inches may be more useful than reaching for an equalizer. Understanding proximity effect allows you to use it intentionally rather than discovering its consequences during the mixing process.
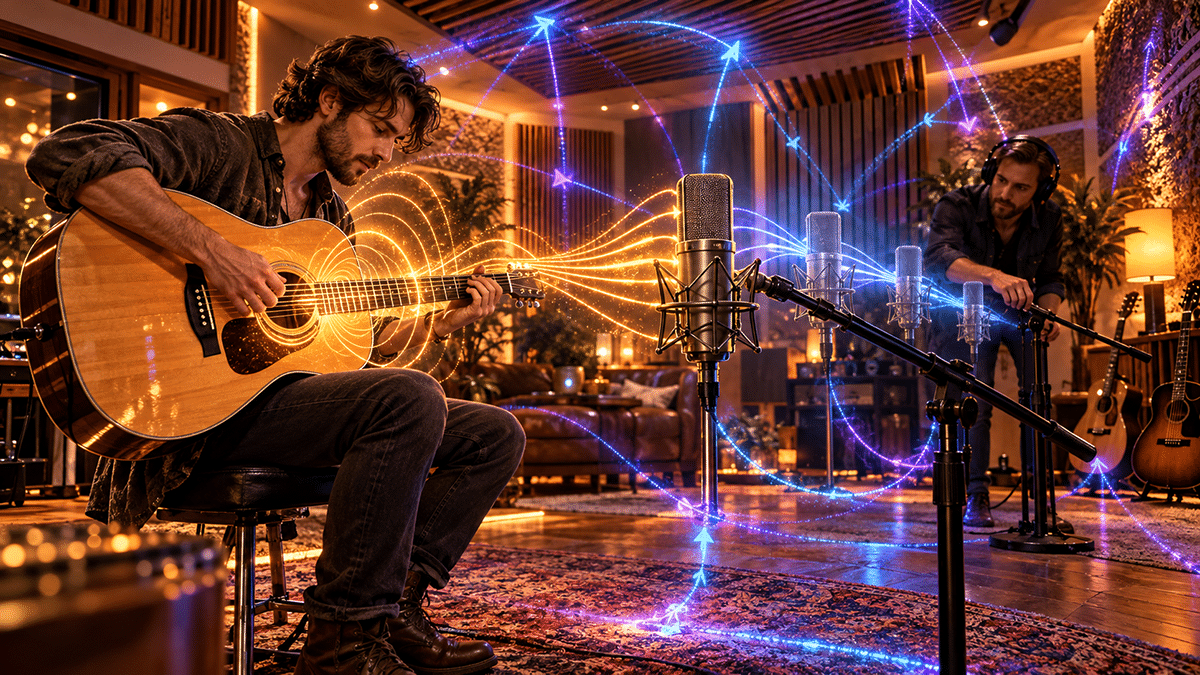
Recording Acoustic Guitar Like a Professional
Understanding Why an Acoustic Guitar Produces So Many Different Sounds
An acoustic guitar is one of the most interesting instruments to record because it produces sound from several different locations at the same time. The strings vibrate, the bridge transfers energy into the soundboard, the wooden body resonates, and the air inside the guitar contributes its own resonant behavior. The player’s fingers introduce additional sounds through picking, fretting, string movement, and contact with the instrument. What reaches the listener is a combination of all these elements, blended together by distance and the acoustic environment.
The difficulty arises when a microphone is positioned so close to one part of the instrument that it captures that area much more strongly than the rest of the guitar. A microphone aimed directly into the soundhole may emphasize low-frequency resonance without capturing enough of the string detail that makes the performance intelligible. A microphone positioned close to the fretting hand may provide beautiful articulation while missing some of the body’s warmth. Neither position is inherently wrong, but each represents a different perspective on an instrument that produces sound across a surprisingly large physical area.
This is why professional acoustic guitar recording begins with listening to the instrument before positioning a microphone. Ask the guitarist to play the actual passage that will appear in the song, then move around the instrument while paying attention to the balance between the strings and body. You may discover that the guitar sounds particularly balanced from a position near the neck-body junction or that the lower bout produces the warmth you want without the excessive resonance found directly in front of the soundhole. Once you recognize the sound you are trying to capture, microphone placement becomes an attempt to reproduce that perspective rather than a guessing game.
The acoustic guitar also changes according to how it is played, which means the recording technique should respond to the musical performance. A delicate fingerstyle arrangement produces a different balance of string attack and body resonance than aggressive rhythm strumming. A guitarist playing with bare fingers generates different transients from someone using a heavy pick, and the instrument may respond differently when played softly or forcefully. The best microphone position for one song may therefore be completely inappropriate for another song recorded with the same guitar and microphone.
Why Engineers Keep Returning to the Twelfth Fret
A useful starting point for recording acoustic guitar is to place a microphone approximately eight to twelve inches from the instrument, aimed toward the area around the twelfth fret or neck-body junction. This position often captures a balance of string definition and body resonance without placing the microphone directly in front of the soundhole’s strongest air resonance. It is not a magic location, and the ideal position depends on the guitar, microphone, room, and player, but it gives beginners a practical reference from which to begin experimenting. Shure’s guitar microphone guidance similarly recommends beginning near the neck-body junction and adjusting distance and direction to balance clarity and warmth. (Shure)
Once the microphone is in place, record a short passage and listen carefully to the relationship between the high and low strings. If the recording sounds thin, experiment with moving the microphone slightly toward the guitar’s body or increasing the distance so it captures more of the complete instrument. If the recording sounds excessively heavy, move the microphone toward the neck or away from the soundhole. These adjustments should be made gradually because relatively small movements can produce noticeable changes, especially when the microphone is positioned close to the instrument.
One mistake beginners frequently make is deciding that the correct microphone position has been found after listening to the guitar by itself. The recording may sound wonderfully full and impressive in isolation, but that enormous low-frequency presence can become a problem when the bass guitar and kick drum enter the arrangement. A rhythm acoustic guitar often needs definition in the midrange more than it needs enough bass to convince the neighbors that someone has installed a second subwoofer. Professional recording decisions are made with the finished song in mind, which sometimes means capturing a slightly leaner acoustic sound that works naturally with the other instruments.
Fingerstyle Recording and the Importance of Small Details
Fingerstyle guitar presents a different recording challenge because the listener often needs to distinguish individual notes within a complicated performance. The thumb may maintain a bass pattern while the other fingers play melody, harmony, and rhythmic accents, creating several musical parts within one instrument. The recording must preserve those relationships without exaggerating every accidental finger movement or string squeak. This requires a careful balance between detail and the overall sound of the guitar.
A small-diaphragm condenser microphone can be particularly useful because many designs offer extended high-frequency response and consistent directional behavior. However, a good large-diaphragm condenser or another suitable microphone can also produce excellent fingerstyle recordings, so there is no need to treat microphone categories as rigid rules. Begin near the neck-body junction and listen to how clearly the melody and bass notes appear. If the bass becomes dominant, move the microphone away from the soundhole or increase the distance slightly. If the melody lacks definition, experiment with moving the microphone toward the neck or changing its angle relative to the strings.
It is also worth considering how the guitarist’s physical movements affect the recording. Fingerstyle players sometimes lean toward the instrument during quiet passages or move slightly while emphasizing particular notes. When the microphone is positioned very close, those movements can change the tonal balance and level because the microphone is hearing a relatively small part of the guitar. Moving the microphone farther away can reduce the audible effect of small performance movements while creating a more balanced picture of the instrument, provided the room sounds good enough to support the additional distance.
Some string and finger noises should remain part of the recording because they contribute to the sense that a real person is performing the music. Excessive squeaks can become distracting, but removing every mechanical sound may leave the guitar feeling unnaturally sterile. The objective is to keep the musical performance in the foreground while allowing the ordinary physical characteristics of the instrument to remain believable. A microphone position that captures the melody beautifully while reducing the most distracting noises can save a considerable amount of editing later.
Strumming, Body Resonance, and Finding the Right Amount of Warmth
Strummed acoustic guitar creates a much broader burst of energy than fingerstyle playing. Several strings are struck together, their individual notes combine, and the guitar’s soundboard responds to the force of the performance. The pick contributes a sharp initial attack, while the body creates the resonance that follows. A microphone placed too close to the picking hand may emphasize the attack, while one positioned too close to the soundhole can produce a recording dominated by low-frequency energy.
For a rhythm guitar part, begin with the microphone near the neck-body junction and ask the player to strum at the intensity expected in the finished recording. A gentle demonstration is not enough if the real performance involves attacking the strings as though the guitarist has a personal disagreement with the instrument. Listen for the balance between pick attack, individual notes, and body resonance, then adjust the position to support the rhythm of the song. Moving slightly toward the body can increase fullness, while moving toward the neck often provides a different balance of string articulation and warmth.
Body resonance is especially important because it contributes much of the personality of an acoustic guitar. The instrument’s construction, body shape, bracing, materials, and internal air resonance influence how different frequencies develop and project into the room. A large-bodied guitar may provide a stronger low-frequency foundation than a smaller instrument, although individual guitars can vary considerably. The microphone does not create those resonances, but it determines which parts of the instrument’s sound become prominent in the recording.
This is also why the guitar itself needs attention before recording begins. Old strings, poor tuning, inappropriate pick choice, and an instrument that has not been properly maintained can create problems that microphone placement will not completely solve. Fresh strings may introduce additional brightness, while a different pick can change the attack and overall tonal balance. Before spending money on a microphone that promises to transform your acoustic recordings, make sure the guitar is producing the sound you actually want. Recording equipment can capture an instrument beautifully, but it cannot negotiate a peace treaty between a badly prepared guitar and a song that deserves better.
Mono and Stereo Recording Without Creating More Problems Than You Solve
There is a persistent belief that professional acoustic guitar recording requires two microphones, preferably arranged in a complicated configuration that looks impressive in studio photographs. In reality, a single microphone can capture an outstanding acoustic performance, and mono recording is often the most practical choice when the guitar occupies a defined position in a larger arrangement. A rhythm acoustic guitar recorded for a blues-rock song may only need enough detail to support the vocal and provide movement alongside the electric instruments. In that situation, a carefully positioned mono microphone can provide exactly the sound required without creating additional phase relationships to manage.
Stereo recording becomes particularly attractive when the acoustic guitar is a featured instrument or when the arrangement benefits from a wider and more spacious presentation. One common approach is the X-Y technique, where two directional microphones are positioned with their capsules as close together as practical and angled away from each other. The stereo image is created primarily by differences in the sound level captured by each microphone, while the nearly coincident capsule positions minimize timing differences. This generally produces a stable stereo recording that retains good tonal consistency when the channels are combined into mono.
Another approach uses a near-coincident arrangement, with the microphones separated by a small distance and angled away from one another. The ORTF technique, for example, uses two cardioid microphones spaced seventeen centimeters apart and angled 110 degrees from each other. This configuration produces stereo information through a combination of level and timing differences, creating a different sense of width and space from a coincident X-Y arrangement. DPA Microphones explains these techniques in its guide to stereo recording, including how spacing and angle influence stereo width and the ability to reproduce the recording convincingly in mono. (DPA Microphones)
A spaced pair of microphones offers another option when you want to capture different areas of the guitar. One microphone might emphasize string articulation near the neck while another captures more of the instrument’s body resonance, allowing the engineer to blend the two perspectives. The danger is that sound reaches the microphones at different times, and those differences can produce comb filtering when the signals are combined. If the result sounds thin or hollow, experiment with microphone position and check the sound in mono rather than assuming that adding a second microphone automatically improves the recording.
For independent musicians recording in small rooms, there is another practical consideration. A wide stereo guitar recording captures not only the instrument but also more information about the surrounding acoustic environment, especially when the microphones are positioned farther away. If the room sounds unpleasant, the resulting stereo image may simply provide a more realistic picture of a room nobody particularly wants to visit. Recording a strong mono performance, followed by a second genuine performance when additional width is needed, may produce a better result than forcing an elaborate stereo technique into an unsuitable environment.
Recording Electric Guitar Without Fighting Your Amp
The Amplifier Is an Instrument, Not Just a Loudspeaker
Electric guitar recording introduces another collection of variables because the sound of the guitar does not end at the instrument’s output jack. The pickups, amplifier circuitry, gain structure, tone controls, speaker, cabinet, and room all contribute to the final sound. A guitarist may spend years searching for an amplifier that responds to their playing in a particular way, yet the speaker and cabinet can influence the recorded tone just as dramatically. Understanding how those elements interact makes microphone placement much easier because you begin thinking about the amplifier as a complete sound-producing instrument.
Guitar speakers are not designed to reproduce sound with the same broad, neutral frequency response expected from studio monitors. Their frequency limitations, resonances, distortion characteristics, and directional behavior are important parts of what makes an electric guitar sound like an electric guitar. A microphone placed directly in front of one part of the speaker therefore captures a particular perspective on a deliberately colored sound source. Move the microphone, and you change that perspective without touching the amplifier’s controls.
Before positioning the microphone, listen to the amplifier in the room and determine whether it is producing the tone the song requires. If the sound is excessively harsh, muddy, or distorted before recording begins, make reasonable adjustments to the guitar and amplifier first. Microphone placement can emphasize or reduce different characteristics, but it should not be expected to rescue a fundamentally unsuitable sound. Once the amplifier is producing something worth recording, the microphone becomes the tool that translates that sound into the perspective needed for the finished track.
Why the Position of the Amplifier Matters
The amplifier’s location within the room changes how its sound interacts with nearby surfaces. A cabinet sitting on a hard floor creates a different reflection pattern from one raised on a stand, while moving the cabinet closer to a wall can alter the low-frequency response through boundary reinforcement. Open-backed cabinets introduce additional interaction because sound radiates from the rear of the amplifier as well as the front. These effects can change the recording even when the microphone remains in exactly the same position relative to the speaker.
One useful experiment is to record the amplifier while it is resting on the floor, then raise it onto a stable platform and repeat the passage. Keep the microphone’s position relative to the speaker as consistent as practical so that the comparison reveals the effect of the cabinet’s relationship with the room. You may discover that raising the amplifier reduces an unpleasant resonance or changes the reflected sound reaching the microphone. The difference may be especially noticeable when using a microphone positioned several inches or feet away from the cabinet.
Raising or tilting the amplifier can also improve what the guitarist hears while performing. Guitar speakers become increasingly directional at higher frequencies, so a musician standing above a cabinet aimed at their knees may hear a darker sound than someone positioned directly in front of the speaker. This sometimes encourages guitarists to increase the amplifier’s treble or volume unnecessarily, only to discover that the microphone captures a much brighter and louder result. Positioning the amplifier so that the player hears a more representative version of the speaker’s output can improve performance decisions before the recording begins.
Finding the Right Sound Across the Speaker Cone
The most familiar close-miking technique for electric guitar involves positioning a microphone near the front of the speaker, but the precise location matters considerably. A guitar speaker contains a central dust cap surrounded by the larger cone, and different areas can produce different tonal balances when captured at close range. Positions near the center often produce a brighter, more aggressive sound, while moving toward the outer portion of the cone generally produces a warmer or darker result. The exact behavior depends on the speaker and microphone, but the pattern is consistent enough to provide a useful starting point.
Begin by positioning a microphone close to the grille cloth and aiming it near the boundary between the dust cap and the surrounding cone. Record a short passage, then move the microphone slightly toward the center while keeping the other variables as consistent as possible. Repeat the process toward the outer portion of the cone and compare the recordings at similar playback levels. Shure’s amplifier-miking guidance describes this approach and explains how movement across the speaker can change the captured brightness without requiring adjustments to the amplifier itself. (Shure)
After experimenting with lateral position, try changing the microphone’s angle. A microphone aimed directly into the speaker captures sound differently from one rotated slightly away from the speaker’s axis, and the off-axis response of the microphone contributes to the result. Depending on the microphone, this can soften some of the upper-frequency energy or create a more rounded tone. The combination of speaker position, microphone angle, and distance gives you a surprisingly wide range of tonal options from a single microphone.
It is worth making these adjustments while listening to the actual guitar part in the context of the song. A bright microphone position may sound exciting during a solo guitar demonstration but become tiring when several rhythm tracks are layered together. A darker position may appear less impressive in isolation yet fit beautifully beneath a vocal without requiring much additional equalization. The most useful guitar tone is not necessarily the biggest or brightest sound you can produce; it is the one that supports the musical arrangement and allows the other instruments to do their jobs.
Choosing the Speaker and Understanding Distance
If your amplifier cabinet contains more than one speaker, do not assume that every speaker will produce an identical recording. Individual speakers can vary because of manufacturing tolerances, wear, and their physical relationship with the cabinet. A close microphone captures a relatively small area of one speaker, so these differences can become more noticeable than they are when listening to the complete cabinet from across the room. Auditioning the individual speakers can therefore be a useful part of the recording process, especially when one speaker seems to provide a better balance of brightness and warmth.
Microphone distance creates another important choice because the sound heard directly against the speaker grille is not necessarily the same sound the guitarist hears while standing several feet away. At very close distances, the microphone captures a highly localized part of the speaker’s output with relatively little room ambience. Moving the microphone back allows it to hear more of the sound radiating from the speaker and cabinet while increasing the contribution of the room. A close position may be ideal for a focused rock guitar, while a more distant position can provide a natural sense of space for a blues performance when the recording environment is suitable.
The challenge is recognizing when the room is contributing something useful. A microphone several feet from a cabinet in a beautiful recording space may capture a wonderful combination of amplifier tone and ambience. The same microphone position in a small untreated bedroom may produce a recording filled with unpleasant reflections and low-frequency resonances. In that situation, keeping the microphone closer and adding a carefully chosen artificial ambience during mixing can provide greater control without permanently recording the room’s less desirable characteristics.
Using Multiple Microphones Without Creating a Phase Disaster
Recording an amplifier with two microphones can provide tremendous flexibility because different microphones and positions can capture complementary characteristics. A dynamic microphone might provide a focused midrange sound, while a ribbon or condenser microphone offers another tonal perspective. However, the microphones are hearing the same underlying performance, and their signals may interact when combined. If the microphones are positioned at different distances from the speaker, timing differences can produce frequency cancellation that changes the combined sound.
Begin by establishing a strong recording with one microphone before adding another. Place the second microphone at approximately the same distance from the speaker, listen to each independently, and then combine them while paying attention to changes in low-frequency weight and midrange clarity. If the combined sound becomes hollow or loses energy, experiment with placement rather than immediately assuming that one of the microphones is unsuitable. Reversing the electrical polarity of one signal may improve the relationship in some cases, but it does not correct every timing difference because phase relationships vary across frequency.
A room microphone creates another layer of complexity because it captures a later arrival of the amplifier’s sound along with additional reflections. When blended carefully, this can add dimension and make the amplifier feel as though it occupies a real acoustic space. However, combining that signal with the close microphone requires attention to timing, phase relationships, and the overall balance of the recording. An additional microphone should contribute something that makes the music better rather than merely justify the amount of equipment visible in the studio photograph.
For independent artists preparing recordings that may need alternative mixes or future licensing versions, there is also value in capturing a clean direct guitar signal alongside the amplifier microphone. A properly configured instrument input or DI arrangement can preserve the guitar’s electrical performance before it passes through the amplifier and speaker. That signal can later be re-amped or processed through suitable amplifier simulation software if the arrangement requires a different sound. This does not replace the original microphone recording, but it provides another option when preparing instrumental mixes, alternate arrangements, or revised productions without requiring the guitarist to recreate the entire performance.

Why Vocalists Sound Different on Different Microphones
Every Voice Has Its Own Frequency Signature
Two vocalists can sing the same note at the same volume and produce remarkably different sounds because the human voice contains much more information than pitch alone. The vocal folds create a series of harmonically related frequencies, while the vocal tract shapes those frequencies into the recognizable characteristics of an individual voice. The singer’s mouth, tongue, throat, and other physical structures influence the resonances that distinguish one person from another. Breath, consonants, sibilance, and performance technique add even more complexity to the sound that eventually reaches the microphone.
Microphones also have distinct frequency-response characteristics, which means different designs emphasize or reduce particular frequency ranges. A microphone with an upper-midrange emphasis may increase the apparent presence of a vocalist, while another with a smoother response through that region may produce a more relaxed sound. A microphone that emphasizes certain high frequencies can make breath and articulation more apparent, but it can also exaggerate sibilance in singers who already produce strong S and SH sounds. The interaction between the microphone and the individual voice explains why one microphone may sound wonderful on a particular vocalist and unpleasant on another.
This is why microphone selection should begin with listening rather than price comparisons. A costly studio microphone may provide excellent technical performance, but its frequency response may not complement the singer or the musical arrangement. A less expensive microphone with a different tonal character can sometimes produce a more useful recording, particularly when the singer’s natural frequency balance already emphasizes areas that the more expensive microphone also accentuates. The goal is not to find the microphone that wins the most online arguments, but to find one that captures the vocalist in a way that serves the music.
Understanding Frequency Curves Without Becoming an Acoustics Professor
A microphone’s frequency-response curve shows how strongly it reproduces different frequencies under specified measurement conditions. A relatively flat response indicates that the microphone is designed to reproduce the incoming signal without strongly emphasizing or reducing particular areas of the spectrum. Other microphones intentionally include frequency-response shaping that contributes to their recognizable tonal character. Understanding these curves can help narrow your choices, but they should be treated as useful technical information rather than a guarantee that a microphone will sound a particular way on every singer.
Imagine recording a vocalist whose voice already contains a strong upper-midrange presence. A microphone that emphasizes the same region may make the vocal sound aggressive or nasal, particularly when the singer increases their intensity. Another microphone with a smoother response may create a more balanced result before an equalizer is inserted. The opposite can happen with a vocalist whose voice lacks articulation, where a suitable presence emphasis might help the lyrics remain intelligible without excessive processing.
Sibilance provides another useful example because strong consonant sounds often contain concentrated high-frequency energy. If a microphone emphasizes the frequencies where a particular singer’s sibilance is strongest, the resulting recording may require additional de-essing during mixing. Changing microphone angle or distance may help reduce the problem, but a different microphone can sometimes provide a more natural balance from the beginning. This is why engineers audition microphones using the singer’s actual performance rather than choosing one based entirely on published specifications.
Sensitivity, Gain, and Why a Louder Microphone Is Not Necessarily Better
Microphone sensitivity describes the electrical output produced when the microphone receives a specified sound pressure level. A microphone with higher sensitivity produces a stronger electrical signal than one with lower sensitivity under the same measurement conditions, but this does not mean it can somehow hear sounds from farther away. Sensitivity is about electrical output, not an ability to reach across a room and capture details that another microphone cannot detect. Confusing those concepts can lead musicians toward expensive purchases that do not address the actual problem.
Many condenser microphones produce relatively strong output signals, while moving-coil dynamic microphones often require more preamp gain to achieve a comparable recording level. This does not make condensers inherently superior for vocal recording because the microphone’s tonal character, polar pattern, self-noise, and suitability for the recording environment also matter. A good dynamic microphone connected to an appropriate preamp can produce an excellent vocal recording, particularly when the vocalist has a powerful voice or the room is less than ideal. Neumann’s explanation of microphone sensitivity describes how electrical output is measured and why some microphones require more amplification than others. (Neumann)
The practical concern for a home studio is whether the microphone and preamp can work together without introducing objectionable noise or distortion. A low-output microphone may require more gain, and some entry-level preamps become noisier or less suitable near the upper end of their available gain range. Before replacing the microphone, determine whether the recording chain is configured properly and whether the vocalist is positioned at a suitable distance. Sometimes the correct solution is better gain staging or a more appropriate preamp, while other situations genuinely benefit from a different microphone.
SPL, Loud Singers, and the Difference Between Recording Level and Distortion
Sound pressure level, usually abbreviated SPL, describes the strength of sound pressure using a logarithmic decibel scale. A microphone’s maximum SPL specification indicates how much acoustic pressure it can handle before reaching a defined distortion limit under the manufacturer’s test conditions. This becomes particularly important when recording powerful singers, loud brass instruments, drums, and guitar amplifiers. However, the microphone is only one component in the recording chain, and distortion can also occur when the preamp receives an electrical signal that exceeds its available headroom.
A powerful vocalist can create very high sound pressure levels at close range, especially during a sustained chorus or an aggressively delivered phrase. Some condenser microphones include a pad switch that reduces the signal reaching sensitive internal circuitry, allowing the microphone to tolerate louder sources. Other microphones provide enough headroom without requiring this adjustment, while the audio interface or external preamp may have its own input pad. The important thing is to identify where distortion is occurring rather than assume that a recording with peaks below digital clipping cannot contain an overloaded analog signal.
Shure’s technical examination of dynamic microphones demonstrates that a well-designed microphone can handle extremely high sound pressure levels while still producing an electrical output capable of overloading a preamp. This distinction matters because turning down the recording level after an overloaded stage will not remove distortion that has already occurred. Moving the microphone farther away, using a suitable input pad, or adjusting the gain structure may be necessary to capture the performance cleanly.
During vocal setup, ask the singer to perform the loudest section of the actual song rather than a comfortable warm-up phrase. Set the recording level with sufficient headroom for unexpected peaks, and listen for distortion instead of relying entirely on the meter. Modern digital recording does not require capturing every vocal as close to full scale as possible, so there is little reason to sacrifice headroom for a slightly larger waveform. A clean recording with sensible levels is considerably more useful than a louder file containing distortion that cannot be removed without compromising the performance.
Diaphragm Size and the Myth That Bigger Automatically Means Better
The diaphragm is the moving element that responds to sound pressure within a microphone’s transducer system. In condenser microphones, diaphragm size influences several technical characteristics, including noise performance, transient behavior, high-frequency response, and directional consistency. Large-diaphragm condensers are commonly associated with vocal recording, while small-diaphragm condensers are often used for acoustic instruments and other sources where accurate detail is important. However, the idea that large diaphragms automatically produce warm sound while small diaphragms automatically produce bright sound is an oversimplification.
Large-diaphragm condenser designs can offer excellent self-noise performance and tonal characteristics that work beautifully with vocals. Small-diaphragm condenser designs often provide extended high-frequency response, consistent pickup patterns, and accurate transient reproduction, which can make them particularly useful for detailed acoustic recordings. These are broad tendencies rather than guarantees because the complete microphone design determines the final result. Neumann’s discussion of diaphragm size explains the technical differences and emphasizes why neither category is universally superior. (Neumann)
For independent artists, the important lesson is that diaphragm size should not become another marketing contest. A microphone with an impressive physical appearance may photograph beautifully, but the finished recording does not care how authoritative the equipment looked while sitting on the stand. What matters is how its design interacts with the source, the room, and the performance. A microphone that captures a vocalist naturally and requires little corrective processing may be more valuable than a more expensive model whose reputation encourages you to overlook an unsuitable tonal match.
Vocal Placement, Breath Control, and Working With the Singer
Even after choosing an appropriate microphone, placement can dramatically change the vocal recording. A singer positioned very close to a directional microphone may experience substantial proximity effect, increasing low-frequency weight and creating an intimate sound. Moving the singer farther away reduces that effect while increasing the microphone’s relative pickup of the room. The correct distance depends on the desired vocal character, the singer’s dynamics, the microphone, and the acoustic environment.
Microphone angle also influences the way the diaphragm receives breath and consonant sounds. Plosive consonants such as P and B can produce strong bursts of air that strike the diaphragm and create unpleasant low-frequency disturbances. A pop filter helps reduce those bursts, while positioning the microphone slightly outside the direct path of the singer’s breath can provide additional control. A microphone placed slightly above mouth level and angled downward may work well for some singers, although the most suitable position depends on the individual’s posture, technique, and vocal tone.
The vocalist’s natural movement should also be considered because some singers lean toward the microphone during quiet passages and move backward when delivering powerful notes. These movements change both recording level and proximity effect, particularly when the microphone is positioned very close. A pop filter can provide a useful visual reference for maintaining distance without forcing the singer into an uncomfortable position. Rather than demanding that every vocalist behave like a stationary laboratory instrument, the recording setup should support the physical expression that helps the musician deliver a convincing performance.
A practical microphone comparison should use the same singer performing the same musical passage at approximately matched playback levels. Louder recordings frequently appear more impressive during casual listening, so comparisons can become misleading when one microphone produces a stronger signal than another. Listen to the recordings individually and within the arrangement, paying attention to articulation, sibilance, low-frequency balance, and how naturally the vocal sits with the other instruments. The microphone that produces the most spectacular isolated vocal may not be the one that works best once the entire band joins the conversation.
Turning Microphone Placement Into a Repeatable Recording Skill
Understanding these concepts is useful, but the real education begins when you experiment with them in your own studio. Choose an instrument and microphone, establish a reasonable starting position, and record a short musical passage that you can reproduce consistently. Change the microphone distance, record the passage again, and compare the results at approximately matched playback levels. Return to the original position and experiment with angle before changing the location of the instrument or microphone within the room. By changing one variable at a time, you begin learning which physical adjustments produce particular tonal results.
This process can become surprisingly revealing because many musicians have never listened to controlled comparisons of microphone placement using their own equipment. They may discover that an acoustic guitar sounds more balanced several inches farther from the soundhole than expected, or that an electric guitar cabinet produces the ideal rhythm tone when the microphone is shifted slightly away from the dust cap. A vocalist might find that moving back from the microphone reduces unwanted low-frequency buildup while preserving the intimacy of the performance. These discoveries are more valuable than memorizing somebody else’s preferred microphone positions because they relate directly to the instruments, room, and equipment you actually use.
Documenting the results creates another benefit because successful microphone positions can become reliable starting points for future sessions. Record the microphone model, approximate distance, angle, instrument position, room location, and any important performance details alongside the resulting audio. Photographs of successful setups can be particularly useful when returning to a project months later, especially if the room has been rearranged or several different musicians use the same recording space. The goal is not to create an elaborate administrative system that requires more attention than the music, but to preserve the practical knowledge gained from each recording session.
Modern AI tools can help organize this information into a searchable collection of recording notes, making it easier to find previous techniques that worked for particular instruments or arrangements. An artist could maintain a simple recording journal containing microphone positions, equipment settings, and observations about the finished sound, then use AI to help locate relevant experiments when preparing a new session. These systems should support the engineer’s judgment rather than pretend that a text description can replace listening to the recording. The real value is keeping useful experience from disappearing between sessions, particularly when an artist records different projects over an extended period.
Better Microphone Placement Is Also Better Music Business
There is a larger reason independent artists should understand microphone placement beyond the satisfaction of producing better recordings. Every recording session costs something, whether that cost appears as studio rental, engineering fees, session musician payments, equipment purchases, or the artist’s own limited creative time. A home studio does not eliminate those costs; it changes how they appear. Spending an entire afternoon trying to repair an acoustic guitar recording that could have been improved with ten minutes of microphone adjustment is still an expensive production decision, even if no invoice arrives afterward.
Learning to capture the intended sound at the source reduces the amount of corrective work required during editing and mixing. A balanced acoustic guitar recording may require less equalization, while a properly positioned amplifier microphone can produce a useful electric guitar tone without complicated processing. A clean vocal recorded with appropriate distance and controlled reflections provides a stronger foundation for the finished mix than one permanently compromised by excessive room coloration or distorted peaks. These improvements make recording sessions more productive and allow the artist to spend more time creating music rather than repairing avoidable technical problems.
Better recordings also give independent artists more flexibility when developing different versions of their work. An acoustic guitar performance captured cleanly may be useful in the original album mix, a stripped-down acoustic release, an instrumental version, or a future licensing opportunity. A well-recorded electric guitar performance accompanied by a clean DI provides additional options if a different amplifier tone is needed for another arrangement. A vocal recorded without excessive room reflections or distortion is easier to incorporate into alternative productions than one whose technical problems have become inseparable from the performance.
That flexibility matters when music becomes a business asset rather than something that disappears from the artist’s attention after release day. Independent musicians increasingly need to think about how their recordings can support live performances, direct music sales, licensing, publishing, merchandise, memberships, and other legitimate revenue opportunities. Preserving clean source recordings and useful alternative versions makes it easier to respond when those opportunities arise. Not every recording will generate additional income, but preparing music properly reduces the unnecessary expense of reconstructing assets that could have been preserved during the original session.
There is also something wonderfully rebellious about refusing to accept the recording industry’s endless suggestion that the solution to every problem is another purchase. Equipment manufacturers create genuinely useful tools, and technology has opened extraordinary possibilities for independent musicians, but ownership of more equipment does not automatically produce better recordings. Knowledge makes existing equipment more valuable because the musician understands how to use it deliberately. A modest home studio operated by someone who understands acoustics, microphone placement, and musical arrangements can produce recordings that serve an independent artist’s business far more effectively than an expensive room filled with equipment nobody has learned to control.
The science behind microphone placement is not mysterious once you begin recognizing the relationships involved. Distance changes the balance between direct sound, room reflections, and proximity effect, while angle influences which parts of an instrument reach the microphone and how its directional response shapes those sounds. Room boundaries introduce reflections and resonances, and different microphone designs translate those acoustic relationships into different electrical signals. Every time you move a microphone, you are making a decision about how those elements should combine in the recording.
The next time your acoustic guitar sounds muddy, your electric guitar seems harsh, or your vocalist suddenly develops an unnatural amount of bass, resist the temptation to immediately open another plugin. Listen to the instrument, consider the room, and experiment with moving the microphone while keeping the performance as consistent as possible. You may still need equalization, compression, or other processing because those tools remain essential parts of modern recording, but they will be working on a better source recording. As your understanding develops, you will spend less time guessing at problems after they have been recorded and more time making intentional decisions before the musician performs.
For an independent artist building a home studio, that is where recording knowledge begins to pay for itself. The equipment becomes more useful, the recordings become easier to mix, and the artist develops the ability to recognize and solve problems without constantly searching for another expensive solution. Perhaps the most satisfying discovery is that the microphone you already own may have been capable of capturing the sound you wanted all along. It simply needed someone to move it to the right place and understand why that place worked.
 |  Spotify |  Deezer |  Breaker |
 Pocket Cast |  Radio Public |  Stitcher |  TuneIn |
 IHeart Radio |  Mixcloud |  PlayerFM |  Amazon |
 Jiosaavn |  Gaana |  Vurbl |  Audius |
 Reason.Fm | |||
Find our Podcasts on these outlets

Subscribe to Our Newsletter
Discover more from Making A Scene!
Subscribe to get the latest posts sent to your email.


