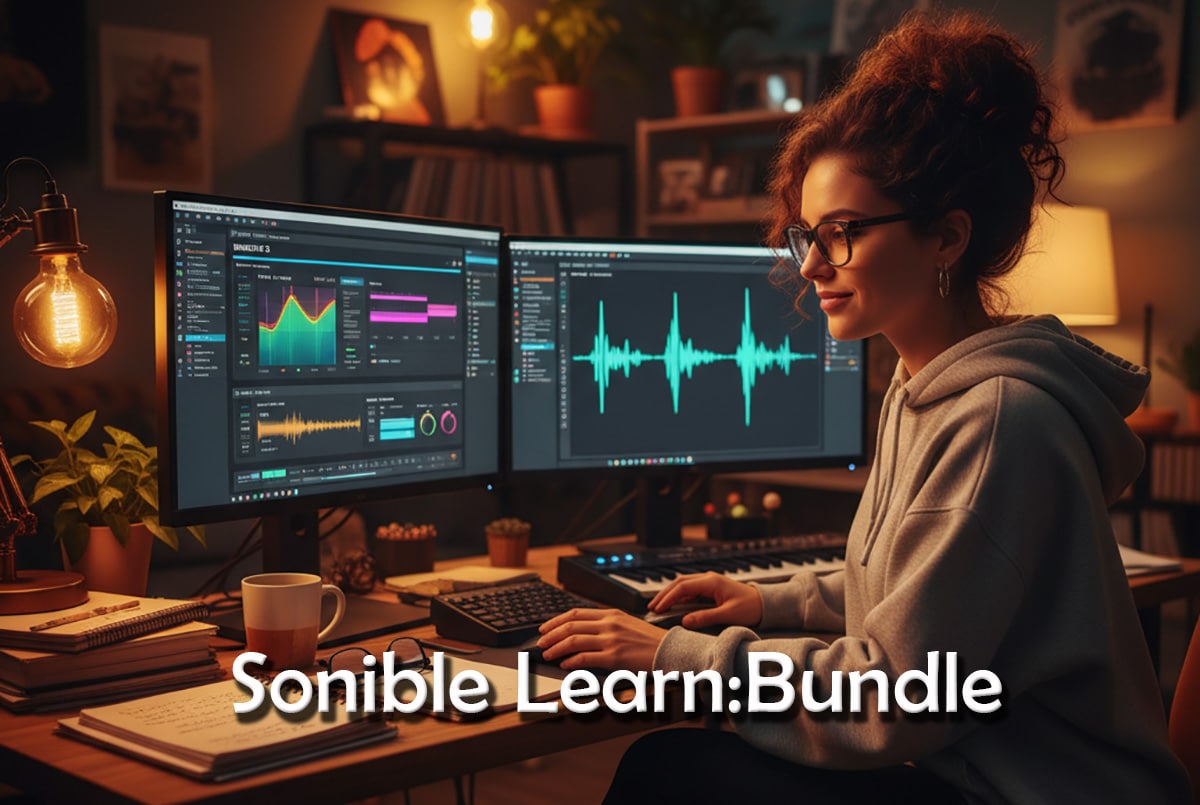
A Deep Dive Review of Sonible’s Learn:Bundle
Making a Scene Presents – A Deep Dive Review of Sonible’s Learn:Bundle
Listen to the Podcast discussion to gain more insight into the Sonible Learn Bundle
What is the Sonible learn:bundle?
First, what is this bundle anyway? Sonible’s learn:bundle is a set of five intelligent plug-ins meant to help with core mixing tasks. Those tasks are:
-
Equalization (EQ)
-
Compression
-
Reverb
-
Limiting
-
Unmasking (i.e. helping reduce frequency clashes between tracks)
Sonible describes them as “assistive AI plug-ins” that guide you while you mix. The idea is that instead of turning knobs blindly, you let the plug-ins analyze your audio and suggest where to cut, boost, compress, etc. Then you can accept, tweak, or override those suggestions.
They offer two views in many of the plug-ins: an Assisted View, which gives simplified controls and guidance, and an Advanced View, which gives you more knobs and freedom. For beginners, that’s helpful because you can start with guidance, then gradually take over as you learn.
At launch, the learn:bundle was introduced at an introductory price ($49 USD until October 6, 2025) before increasing to a full price. It supports Windows and macOS, and comes in VST, VST3, AU and AAX formats.
One more thing: sometimes users report plug-in GUI problems (like frozen or blank windows). Sonible’s own support site lists “plugins freezing when running a two screen setup on Windows” among troubleshooting tips. Also, in more general plugin/GPU issues, people mention needing correct OpenCL / OpenGL / Vulkan drivers to make GUIs render correctly. (Especially for graphics-accelerated UIs.) So if you see the GUI not responding (blank screen, freeze), a solution might be to install or update your OpenCL / OpenGL / Vulkan compatibility drivers from Microsoft or from your GPU maker. (If that fails, reinstalling or updating GPU drivers may help.)
So with that background, let’s dig into how each plug-in works and how it helps someone learn mixing.
How the learn:bundle helps you learn EQ
Starting with learn:EQ. EQ is tricky for beginners because you often hear that you “should cut here” or “boost there,” but you don’t always know why or how much. Learn:EQ tries to bridge that gap.
When you insert learn:EQ on a track, it analyzes the frequency content and suggests an EQ curve to shape the tone. It might, for example, pull out muddiness in the low mids or gently lift brightness in the highs. In the Assisted View you’ll see tone sliders (e.g. “Bass,” “Mid,” “High”) instead of dozens of parametric bands, so things are simpler. Then, in Advanced View, you can open up band-by-band control—you can tweak cutoff frequencies, Q (bandwidth), boost/cut amounts, etc.
Because it shows real-time curves and lets you hear the difference between “before” and “after,” you start to develop intuition: “Oh, that cut at 300 Hz cleans up the mud,” or “Boosting 8 kHz adds air.” In other words, you get to learn by listening while seeing what the AI is doing.
In some reviews, learn:EQ is praised for making EQ approachable, letting you hear what the “suggested end goal” sounds like, and then letting you tweak from there. But reviewers also warn: the suggested EQ is a starting point, not a final answer. You still need to listen in context (with drums, bass, vocals all playing) to make final EQ decisions. So it teaches you: don’t trust a preset blindly, but use it as a guide.
So for a new engineer, learn:EQ is a safe playground. You can see what the AI suggests, and then practice modifying the curve. Over time, you’ll begin to make your own EQ moves more confidently.
Learning compression with learn:comp
Next up: learn:comp (compression). Compression is often one of the more confusing tools to master because it involves thresholds, ratios, attack, release, knee, gain makeup, and more — all affecting dynamics.
Learn:comp analyzes your input signal (say a vocal track or drum track) and suggests compression settings that help control dynamics while preserving musical character. In Assisted View, it gives you simpler, friendlier sliders (for example, how much “leveling” or “punch”) rather than showing every technical knob. Then in Advanced View you can dig into attack/release, ratio, knee, sidechain settings, etc. One of the appealing parts is that as you adjust, you see in real time how the waveform or gain reduction curve changes. This helps you connect the visual with the sound. Audio Plugin Guy’s review points out that learn:comp “visualizes its functionality and options in a way that feels extremely intuitive.”
So how does this teach? Well, you can experiment: increase ratio, slow attack, faster release, see what happens to the waveform and listen. Over time you’ll start understanding how attack shapes the initial transient and how release controls how natural the tails are. Because you’re working with a suggestion already that is mostly “safe,” you reduce the fear of “breaking” your sound. It gives you confidence to try wild settings and hear the difference.
One caveat: compression always depends on context. A vocal might need very different settings than a snare or a drum bus. The AI suggestion helps you avoid starting from zero, but you still need to train your ears to judge what’s musical. That’s part of the learning curve the bundle aims to assist with.
Experimenting with reverb via learn:reverb
Reverb is about space, depth, and how far back or forward something sits in your mix. For many beginners, using reverb poorly leads to a muddy mix or losing clarity. A common mistake is adding too much reverb or picking the wrong type (plate, hall, room), or not thinking about pre-delay, decay time, diffusion, etc.
learn:reverb is the AI reverb in the bundle. When you put it on a track (say a vocal or a synth), it will examine that track and suggest appropriate reverb settings (size, decay, mix) to give some space while preserving clarity. In the simpler Assisted view, you might see controls like “Distance” or “Depth” rather than tweaking every parameter. Then Advanced view exposes more conventional reverb controls.
The interesting thing here is that learn:reverb helps you think of reverb not just as “an effect to slap on,” but as a positioning tool — you place instruments in space and depth, making them feel nearer or further away. Audio Plugin Guy calls learn:reverb “fun” and says it helps you play with positioning in your mix. So in addition to hearing what a suggestion sounds like, you also see visually how much you’re mixing wet vs dry, how big the space is, etc.
For learning, this is golden: you try small changes (e.g. increase decay, adjust pre-delay) and immediately see/hear how your mix changes. Over time you’ll develop a sense of “this instrument needs a little room, but not so much that it blurs with others.”
Limiting and mastering with learn:limit
Once your tracks are shaped and balanced, you often push toward final loudness using a limiter. But if done badly, limiting can smash the mix, crush dynamics, or introduce distortion.
learn:limit helps with that. It analyzes your final audio (or bus or master track) and suggests limiting settings that maximize loudness while keeping punch and clarity. In Assisted mode, it gives smart, guided controls. In Advanced mode, you get more control over ceiling, threshold, lookahead, etc. Sonible even gives video tutorials showing how to prepare tracks using learn:limit.
From a learning standpoint, you can see how far the limiter pushes, how close to ceiling, how much gain reduction is happening. You also see what’s safe vs too aggressive. Over time, you’ll internalize safe headroom margins, how much you can push dynamics, and how to judge transparency vs loudness.
One reviewer (Audio Plugin Guy) says learn:limit is among the more useful tools for quick mixing scenarios. Also, in a Sound On Sound news post, Sonible says the bundle helps students, teachers, and beginners understand not just what effect is applied, but why — making it a teaching tool.
That said, in the audio world there are always trade-offs: if you push too hard, even the smartest limiter can’t rescue a poor mix. So again, learn:limit is best seen as a safety net and teacher, not a magic button.
Handling masking via learn:unmask
Masking (or spectral masking) happens when two or more instruments or tracks occupy the same frequency space, making them interfere or muddy each other. A classical example: a vocal competing with a guitar or pads in the same midrange. A common solution is to carve some frequencies out (e.g. EQ one, boost the other), or sidechain (ducking) one when the other plays.
learn:unmask is Sonible’s tool to help address that. It looks at two audio sources (for example, guitar and vocal) and analyzes where they collide in frequency. Then it suggests ducking or carving settings to reduce the conflict, giving each track more clarity. In Assisted Mode you’ll see a simplified control and visualizations of which frequencies are overlapping. In Advanced Mode you can see exact bands and how much reduction is happening.
This is a very useful teaching tool because it shows where in frequency space conflicts occur (for example you may see that the vocal and guitar conflict around 2–4 kHz). Then you see what the AI suggests to resolve it. Then you can tweak – cut a band from guitar, lift a different band on vocal, etc.
In practice, though, not everyone found learn:unmask as intuitive. In the review by Audio Plugin Guy, learn:unmask was the weakest in terms of being a learning tool; its visual communication and intuitiveness could improve. But even so, it’s a helpful tool, especially if you’re learning to mix multiple tracks and trying to understand spectral relationships.
Overall learning workflow with the bundle
So how would a new engineer use this bundle as a learning path? Here’s a possible workflow, in a conversational, step-by-step way:
-
Start with one track (e.g. vocals or a guitar)
Insert learn:EQ. Let it suggest a curve. Listen. Then tweak. Try toggling different bands. Over time, you’ll begin to hear how small adjustments shift tone. -
Add compression
Next insert learn:comp after EQ (if you want) or in parallel. Let it apply gentle dynamics control. Then experiment: adjust the attack, release, try more or less amount. Watch how the waveform or gain reduction changes. -
Add reverb for spatial sense
Insert learn:reverb to place the track in space. Try small decays, pre-delay, and see how it blends with the dry signal. The goal is adding depth without washing out clarity. -
Check masking with another track
Put learn:unmask linking the vocal (or instrument) and another track (say a guitar). See where they conflict in frequency. Let the AI suggest a duck or cut. Then modify it. Mute one track, hear how clarity changes. -
At mix bus or final bus, apply learn:limit
When your tracks are roughly balanced, insert learn:limit on the master bus. Let it suggest safe limiting settings. Compare before vs after. Don’t push too far initially — learn how much gain reduction is acceptable.
By repeating this on multiple tracks and across sessions, you gradually internalize what makes a good EQ move, what compression sounds healthy, how reverb should feel in a mix, how masking works, and how to safely push loudness.
Because each plug-in gives both a guided and a free mode, you can start guided, then transition to full control. And because you always see real-time visual feedback (curve, waveforms, gain reduction), your ears start syncing with your eyes.
It’s like having a teacher whispering suggestions while you try things yourself.
Strengths & limitations (what works well, and what to watch out for)
Strengths
-
Lower learning barrier. The bundled AI suggestions let you start from a safer point than “blank canvas.”
-
Real-time visual feedback. Seeing curves, gain reduction, overlap visuals helps connect what you hear with what’s happening under the hood.
-
Dual modes (Assisted / Advanced). You can gradually shift from guided to hands-on control.
-
All core tools in one suite. You don’t have to patch together EQ from one company, compressor from another, etc.
-
Good sound quality. Because it’s Sonible, not just “toy” tools — many users say the sound is perfect for real mixing.
-
Educational value. It’s explicitly positioned as a learning / teaching tool (useful for students or instructors).
Limitations / things to watch out for
-
Suggestions are starting points, not final answers. Sometimes the AI might make general or broad curves that need refining in context. As one reviewer put it: learn:EQ often gives a “low-mid dip and high-mid bump” as a generic curve that might not suit every mix.
-
Context dependence. The AI may not fully account for how multiple tracks interact (that’s your job).
-
learn:unmask’s clarity. Some users found the unmasking tool’s visual feedback less intuitive; clearer visuals or more explanation might help.
-
GUI / plugin stability issues. As mentioned earlier, some users report freezes, blank GUIs, or sluggish behavior on multi-monitor setups on Windows. Sonible’s troubleshooting page acknowledges plugin freezing in certain setups.
-
Compatibility & rendering quirks. In the broader plugin world, there are documented cases where plugins built with JUCE (or GPU-based rendering) need certain driver support (OpenGL, Vulkan, etc.). For instance, some JUCE8-based plugins show blank GUI unless Direct2D / OpenGL support is available.
-
Full control vs over-automation. Relying too much on AI suggestions can slow your own growth if you never challenge or override them. Use them as teachers, not crutches.
Is it worth it for a beginner / new engineer?
In my assessment, yes — the learn:bundle is a very good value for a beginner or aspiring mix engineer, especially at its introductory price. It strikes a strong balance: it gives you enough guidance to avoid overwhelming mistakes, yet it exposes you to real controls so you learn gradually.
It’s not a silver bullet. You still need to listen, compare, reference good mixes, and train your ears. But the bundle accelerates your learning curve by giving you safer starting points and visual feedback (which accelerates ear training).
When your ears are still rough, having a smart “buddy” suggest EQ cuts or compression settings can save you hours of trial and error. Over time, you can rely less on suggestions and more on your own judgment.
For students, teachers, or people who want a teaching tool integrated in the tools themselves, this is one of the more elegant solutions I’ve seen recently. Sonible positions it exactly this way.
Once you outgrow it, you’ll want to supplement with more surgical tools like the Smart:Bundle or other advanced EQs, multi-band compressors, saturators, dynamic EQs and train blind (i.e. do mixes without suggestions). But the learn:bundle is a great stepping stone.
Comparison Chart Between the Learn and the Smart Bundle Series
| Feature / Aspect | Learn Bundle | Smart Bundle | What It Means in the Studio |
| Purpose | Built as a learning and teaching tool. Designed to help beginners understand EQ, compression, reverb, limiting, and unmasking. | Built for professional production and mastering. Designed for engineers who already know what they’re doing and want deeper control. | Learn Bundle teaches you why things sound good. Smart Bundle helps you finish faster once you already know. |
| AI Engine | Uses a simplified version of Sonible’s smart:engine. Quick analysis with lighter CPU load. | Uses full smart:engine 2.0 with detailed, adaptive, context-aware processing. | Learn Bundle gives “good enough” starting points. Smart Bundle does deep spectral and dynamic analysis for surgical results. |
| User Interface | Two modes: Assisted View (simple tone/punch sliders) and Advanced View (standard plugin controls). | Single advanced interface — always shows full detail, with intelligent visualizations and parameter weighting. | Learn Bundle feels friendlier to beginners. Smart Bundle assumes you already understand parameters like ratio, knee, or LUFS. |
| Plugin List | learn:EQ, learn:comp, learn:reverb, learn:limit, learn:unmask | smart:EQ 4, smart:comp 2, smart:reverb, smart:limit, smart:unmask | The Smart versions are newer, feature-rich editions of the Learn lineup. |
| Learning Approach | Shows you what the AI does, with visuals that teach how frequencies and dynamics behave. | Focuses on high-precision results with less explanation — you get automatic mix balancing, target profiles, and adaptive parameters. | Learn Bundle = classroom. Smart Bundle = pro studio. |
| Customization & Profiles | Minimal customization — the AI makes broad, safe adjustments. | Includes genre profiles, target curves, reference matching, and adaptive weighting to emulate professional tonal balances. | Smart Bundle can match your vocal EQ to commercial tracks automatically. Learn Bundle shows you what makes those tracks sound that way. |
| CPU Usage | Lightweight, quick to load, ideal for laptops or teaching labs. | Heavier processing because of advanced AI analysis and real-time adaptation. | Learn Bundle is great for mobile or home setups. Smart Bundle needs a stronger system for smooth playback. |
| Price (Approx.) | $49 (intro) to $79 retail | $299–$399 retail | Learn Bundle is affordable for students and self-taught musicians. Smart Bundle is an investment for pros. |
| Real-Time Adaptivity | Static suggestions (analyzes once when you hit Learn). | Dynamic analysis (keeps adapting as the track plays). | Smart Bundle automatically adjusts if your vocalist gets louder in the chorus — Learn Bundle does not. |
| Visual Feedback | Simplified, big friendly graphics to help train your ear. | Detailed spectral graphs, loudness ranges, LUFS meters, reference match displays. | Learn Bundle = “see the basics.” Smart Bundle = “measure and master.” |
| Integration with DAWs | Perfect for track-by-track learning. Works well with features like Studio One’s Mix Scenes and Track Presets for experimentation. | Great for finalizing mixes and mastering chains using Studio One’s Project Page or Master Bus. | Use Learn Bundle during your mix phase; use Smart Bundle when preparing the release master. |
| Educational Value | High — designed for training courses, classrooms, and home learning. | Moderate — assumes knowledge of mixing principles. | Learn Bundle is a great companion for anyone studying audio engineering. |
| Speed of Workflow | Slightly slower (requires clicking “Learn” and listening steps). | Faster (AI works continuously, adapts live). | Smart Bundle can finish in half the time once you’re skilled. |
| AI Unmasking Behavior | One-to-one track unmasking (e.g. vocal vs. guitar). | Multi-track masking management (handles up to 3 sources dynamically). | Smart Bundle gives more precise separation for complex mixes. |
| Metering & Loudness Targets | Basic visual meters for loudness and dynamics. | Full LUFS, True Peak, Dynamic Range and distribution graphs with streaming-platform presets. | Smart Bundle tells you when your track meets Spotify or Apple loudness standards. |
| Learning Curve | Gentle and forgiving — ideal for teaching environments. | Steep but rewarding — suited for experienced engineers. | Learn Bundle builds foundation; Smart Bundle sharpens precision. |
| Typical User | Indie artists, students, content creators, and self-producing musicians. | Mixing engineers, mastering professionals, post-production editors. | Learn Bundle democratizes studio skills. Smart Bundle professionalizes them. |
 |  Spotify |  Deezer | Breaker |
 Pocket Cast |  Radio Public |  Stitcher |  TuneIn |
 IHeart Radio |  Mixcloud |  PlayerFM |  Amazon |
 Jiosaavn |  Gaana | Vurbl |  Audius |
Reason.Fm | |||
Find our Podcasts on these outlets
Buy Us a Cup of Coffee!
Join the movement in supporting Making a Scene, the premier independent resource for both emerging musicians and the dedicated fans who champion them.
We showcase this vibrant community that celebrates the raw talent and creative spirit driving the music industry forward. From insightful articles and in-depth interviews to exclusive content and insider tips, Making a Scene empowers artists to thrive and fans to discover their next favorite sound.
Together, let’s amplify the voices of independent musicians and forge unforgettable connections through the power of music
Make a one-time donation
Make a monthly donation
Make a yearly donation
Buy us a cup of Coffee!
Or enter a custom amount
Your contribution is appreciated.
Your contribution is appreciated.
Your contribution is appreciated.
DonateDonate monthlyDonate yearlyYou can donate directly through Paypal!
Subscribe to Our Newsletter
Order the New Book From Making a Scene
Breaking Chains – Navigating the Decentralized Music Industry
Breaking Chains is a groundbreaking guide for independent musicians ready to take control of their careers in the rapidly evolving world of decentralized music. From blockchain-powered royalties to NFTs, DAOs, and smart contracts, this book breaks down complex Web3 concepts into practical strategies that help artists earn more, connect directly with fans, and retain creative freedom. With real-world examples, platform recommendations, and step-by-step guidance, it empowers musicians to bypass traditional gatekeepers and build sustainable careers on their own terms.
More than just a tech manual, Breaking Chains explores the bigger picture—how decentralization can rebuild the music industry’s middle class, strengthen local economies, and transform fans into stakeholders in an artist’s journey. Whether you’re an emerging musician, a veteran indie artist, or a curious fan of the next music revolution, this book is your roadmap to the future of fair, transparent, and community-driven music.
Get your Limited Edition Signed and Numbered (Only 50 copies Available) Free Shipping Included
Discover more from Making A Scene!
Subscribe to get the latest posts sent to your email.
