

Signal Flow Made Simple: How Sound Travels from Your Mic to Your Mix


Making a Scene – Signal Flow Made Simple: How Sound Travels from Your Mic to Your Mix
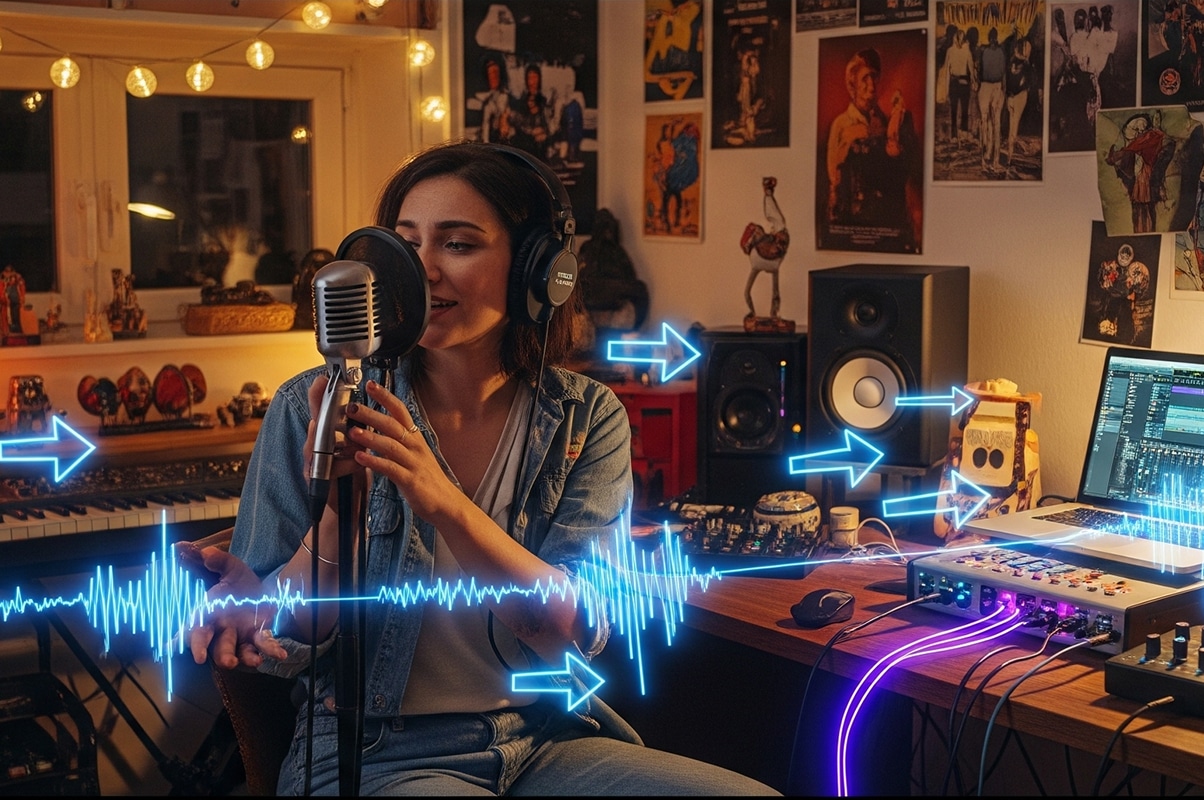
So, you just bought your first microphone and audio interface. You’re excited, maybe even a little overwhelmed, and you’re ready to start recording songs in your home studio. But before you press record, there’s one important thing you need to understand: signal flow.
Signal flow is basically the path your sound takes—from the moment you sing into a microphone or strum a guitar, all the way to the speakers or headphones where you finally hear it back. Think of it like a road trip: your sound is the car, and every piece of gear it touches is a stop along the way. If you take a wrong turn, you might end up lost, stuck in traffic, or worse, broken down on the side of the road.
In this deep dive, we’ll break down signal flow in plain, simple language. We’ll use metaphors like water pipes and electricity to make it feel less like science class and more like real life. By the end, you’ll not only understand what signal flow is, but you’ll also know why the order of your gear matters, how to set proper levels, and how gain staging can make or break your mix.
What Is Signal Flow, Really?
At its core, signal flow is the journey your sound takes through your recording system. It’s the sequence of steps the audio signal follows. Imagine water moving through pipes in your house: the faucet is your voice or instrument, the pipes are the cables and gear, and the glass of water at the end is your finished mix. If the pipes are leaky or the water pressure is too high, you’re not going to enjoy that drink. Same with audio—if your signal path isn’t set up properly, your final recording won’t sound great.
Or think of electricity. You flip a switch, the current flows, and the light bulb turns on. If the wiring is messy or overloaded, the light flickers or blows out. Signal flow works the same way: clean, organized routing equals clean, strong sound.
The Basic Flow: Mic to Mix
Let’s map out the basic journey step by step. This is the path for most home studios:
-
The Source – Your voice, guitar, keyboard, or any sound you’re recording.
-
The Microphone or Instrument Cable – Captures the sound and turns it into an electrical signal.
-
The Audio Interface (Preamp + Converter) – Boosts the signal to a usable level and changes it from analog (electricity) to digital (computer language).
-
The Computer & DAW (Digital Audio Workstation) – Records, processes, and mixes the signal.
-
Plugins & Effects – EQ, compression, reverb, delay—whatever tools you add inside your DAW.
-
The Output (Monitors/Headphones) – Converts the signal back into sound waves you can hear.
That’s the simplest version. Of course, you can add more stops—like hardware compressors, mixers, or pedals—but this basic chain is what most indie artists start with.
Why Order Matters
Let’s go back to the water pipe analogy. Imagine if you had dirty water, but instead of running it through a filter first, you added flavor syrup before filtering it. Gross, right? You’d end up with filtered strawberry-flavored mud.
That’s what happens when you put things in the wrong order in your signal flow. The order of processing matters because each step affects the next.
For example, if your signal is too quiet when it leaves the mic and goes into your interface, your DAW will end up recording a weak, noisy sound. And no amount of plugins later will make that sound as clean as if you’d set the level properly at the start.
Signal flow is like stacking dominoes. If the first one doesn’t fall correctly, the whole chain gets messy.
The Mic: Where It All Begins
Your microphone is the faucet, the very start of the chain. It takes vibrations from the air and turns them into electrical energy. Different mics do this in different ways (dynamic, condenser, ribbon), but the idea is the same.
If the mic isn’t placed correctly or if the sound going into it isn’t good, the rest of the signal flow won’t matter much. That’s why engineers often say: “Get it right at the source.”
Want a clean vocal? Sing clearly, control your distance, and choose the right mic for your style. Bad mic technique or placement is like turning on a faucet full of dirt—you can try to clean it up later, but it’s always better to start with clean water.
The Audio Interface: Your Translator
After the mic captures the sound, the signal travels down the cable and hits your audio interface. This little box is like the heart of your studio—it decides how strong your signal is and how your computer understands it. The interface has two main jobs:
-
Preamplification (Gain) – Microphones output a very weak signal. The preamp boosts it to “line level,” which is strong enough to be recorded.
-
Conversion (A/D) – Converts that analog electrical signal into digital ones and zeros your computer understands.
Think of the audio interface like a translator at a meeting. You’re speaking one language (analog sound waves), but the computer only speaks another (digital code). The translator makes sure nothing important gets lost in translation.
But here’s where things get even more interesting: the quality of that translation depends on sample rate and bit depth. These might sound like scary tech terms, but they’re really not once you put them into real-world language.
Sample Rate: The Speed of the Camera
Imagine you’re filming a hummingbird. If your camera only takes one picture every second, you’d miss almost everything—the wings would just be a blur. But if your camera takes thousands of pictures per second, you capture every flap in detail.
That’s what sample rate is. It’s how many “pictures” your interface takes of the sound every second. The standard for CD music is 44.1 kHz, which means 44,100 snapshots per second. Most home studios record at 48 kHz (common for video), or even higher rates like 96 kHz. The higher the sample rate, the more detail, but it also takes up more space on your hard drive.
So, sample rate = the speed of the camera that’s capturing your sound.
Bit Depth: The Sharpness of the Photo
Now let’s stick with the camera metaphor. A photo can be low resolution (grainy and pixelated) or high resolution (clear and sharp). That sharpness is like bit depth.
Bit depth decides how much detail each snapshot holds—especially in the quiet parts of your music. The most common bit depth is 24-bit, which gives you a huge range from the softest whisper to the loudest scream without distortion. Older CDs used 16-bit, which still works, but 24-bit is like having way more room to breathe.
So, bit depth = how detailed and clear each snapshot is.
Why This Matters
If your sample rate is too low, your recordings might sound grainy or lose tiny details of the performance. If your bit depth is too low, your quiet passages might get noisy or distorted. Using the standard settings (44.1 kHz sample rate and 24-bit depth) gives you professional-level quality without overloading your computer.
In other words: your audio interface isn’t just passing sound along—it’s deciding how faithfully that sound is captured. Get it right here, and everything else in your signal flow will have a solid foundation.
Gain Staging: The Secret to Clean Sound
Gain staging sounds fancy, but it’s really just about setting the right volume levels at every stage of the signal flow. Think of it like cooking: if you add too much salt at the start, everything will taste salty no matter how much you try to balance it later.
In recording, if your mic gain is set too high, the sound will distort (clipping). If it’s too low, your signal will be buried in noise. Both are bad.
The goal of gain staging is to keep the signal strong enough to be clear, but not so strong that it clips. A healthy level usually means your meters in the DAW are bouncing around the middle—not constantly slamming into the red, but not whispering at the bottom either.
The DAW: Your Playground
Once your signal is digital, it enters your DAW (Logic, Ableton, Pro Tools, Studio One, Reaper—whatever you use). This is your canvas, your playground, your laboratory. Here, you can record multiple tracks, edit, and shape the sound.
Plugins like EQ and compression are basically tools that continue the signal flow inside your computer. The order you put them in still matters. For example, EQ before compression gives the compressor a different signal than compression before EQ. It’s like deciding whether to clean your clothes before folding them, or folding them before cleaning. Both affect the outcome.
Monitoring: Hearing the Truth
Finally, your sound leaves the DAW and flows back through your audio interface into your headphones or studio monitors. This is the last stage of signal flow: playback.
If your monitors aren’t accurate or your headphones color the sound too much, you might think your mix sounds amazing, only to play it in the car and realize it’s muddy or too bright. Monitoring is like the mirror you use to check your outfit before going out. If the mirror is warped, you won’t know what you really look like.
Common Signal Flow Mistakes Beginners Make
Now that we’ve covered the journey, let’s look at some common beginner pitfalls:
-
Plugging things into the wrong inputs. Mics go into mic inputs, instruments into instrument inputs, and line-level gear into line inputs. Wrong match = bad sound.
-
Ignoring gain staging. Setting everything too hot (clipping) or too quiet (noisy) ruins recordings before you even start mixing.
-
Over-processing. Throwing five plugins on a track won’t fix a bad recording. Start clean.
-
Forgetting order. Effects like reverb and delay usually come at the end of the chain. If you EQ after reverb, you’re EQing the reverb too.
Understanding these mistakes helps you avoid them before they derail your sessions.
Why Signal Flow Makes You a Better Artist
Here’s the real reason all this matters: if you understand signal flow, you gain control over your sound. Instead of guessing why something sounds bad, you can trace the path and find the problem. Is it the mic? The gain? The DAW? The monitoring? Signal flow is like having a map—you know where to look when something goes wrong.
Plus, when you understand levels and order, your mixes start cleaner, your recordings sound more professional, and you spend less time fixing and more time creating.
Putting It Into Practice
Let’s imagine you’re recording your first song at home. Here’s how it might look:
You plug in your mic, open your DAW, and sing into it. You notice the sound is distorted. Instead of panicking, you follow the signal flow. You check the mic distance—too close. You check the gain knob on your interface—it’s cranked up too high. You lower it, try again, and now the sound is clear and full.
Later, you add EQ and compression in your DAW. You try EQ before compression, then swap the order. You notice how the sound changes. By experimenting with signal flow, you’re not just recording—you’re learning to engineer.
This is the magic of knowing how sound travels. You become the driver of the car instead of just a passenger.
Final Thoughts
Signal flow might sound technical, but it’s really just about knowing the path your sound takes and keeping it healthy along the way. From the mic to the mix, every stop on the journey matters. Order matters. Levels matter. And when you understand them, you unlock the ability to capture your music in the best way possible.
So the next time you hit record, remember: your song is like water running through pipes. Keep the pipes clean, the flow steady, and the glass at the end will taste refreshing. That’s how you go from mic to mix with confidence.
 |  Spotify |  Deezer | Breaker |
 Pocket Cast |  Radio Public |  Stitcher |  TuneIn |
 IHeart Radio |  Mixcloud |  PlayerFM |  Amazon |
 Jiosaavn |  Gaana |  Vurbl | Audius |
Reason.Fm | |||
Find our Podcasts on these outlets
Buy Us a Cup of Coffee!
Join the movement in supporting Making a Scene, the premier independent resource for both emerging musicians and the dedicated fans who champion them.
We showcase this vibrant community that celebrates the raw talent and creative spirit driving the music industry forward. From insightful articles and in-depth interviews to exclusive content and insider tips, Making a Scene empowers artists to thrive and fans to discover their next favorite sound.
Together, let’s amplify the voices of independent musicians and forge unforgettable connections through the power of music
Make a one-time donation
Make a monthly donation
Make a yearly donation
Buy us a cup of Coffee!
Or enter a custom amount
Your contribution is appreciated.
Your contribution is appreciated.
Your contribution is appreciated.
You can donate directly through Paypal!
Subscribe to Our Newsletter
Order the New Book From Making a Scene
Breaking Chains – Navigating the Decentralized Music Industry

Breaking Chains is a groundbreaking guide for independent musicians ready to take control of their careers in the rapidly evolving world of decentralized music. From blockchain-powered royalties to NFTs, DAOs, and smart contracts, this book breaks down complex Web3 concepts into practical strategies that help artists earn more, connect directly with fans, and retain creative freedom. With real-world examples, platform recommendations, and step-by-step guidance, it empowers musicians to bypass traditional gatekeepers and build sustainable careers on their own terms.
More than just a tech manual, Breaking Chains explores the bigger picture—how decentralization can rebuild the music industry’s middle class, strengthen local economies, and transform fans into stakeholders in an artist’s journey. Whether you’re an emerging musician, a veteran indie artist, or a curious fan of the next music revolution, this book is your roadmap to the future of fair, transparent, and community-driven music.
Get your Limited Edition Signed and Numbered (Only 50 copies Available) Free Shipping Included
Discover more from Making A Scene!
Subscribe to get the latest posts sent to your email.


