


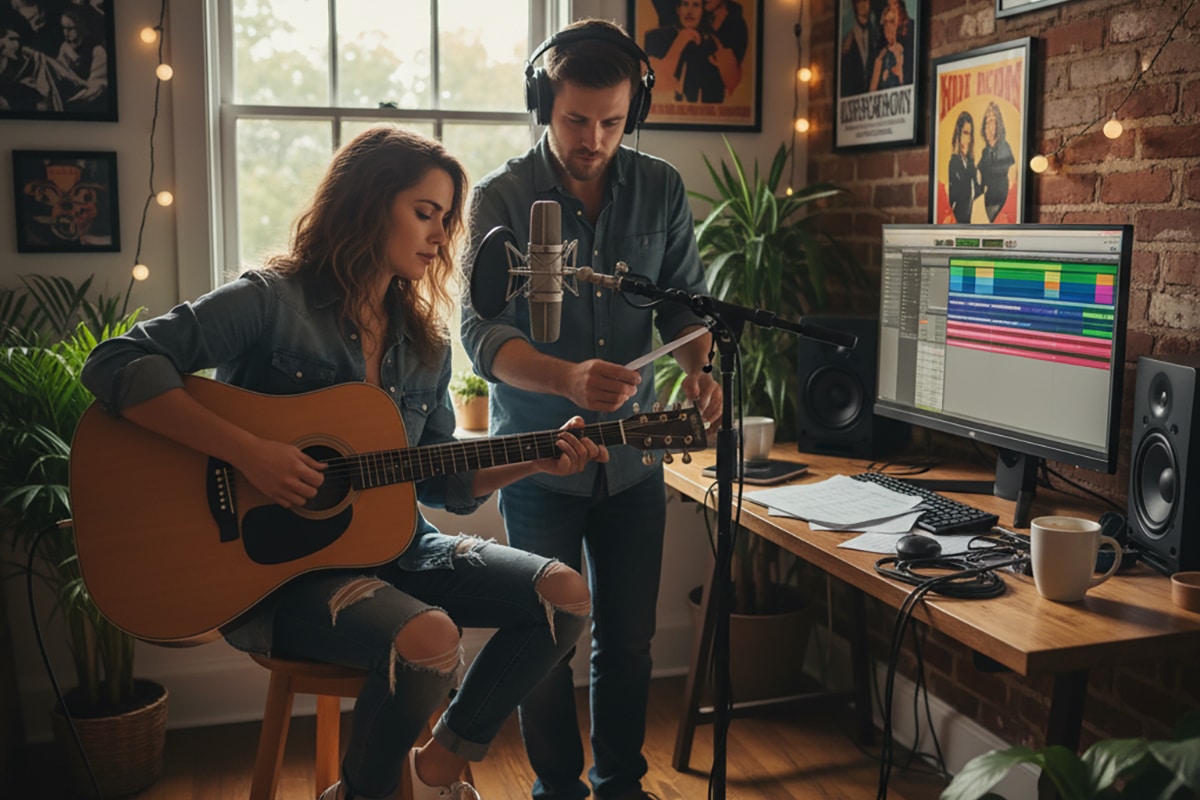
The Art of Mic Placement: Getting a Pro Sound from a Cheap Mic


Making a Scene Presents – The Art of Mic Placement: Getting a Pro Sound from a Cheap Mic
Make sure you check out the podcast above for an in depth discussion of microphone placement
Introduction: It’s Not About the Price Tag
Every indie artist knows the struggle: you look at your bank account, then you look at those glossy ads for $3,000 microphones, and your heart sinks. But here’s the truth that doesn’t get advertised enough—you don’t need an expensive microphone to get a professional sound. What you really need is an understanding of mic placement.
A cheap mic in the right spot will often beat an expensive mic in the wrong spot. That’s the magic of knowing how to position, angle, and use your microphone to capture the sound you want. The best engineers in the world spend more time moving mics around than they do fiddling with EQ or plugins. Why? Because the placement of the mic decides what sound actually gets recorded in the first place.
In this deep dive, we’re going to explore how you can get pro-level recordings at home, even if your microphone didn’t break the bank. We’ll talk about vocals, acoustic guitar, electric guitar amps, and even some advanced tricks like off-axis recording and learning how speaker roll-off changes your tone.
By the end, you’ll see that the microphone you already own is more powerful than you think—if you know how to place it.
Why Mic Placement Matters More Than Plugins
Think of your microphone as a camera. If you point a camera at someone under bad lighting, no amount of Instagram filters will make it truly great. But with the right angle and lighting, even a phone camera can capture a stunning photo. Microphones work the same way.
When you place a mic in front of a sound source, you’re deciding how much low end, high end, attack, warmth, or room sound it captures. Move it just a few inches, and the sound changes dramatically. Engineers joke about this all the time—“Move it before you EQ it.” That’s because EQ can only fix so much. But mic placement shapes the actual raw sound, which means less fixing later.
And the good news? Moving a mic around costs nothing. No plugin subscription required.
The Basics: How Sound Hits a Microphone
Before we dive into techniques, let’s break down why mic placement works the way it does.
Sound waves spread out in space, and your microphone only hears a slice of them depending on where it sits. If you move closer, the mic hears more detail and low end (this is called the proximity effect). If you move farther away, the sound is more balanced but also picks up more of the room. If you angle the mic slightly, you change the way frequencies hit the diaphragm, which changes the tone.
Even tiny moves—like shifting the mic one inch to the left—can be the difference between muddy and clear. That’s why pro engineers spend so much time listening, adjusting, and finding the sweet spot before they ever hit record.
Recording Vocals: Make the Mic Work for You
Let’s start with vocals, since that’s where most indie artists focus first. You’ve got your mic, your voice, and probably not a fancy vocal booth. No problem. Here’s how to make it sound good.
Distance and the Proximity Effect
If you sing right up close to the mic—like an inch away—you’ll notice your voice sounds bigger and warmer, with more bass. That’s the proximity effect at work. It can sound intimate and powerful, but it can also get boomy if you’re not careful.
If you step back 6–8 inches, the sound balances out. The low end rolls off, and your voice sounds clearer. This is usually a good spot for most singers.
Pro tip: Try both. Record a line close up and another line farther back. See which one fits your song better.
Angle and Plosives
Ever notice those annoying “p” or “b” pops that overload the mic? That’s air blasting the capsule. You can fix this by singing slightly off-axis. Instead of pointing the mic straight at your mouth, angle it just a little to the side. You’ll still capture the tone of your voice, but you’ll avoid the bursts of air.
If you don’t own a pop filter, this trick is a lifesaver.
Room Sound
Your room is part of your recording whether you like it or not. Bare walls bounce sound back into the mic, making it sound echoey or thin. If you can, hang a blanket behind you or record in a closet with clothes. The mic won’t pick up as much of the room, and your vocals will sound more direct.
Acoustic Guitar: Finding the Sweet Spot
Recording acoustic guitar is all about capturing a natural, balanced sound. The mistake many beginners make is pointing the mic straight at the sound hole. That’s where the bass blasts out, and it usually sounds muddy and boomy.
Aim Between the Sound Hole and the 12th Fret
One of the most tried-and-true placements is to put the mic about 6–12 inches away, aimed at the spot between the sound hole and the 12th fret. This gives you a nice balance of low end, mids, and sparkle without the mud.
Use Your Ears
Here’s where your ears come in. Strum your guitar and move your head slowly across the front of it. Listen to how the sound changes as you shift from the sound hole to the neck. That change you hear is exactly what the mic will capture depending on where you place it. Once you find a spot that sounds right to your ears, put the mic there.
Off-Axis Tricks
If your guitar is too bright or harsh, try angling the mic slightly away from the strings. This softens the attack and smooths out the sound. If you want more presence, angle it back toward the picking hand.
Think of off-axis placement as tone-shaping without EQ.
Electric Guitar Amps: Working with the Speaker Cone
Electric guitar amps are a whole world of tone on their own, and mic placement can make or break the sound you capture. What many beginners don’t realize is that the tone changes dramatically depending on where you position the mic in front of the speaker.
Center vs. Edge
If you place the mic right at the center of the speaker cone, you’ll get a brighter, sharper tone with lots of bite. Slide the mic toward the edge, and the sound becomes warmer and rounder, with less treble. This shift is called the roll-off of the speaker. Every guitar speaker naturally loses some high-frequency energy as you move away from the middle. Pro engineers use this to sculpt the tone before they even touch EQ.
Distance
Placing the mic close—just an inch away from the grill—gives you a tight, punchy sound with very little room noise. Pulling the mic back a foot or two captures more of the amp in the room, giving it size and air. Many classic recordings use both: a close mic for punch and a room mic for space, then blended together. Even if you only have one mic, moving it back and forth to test these positions can unlock new textures.
Off-Axis
Just like vocals and acoustic guitar, angling the mic slightly off to the side can smooth out harshness. A mic pointed dead center on-axis can sound brittle, especially at loud volumes. Tilt it a little off-axis, and the tone softens while still keeping definition.
Using Figure-8 for Extra Depth
Here’s where polar patterns come into play. If your microphone has a figure-8 option, try using it in front of a guitar amp. The front of the mic captures the direct punch of the speaker, while the back picks up the reflections from the room. This creates a natural blend of close and ambient sound without needing a second mic.
Blues and rock engineers have leaned on this trick for decades, especially when recording in lively rooms where the reflections add character. For example, if you’re tracking in a small space with wood floors or brick walls, figure-8 placement can turn those reflections into part of the tone rather than something you’d normally fight to remove.
If you prefer more control, you can even angle the mic slightly so the back side “hears” less of the amp and more of the room’s bounce. It’s like having a built-in reverb channel without plugins.
Microphone Patterns: Tailoring What the Mic Hears
Not all microphones listen the same way. Some capture sound equally from every direction, while others act more like a spotlight, focusing tightly on a single source. These “pickup patterns” or “polar patterns” are built into the mic’s design, and knowing how to use them gives you extra control over the sound before it ever hits your DAW. Even budget mics sometimes come with a switch that lets you choose between patterns, so let’s break down the main ones and how indie artists can use them.
Cardioid: The Go-To for Most Recordings
Cardioid mics are shaped like a heart in the way they “hear.” They capture sound mainly from the front, reject most from the back, and pick up a little from the sides. This is the most common pattern you’ll find on affordable studio mics. It’s perfect for vocals, guitar amps, and acoustic instruments in bedrooms or small home studios, because it helps minimize unwanted reflections and background noise.
Think of Billie Eilish’s early bedroom recordings with her brother Finneas. They leaned heavily on cardioid mics because they needed to keep the focus on Billie’s whispery, intimate vocals while blocking out the noise of a not-so-perfect room. That choice of pattern was just as important as mic placement.
Omnidirectional: Open and Natural
Omnidirectional mics capture sound equally from all directions. This makes recordings feel more open and natural, as if you’re sitting right there in the room with the artist. On vocals, omni can sound beautifully airy, but it will also pick up every little noise—the hum of a fan, the creak of a chair, the slap of your room’s walls.
On acoustic guitar, omni can capture a really balanced tone, especially if the room has character. Indie folk artists often use omni patterns to preserve the raw, live feel of their songs. If your room sounds good, omni can make a $100 mic sound like it belongs in a professional studio.
Figure-8: Front and Back, None on the Sides
Figure-8, also called bi-directional, picks up sound from the front and back while rejecting almost everything from the sides. This pattern is incredibly creative. You can place a singer on one side and a guitarist on the other, recording both at the same time with one mic. Or you can face the front of the mic toward your instrument and let the back capture the room’s reflections, which adds a natural sense of space.
Classic blues and early rock ’n’ roll records relied heavily on ribbon mics with figure-8 patterns. That’s part of why those old recordings sound so warm and full—they weren’t just capturing the voice or guitar, but also the room breathing around it. If you’ve ever listened to Robert Johnson’s recordings or Muddy Waters’ early sessions, that “bloom” you hear is often the result of figure-8 ribbons pulling in both front and back sound.
Tailoring with Patterns
Here’s where you can get hands-on. If your vocals sound too dry and lifeless with cardioid, try omni to open them up. If your acoustic guitar feels thin, omni can give it more body in the right room, while figure-8 can add a nice blend of direct tone and room reflections. On guitar amps, cardioid keeps things punchy, but switching to figure-8 might let you blend in some room vibe without needing a second mic.
The important thing is to remember that patterns aren’t just “settings”—they’re tools that let you shape the vibe of your recording. Just like moving a mic closer or angling it differently changes tone, flipping that pattern switch can completely alter the feel of your track.
And here’s the best part: you don’t need a $3,000 microphone to use these tricks. Many budget large-diaphragm condensers now come with multiple polar patterns. Learning how to use them will give you more mileage out of the mic you already have, making it feel like three different mics in one.
Advanced Tricks: Shaping Sound with Placement
Once you’ve mastered the basics, you can start experimenting with more creative placements.
Double-Miking
If you have two mics, try putting one close to the source and one farther away. Blend them together for depth. For example, a close mic on the acoustic guitar plus a room mic can make it sound like you’re right there in the space.
The “Move Before EQ” Rule
Anytime you’re tempted to grab an EQ plugin to fix something, stop and try moving the mic first. Too boomy? Move the mic away from the sound hole. Too harsh? Angle it off-axis or move it toward the edge of the speaker cone.
Use the Room
Sometimes the best sound isn’t right up close. Try putting the mic across the room and capturing the natural reverb of your space. If your room sounds good, this can add depth and character that no plugin can fake.
Cheap Mic, Pro Results
Here’s the takeaway: the price of your microphone doesn’t limit you nearly as much as you think. Placement, distance, angle, and room matter more. Countless indie artists have made hit records on budget mics simply because they understood how to use them.
Spend time experimenting. Move your mic an inch this way, two inches that way. Angle it slightly. Step back and listen. Over time, you’ll train your ears to know exactly where the sweet spot is for your voice, your guitar, and your amp.
That’s how you get pro sound from a cheap mic.
Conclusion: Your Ears Are the Real Gear
At the end of the day, recording is about listening. The microphone is just a tool, and even the most affordable one can capture magic if you place it right. Instead of chasing expensive gear, chase better mic placement.
Remember:
-
For vocals, balance distance and angle to control warmth and avoid pops.
-
For acoustic guitar, find the sweet spot between the sound hole and 12th fret.
-
For amps, use the center for brightness, the edge for warmth, and off-axis for smoothness.
With these techniques, you’ll turn your budget mic into a professional weapon. And the best part? You’ll learn skills that stay with you forever, no matter what mic you upgrade to later.
So grab your mic, move it around, and start recording. You’ll be surprised how professional your tracks can sound—without spending a fortune.
 |  Spotify |  Deezer | Breaker |
 Pocket Cast |  Radio Public |  Stitcher |  TuneIn |
 IHeart Radio |  Mixcloud |  PlayerFM |  Amazon |
 Jiosaavn |  Gaana |  Vurbl | Audius |
Reason.Fm | |||
Find our Podcasts on these outlets
Buy Us a Cup of Coffee!
Join the movement in supporting Making a Scene, the premier independent resource for both emerging musicians and the dedicated fans who champion them.
We showcase this vibrant community that celebrates the raw talent and creative spirit driving the music industry forward. From insightful articles and in-depth interviews to exclusive content and insider tips, Making a Scene empowers artists to thrive and fans to discover their next favorite sound.
Together, let’s amplify the voices of independent musicians and forge unforgettable connections through the power of music
Make a one-time donation
Make a monthly donation
Make a yearly donation
Buy us a cup of Coffee!
Or enter a custom amount
Your contribution is appreciated.
Your contribution is appreciated.
Your contribution is appreciated.
DonateDonate monthlyDonate yearlyYou can donate directly through Paypal!
Subscribe to Our Newsletter
Order the New Book From Making a Scene
Breaking Chains – Navigating the Decentralized Music Industry

Breaking Chains is a groundbreaking guide for independent musicians ready to take control of their careers in the rapidly evolving world of decentralized music. From blockchain-powered royalties to NFTs, DAOs, and smart contracts, this book breaks down complex Web3 concepts into practical strategies that help artists earn more, connect directly with fans, and retain creative freedom. With real-world examples, platform recommendations, and step-by-step guidance, it empowers musicians to bypass traditional gatekeepers and build sustainable careers on their own terms.
More than just a tech manual, Breaking Chains explores the bigger picture—how decentralization can rebuild the music industry’s middle class, strengthen local economies, and transform fans into stakeholders in an artist’s journey. Whether you’re an emerging musician, a veteran indie artist, or a curious fan of the next music revolution, this book is your roadmap to the future of fair, transparent, and community-driven music.
Get your Limited Edition Signed and Numbered (Only 50 copies Available) Free Shipping Included
Discover more from Making A Scene!
Subscribe to get the latest posts sent to your email.


