
Mix Clarity: The Truth About Masking (And How to Fix It)


Making a Scene Presents – Mix Clarity: The Truth About Masking (And How to Fix It)
Listen to the Podcast Discussion for more insight into what is Masking in your Mix and How to fix it!
by a recording engineer who’s spent way too many nights chasing clarity in crowded mixes
There’s a moment every indie artist hits when a mix sounds almost perfect… but something feels wrong. The vocals are there, the bass is there, the guitars are crunchy, the kick is thumping — yet somehow, it all sounds like a muddy soup instead of a clear, powerful record.
You might try turning things up, EQing harder, or adding compression, but nothing seems to fix it. That’s not a “bad mix.” That’s masking — one of the most misunderstood problems in music production.
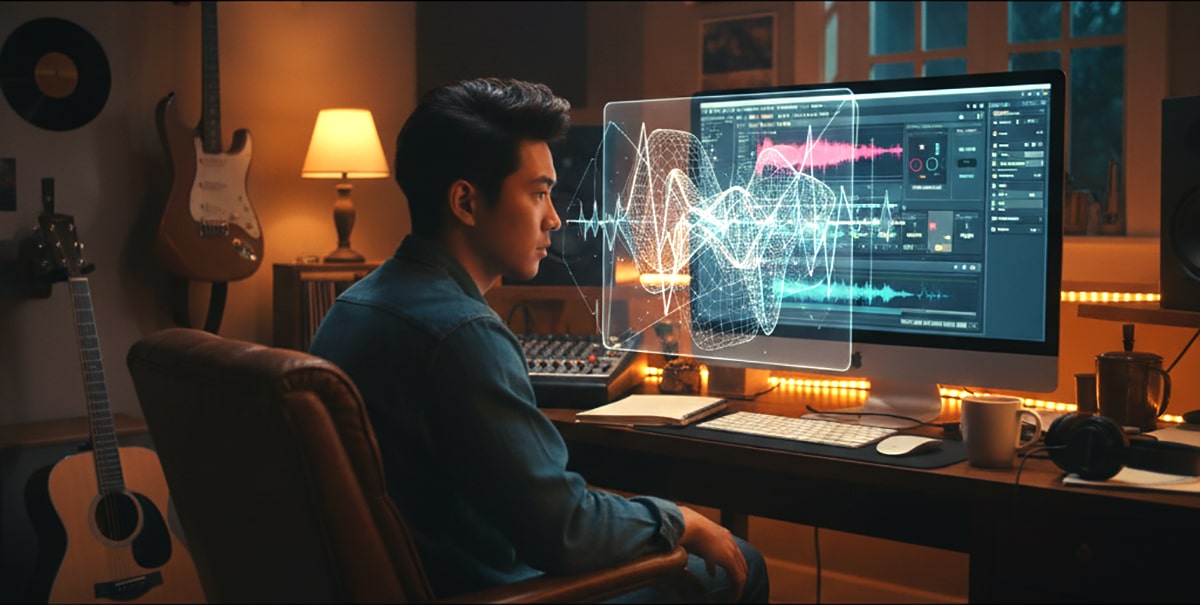
In this deep dive, we’re going to unpack what masking actually is, how it sneaks into your mixes, why it happens even when your tracks sound great on their own, and how modern tools like iZotope Neutron 4 and Ozone 12 can literally see it for you and fix it with AI precision.
By the end, you’ll understand how to make every instrument shine without stepping on each other — and how to finally hear that “pro mix” clarity you’ve been chasing.
What Is Masking?
Masking happens when two or more sounds fight for the same frequencies at the same time. When that happens, one sound hides another — kind of like two people talking over each other.
In a mix, masking is what makes your vocals disappear when the guitars come in, or your kick drum vanish under the bass. The sounds don’t actually vanish — your ear just can’t tell them apart anymore.
Imagine you’re at a party. If two people are talking to you in the same tone of voice, you can’t understand either one. But if one speaks in a low rumble and the other in a higher voice, suddenly you can separate them easily. That’s the goal of mixing — to give every sound its own space so the listener’s ear can lock onto what matters.
That’s why pro engineers are obsessed with clarity. Masking is the enemy of clarity.
The Science Behind Masking (Without the Boring Stuff)
When two sounds share similar frequencies — say, your bass guitar and your kick drum both pounding around 80 Hz — the louder or denser sound will “mask” the other. The ear can only focus on one thing at a time within that frequency range.
Our hearing is most sensitive between 1 kHz and 5 kHz, the area where vocals, guitars, and snares all live. That’s why so many mixes sound harsh or crowded there. It’s where masking does the most damage.
There are two main kinds of masking:
1. Frequency Masking – When instruments overlap in tone or range (like vocals and guitars both filling the mids).
2. Temporal Masking – When one sound hides another that happens just before or after it (like a loud snare hit covering a quiet hi-hat).
Even if your levels are technically balanced, masking can make a mix sound dull, flat, or muddy.
How Masking Affects Your Mix
Masking doesn’t just make things sound unclear — it causes emotional and physical problems for your mix.
When frequencies overlap too much, your ears work harder to separate sounds. That means listener fatigue. It’s why a mix might sound “fine” at first, but after 10 minutes you want to turn it off.
Vocals, for example, can lose their intimacy if the guitars and cymbals are covering their frequency range. You might start pushing the vocals louder and louder, which leads to distortion or compression artifacts.
Your low end can suffer too. The kick and bass are both essential, but they live close together. If they’re not separated by tone or timing, they’ll blur into one undefined thump. The same thing happens with piano and pads, or synths and electric guitars — too much overlap and everything loses detail.
The result? A flat, lifeless mix.
The Old School Fixes
Before fancy plugins and AI assistants, engineers had to fix masking by ear — using EQ, panning, and volume moves.
They’d “carve out” space using EQ subtraction. For example, if the guitar was masking the vocal at 2.5 kHz, they’d cut a few dB at 2.5 kHz on the guitar and boost it slightly on the vocal. This created a pocket where the vocal could shine.
Compression helped too. You could sidechain a compressor on the bass to duck slightly every time the kick hit — making the kick punch through. Engineers still use this trick today because it keeps the groove tight and clear.
And of course, panning was another secret weapon. By spreading sounds across the stereo field, you give each instrument its own real estate. Guitars left and right, vocals in the center, bass and kick down the middle — suddenly there’s room for everyone.
But these methods take experience and time. If you don’t have perfect ears or a treated studio, it’s easy to overdo it. That’s where today’s technology changes everything.
Enter the AI Era: Unmasking with iZotope
iZotope, one of the most respected names in audio technology, has made tools that practically think like an engineer. Their Neutron 4 and Ozone 12 plugins include a feature called Unmask, which automatically detects where masking is happening between tracks and helps you fix it.
These tools use intelligent frequency analysis to “see” which sounds are clashing and then apply gentle, targeted EQ to create separation — without killing the natural tone.
Website: https://www.izotope.com
Let’s break down how these tools work and how you can use them in your own mixes.
Part 1: Using Neutron 5’s Unmask Module (Mix Stage)
Neutron 5 is like a smart assistant that sits on your mix tracks and helps them get along. It’s designed for mixing, so this is where you fix masking between individual tracks.
Website: https://www.izotope.com/en/products/neutron.html
Step 1: Set Up Your Tracks
Let’s say you’re working on vocals and guitars. The vocals sound dull when the guitars come in. Masking alert!
- Insert Neutron 5 on both the vocal track and the guitar bus.
- In Neutron, open the Unmask module on the vocal track.
- Choose the guitar track as the “target.”
Now Neutron is analyzing both in real-time to see where frequencies are overlapping.
Step 2: Let Neutron Do Its Thing
Once linked, Neutron shows a visual display of frequency collisions. You’ll literally see where the vocal and guitar are fighting.
Click “Learn” or “Unmask” — the plugin automatically carves small EQ dips in the guitar where the vocal needs room. It’s like telling the guitar, “Hey, back off a little right here.”
You can adjust the Amount slider to control how strong the effect is. Start gentle — around 25–35%. Too much, and your mix can start to sound thin.
Step 3: Apply It to Bass and Kick
Now let’s fix the low end. The kick and bass are classic masking enemies.
- Put Neutron on both kick and bass.
- Open Unmask on the bass track.
- Choose the kick as the target.
- Hit “Learn” and adjust the Amount until the kick starts to pop through clearly.
You’ll notice how the low end suddenly tightens up — the bass still fills the space, but the kick’s attack becomes sharp and defined.
Step 4: Unmask the Mix Bus
Once you’ve done the main tracks, try placing Neutron’s Mix Assistant on your buses. The Mix Assistant can automatically analyze relationships across your entire mix and help balance frequencies. It uses similar unmasking logic, but across the big picture.
When you hit “Balance,” it takes masking into account and adjusts your gain structure to reduce conflict before you even start detailed EQ work.
Part 2: Using Ozone 12’s Unmask Module (Mastering Stage)
Once your mix is balanced, masking can still happen when you move into mastering. Maybe your kick and bass now sound great, but the overall mix feels cloudy when compared to a commercial track.
That’s where Ozone 12 comes in.
Website: https://www.izotope.com/en/products/ozone.html
Ozone 12 has a powerful new Unmask module that works between your mix and a reference track or within your own master chain.
Step 1: Load Your Mix and Reference
Insert Ozone 12 on your master bus. Choose a reference track that represents the sound you’re aiming for — maybe a favorite song in your genre.
Click the Unmask module and select your mix as the source and the reference as the target.
Ozone will now analyze both and show where your mix has overlapping or smeared frequencies.
Step 2: Hit “Learn” and Watch the Magic
Click “Learn” and Ozone automatically applies small, smart EQ moves to unmask details in your mix — especially in the high mids and low end.
The display shows gain reductions in areas that were muddy or congested. You’ll hear instant clarity — vocals pop forward, kicks tighten, and reverb tails become more distinct.
Step 3: Adjust Intensity and Listen Critically
You can fine-tune how strong the Unmask effect is. Use your ears — the goal is not to change your mix’s character but to let it breathe.
Compare your unmasked and original versions with the Bypass button. The difference can be subtle but powerful. It’s that final “air” and definition you hear in commercial masters.
How Unmasking Differs from Regular EQ
You might think, “Isn’t this just EQ?” Not quite.
Regular EQ applies static boosts or cuts, whether masking is happening or not. Unmasking, on the other hand, is dynamic and context-aware. It reacts in real-time based on how two tracks interact.
For example, your bass might only clash with the kick during certain notes. Traditional EQ would cut the same frequency all the time, possibly thinning your tone. Unmasking only adjusts it when masking actually happens.
That’s why tools like Neutron and Ozone sound so natural — they move dynamically with your music.
How to Train Your Ears to Hear Masking
Even with all these tools, your ears are still the final judge. The best engineers can spot masking instantly. Here are a few ways to train yourself:
Listen for instruments that seem to “fade” when others come in. That’s a sign of frequency overlap. Try soloing each instrument to hear what’s missing when they play together.
Play your mix on small speakers or even phone speakers. Masking shows up fast there because the limited frequency range exaggerates conflicts.
Also, try listening in mono. Stereo width can hide masking problems. When you collapse to mono, any frequency fights will become painfully obvious — especially in vocals and bass.
Once you can hear masking, you’ll start instinctively mixing around it.
Other Tools That Help Fight Masking
While iZotope’s Unmask tools are top-tier, a few other plugins can help too.
FabFilter Pro-Q 3 – This EQ has a “dynamic EQ” mode and spectrum analyzer that shows real-time collisions between tracks. It’s perfect for visual learners.
Website: https://www.fabfilter.com/products/pro-q-3-equalizer-plug-in
Sonible Smart:EQ 4 – Uses AI to balance spectral energy and reduce masking automatically, great for quick vocal or mix fixes.
Website: https://www.sonible.com/smarteq4/
Wavesfactory TrackSpacer – Dynamically ducks specific frequencies from one track based on another. It’s like a sidechain EQ.
Website: https://www.wavesfactory.com/audio-plugins/trackspacer/
These plugins approach masking from different angles but share the same goal: make space so everything can be heard clearly.
Real-World Example: Unmasking Vocals in a Rock Mix
Let’s walk through a practical example.
You’ve got a powerful rock vocal, crunchy guitars, solid bass, and a driving kick. Everything sounds great — until you put it together. Suddenly the vocal loses energy and sounds buried.
Here’s how you’d fix that with Neutron and Ozone.
- Insert Neutron 5 on both the vocal and guitar bus.
- Open Unmask on the vocal and set the guitar bus as the target.
- Hit “Learn” and adjust the Amount until the vocal stands out.
- On the master bus, load Ozone 12 and run the Unmask module to clean up the overall mix.
- Compare before and after. The difference will feel like someone wiped fog off a window.
The vocal cuts through naturally, the guitars still sound full, and the whole mix feels open. That’s the magic of proper unmasking.
Understanding the Balance Between Masking and Blending
Here’s a fun twist — some masking is actually good.
If every sound in your mix had totally separate frequencies, it would sound disjointed and sterile. A little overlap helps glue the mix together and gives it cohesion.
The trick is to control how much overlap there is and where it happens. You want the instruments to blend harmoniously, not blur together. Think of it like painting — the colors can mix a little, but if everything turns brown, you’ve gone too far.
Unmasking should be subtle and musical. The goal isn’t to isolate every element — it’s to help the important ones stand out when they need to.
Tips from the Mixing Desk
After years of mixing, here’s what experience teaches you about masking:
Most masking happens because you’re not thinking in frequency ranges. Every instrument occupies its own area — kick (40–100 Hz), bass (60–250 Hz), guitars (100–5,000 Hz), vocals (200–10,000 Hz), cymbals (5,000–15,000 Hz). When too many sounds share the same zone, your mix starts to cloud up.
Instead of chasing volume, focus on space. EQ with intention. Don’t boost everything — carve out areas so each part breathes.
And when in doubt, less is more. Sometimes removing an unnecessary synth or guitar double fixes masking better than any plugin.
Why Masking Matters More in the Streaming Era
With today’s playback devices — earbuds, phones, smart speakers — clarity matters more than ever. These tiny speakers can’t reproduce full frequencies, so masking becomes way more noticeable.
That’s why pro mixers are obsessed with midrange clarity and unmasking tools. They’re mixing for real-world playback, not just studio monitors.
If your mix translates clearly across all devices, it’s not luck — it’s smart unmasking.
Final Thoughts: Hearing the Mix You Imagined
Masking isn’t your enemy — it’s a signal that your mix has potential. It means you’ve got great elements that just need space to shine.
Tools like iZotope Neutron 4 and Ozone 12 take what used to be guesswork and turn it into an exact science. They let you see what your ears might miss and guide you toward professional clarity faster than ever.
But remember — plugins are just assistants. The final decision is still yours. Your taste, your balance, your emotion — that’s what makes your mix special.
So next time your vocals vanish or your low end feels muddy, don’t panic. That’s just masking saying, “Hey, I’m here.” Take a deep breath, open your Unmask module, and give your mix the space it deserves.
When you hear that crisp separation — vocals shimmering above the guitars, bass locking perfectly with the kick — you’ll know exactly what real clarity sounds like.
And you’ll never fear masking again.
Referenced Tools & Links
- iZotope Neutron 5 – https://www.izotope.com/en/products/neutron.html
- iZotope Ozone 12 – https://www.izotope.com/en/products/ozone.html
- FabFilter Pro-Q 3 – https://www.fabfilter.com/products/pro-q-3-equalizer-plug-in
- Sonible Smart:EQ 4 – https://www.sonible.com/smarteq4/
- Wavesfactory TrackSpacer – https://www.wavesfactory.com/audio-plugins/trackspacer/
 |  Spotify |  Deezer | Breaker |
 Pocket Cast |  Radio Public |  Stitcher |  TuneIn |
 IHeart Radio |  Mixcloud |  PlayerFM |  Amazon |
 Jiosaavn |  Gaana |  Vurbl | Audius |
Reason.Fm | |||
Find our Podcasts on these outlets
Buy Us a Cup of Coffee!
Join the movement in supporting Making a Scene, the premier independent resource for both emerging musicians and the dedicated fans who champion them.
We showcase this vibrant community that celebrates the raw talent and creative spirit driving the music industry forward. From insightful articles and in-depth interviews to exclusive content and insider tips, Making a Scene empowers artists to thrive and fans to discover their next favorite sound.
Together, let’s amplify the voices of independent musicians and forge unforgettable connections through the power of music
Make a one-time donation
Make a monthly donation
Make a yearly donation
Buy us a cup of Coffee!
Or enter a custom amount
Your contribution is appreciated.
Your contribution is appreciated.
Your contribution is appreciated.
DonateDonate monthlyDonate yearlyYou can donate directly through Paypal!
Subscribe to Our Newsletter
Order the New Book From Making a Scene
Breaking Chains – Navigating the Decentralized Music Industry

Breaking Chains is a groundbreaking guide for independent musicians ready to take control of their careers in the rapidly evolving world of decentralized music. From blockchain-powered royalties to NFTs, DAOs, and smart contracts, this book breaks down complex Web3 concepts into practical strategies that help artists earn more, connect directly with fans, and retain creative freedom. With real-world examples, platform recommendations, and step-by-step guidance, it empowers musicians to bypass traditional gatekeepers and build sustainable careers on their own terms.
More than just a tech manual, Breaking Chains explores the bigger picture—how decentralization can rebuild the music industry’s middle class, strengthen local economies, and transform fans into stakeholders in an artist’s journey. Whether you’re an emerging musician, a veteran indie artist, or a curious fan of the next music revolution, this book is your roadmap to the future of fair, transparent, and community-driven music.
Get your Limited Edition Signed and Numbered (Only 50 copies Available) Free Shipping Included
Discover more from Making A Scene!
Subscribe to get the latest posts sent to your email.


